Guest Post at Elementally Speaking

BALLERINA

My friend CrisDee over at Elementally Speaking asked if I would guest post for her site where she shares with you ideas for creating, capturing and keeping family memories.(see the post below, or at http://elementallyspeaking.wordpress.com/2009/07/06/new-feature-photo-tips-from-stacie-errera/Thanks Cris!)

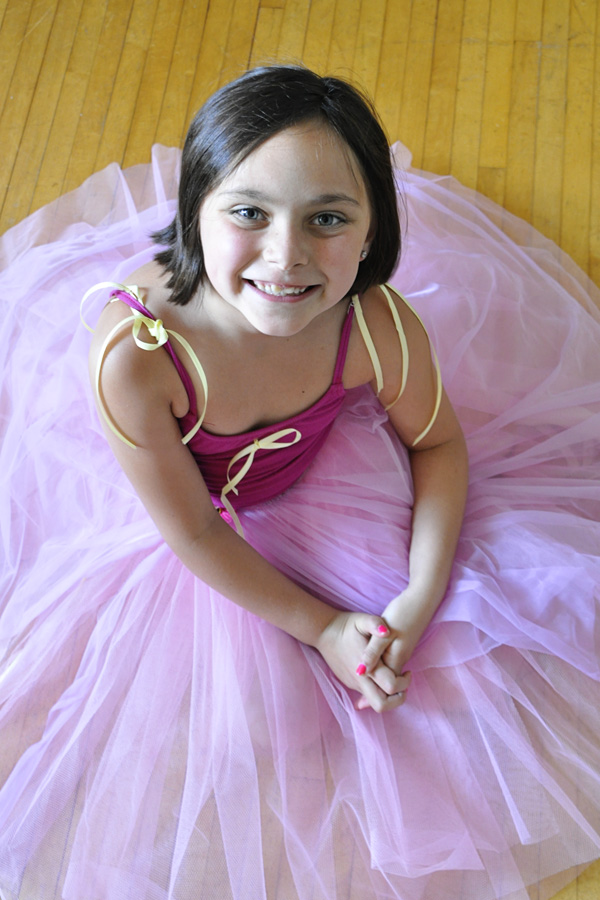
When it comes to our children’s stage performances, it is very difficult to get great shots unless you have total access during a rehearsal. The mistake most people make is to take photos from their seat in the auto mode.  If you do this, the flash will go off and you’ll get a dark stage and very well lit heads of the people in front of you.  So sit back and enjoy you child’s live performance with your eyes rather than through your camera’s viewfinder (I know, any of us shutterbugs find this an almost impossible suggestion!).Instead, concentrate on getting a nice shot of your child in costume by venturing back stage during rehearsals or prior to the performance.  I checked on my daughter the day before her recital and saw her costume for the first time.  I was thrilled when I saw the light streaming in from the windows behind the back stage curtains.  I asked her to sit down for a moment with the side of her face parallel to the windows to get nice side lighting on her face.  I then crouched down just a little so that I could see her ballerina skirt spread all around her and her big happy smile.  This point of view also let me include some of the wood floor that her pretty feet danced on the next day and one that really gives the viewer the true picture of what was happening when I took the photo.  Find a place in the environment that has some windows and position your actor or dancer so that the light brings out the detail in the costume and a highlight in your child’s eyes.  Don’t get too close to the window as the light will be too harsh.  Instead, move a few feet or more away from the window for an even light.  I always try to not use the flash and opt for natural light whenever possible.

Photoshop 101 Color Correction

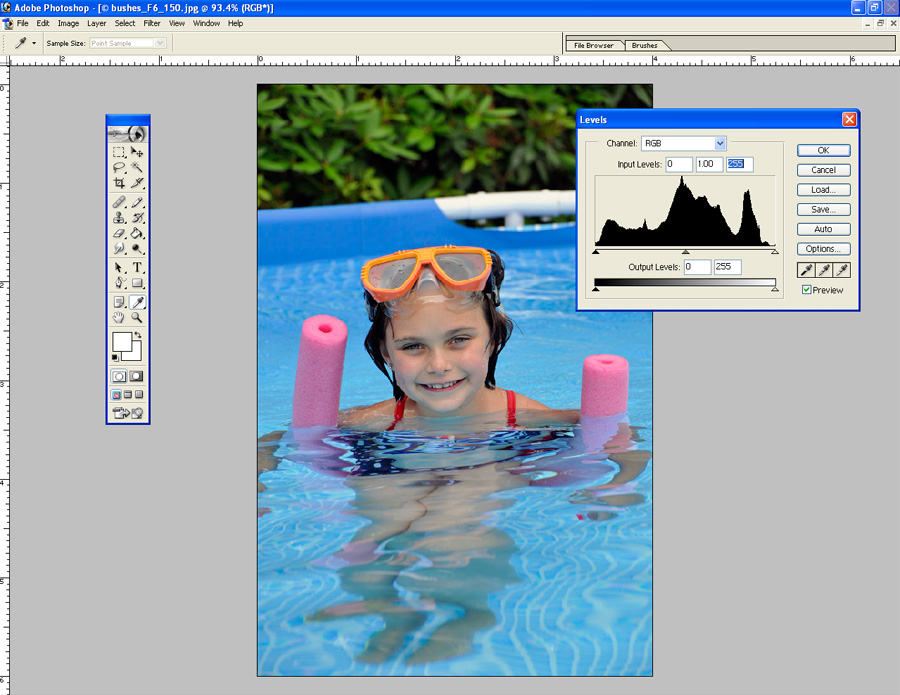
I am no Photoshop guru. Everything I know I learned from photographers Ken Hubbard and Andre Costantini, two pros who DO know their Photoshop. But I can fix a shot that’s too dark, or the wrong tint. Sometimes sharpen it up a bit. The thing to remember with digital is that almost all images need a little boost. If you send your images out to a lab to make prints (like Shutterfly or any other online processing) or drop them off at a drug store, the images automatically go through processing to increase contrast, correct a little color and sharpen them. But if you print at home like me, it’s worth the little bit of time to take a great shot and make it even better. Software like Photoshop Elements, Picassa and more are a great investment of both time and money. I noticed my shot of her in the pool from Sunday’s aperture post was looking a little blue. So I took a moment to fix it and thought this would be a good post. Here we go…

Step 1: Go to Edit > Adjustments > Levels (Ctr+L) and move your slider on the right until you meet the black hill. If need be, move the slider on the left to meet the black hill, too.1_levels
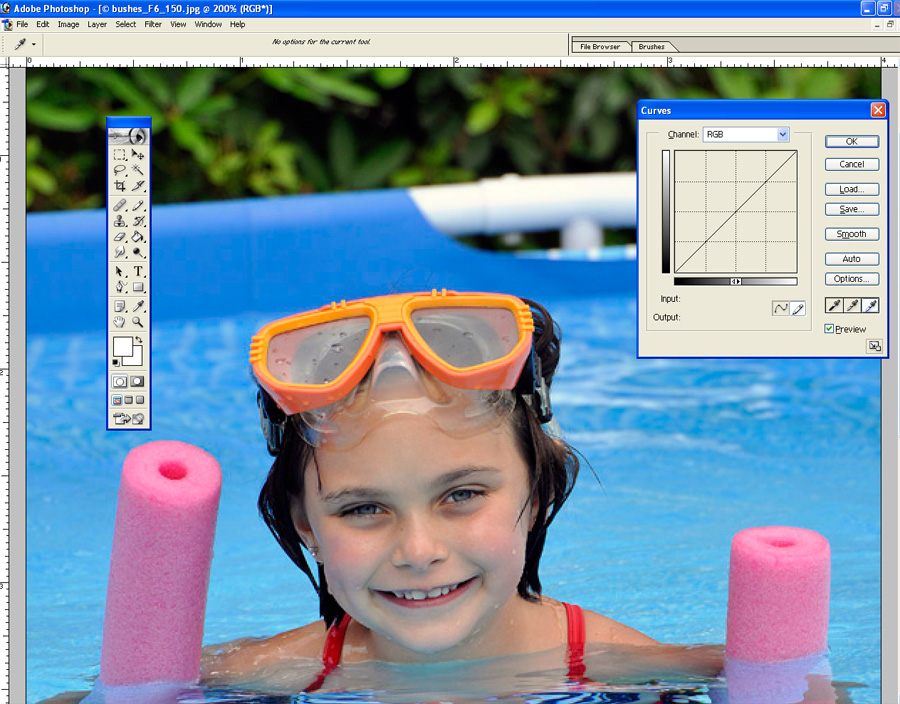
Step 2: Next, I zoomed in on the photo and went to Image > Adjustments > Curves (Ctr + M) and clicked the eyedropper on the right (white) and selected a white point in the photo (the rail of the pool in the background). The image now shifted color and became brighter.
2_curves
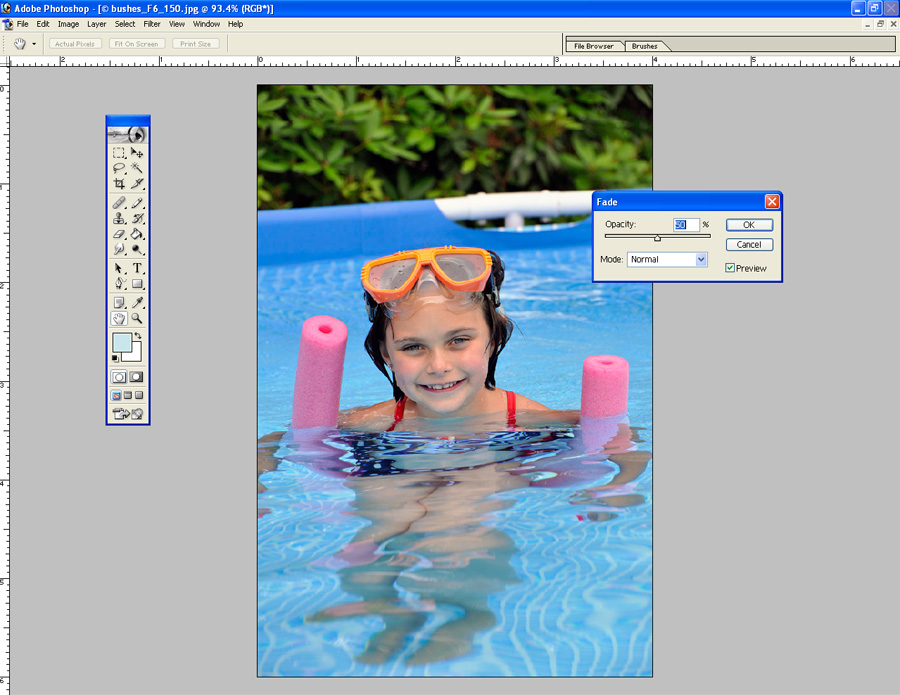
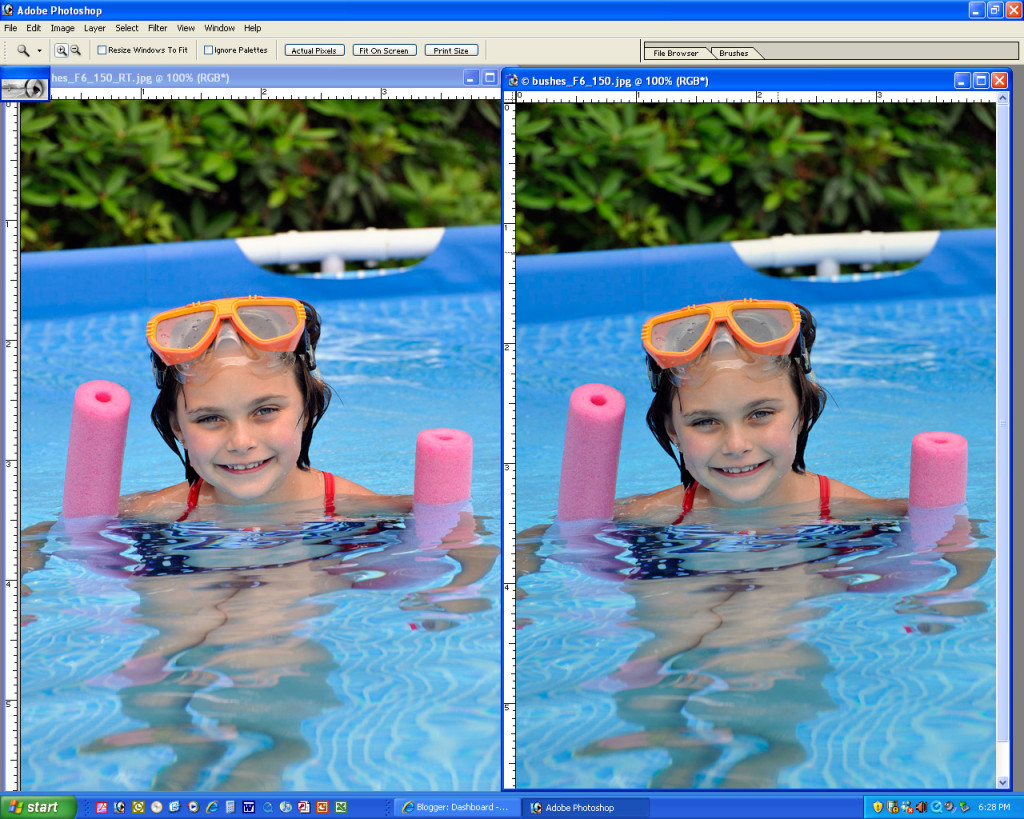
Step 3: However, I thought it was too bright. So I went to Edit > Fade > Fade Curves (fade will adjust the opacity of whatever your last action was) and selected 50%. I like the difference. I think the retouched version pops a little more and it not so blue.
5_after-before

Unclutter Your Photo’s Background

earring_F6_150

Understanding the function of F-stops, or the aperture of your lens, is undeniably the most confusing of your DSLR’s features. However, once you master it, you will make a huge leap forward in the quality of your photos.

As a photo student in high school and college, I stuck a slip of paper onto the back of my camera (yes, in film days SLRs had a bookplate slot on the back of the camera where you slipped in a flap from your film box so that you could remember what film you had loaded. Can you imagine?!). On this slip I wrote, “open aperture=blurry” and “small aperture=sharp.”

An open aperture lets in a lot of light. On your lens it is a setting like F/2.8, 3.5, 5.6, or 6.3. Think of the aperture as your eye’s pupil. If there is not much light, your pupil gets bigger, or “opens” to let in more light. But a big result of using an open aperture is the effect of a blurry background that really makes your subject pop off the page (or screen). You can easily control the aperture setting on your camera by putting the camera on “A” and dialing in one of the aforementioned numbers. Your camera will automatically pick a shutter speed to make a proper exposure.

If you have a distracting background, dialing in a wider (or open aperture) will make the background blurry and eliminate the distractions. However, maybe you want the background really clear. Like if you’re standing in front of a sign that you want to be able to read in the photo. Then you would dial in a small aperture.

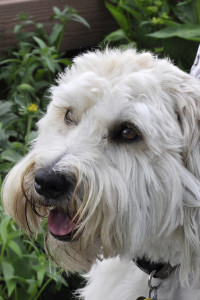
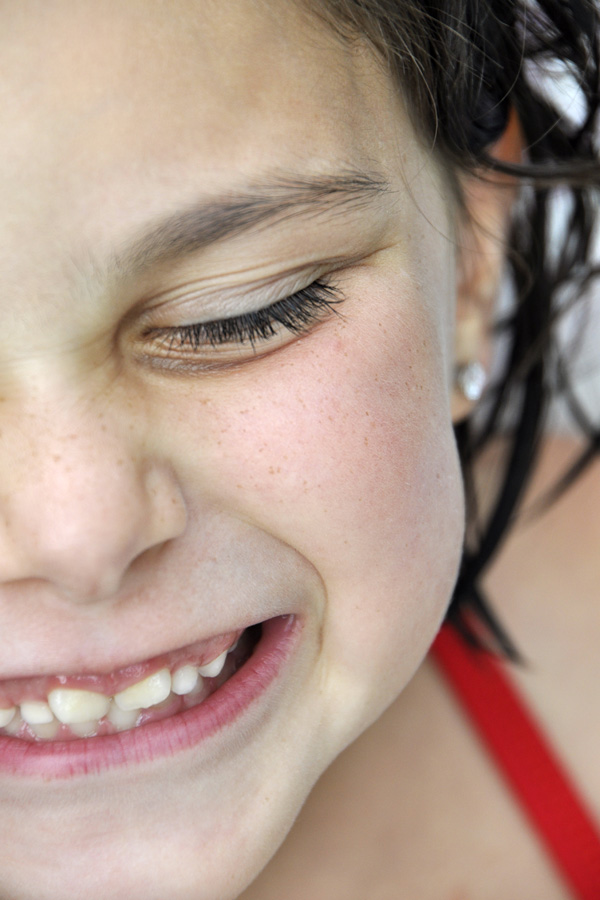
In this first photo, her eye is in focus, but her earring is not, and neither is the tip of her nose. I was just a few feet away and had the camera set to “A” (Aperture Priority) and dialed in F/6.3. Now conversely, if you choose a small aperture, like F/22 or F/32, your background will appear more sharp. Again, imagine a bright sunny day and how your pupils react: they get smaller and let in less light. But also, think about when you squint and how things get clearer. This is sort of how a smaller aperture works. In the second photo, I dialed in F/32 and her earring is now in more focus.
{F/6}
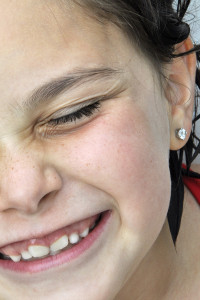
{F/6}

{F/32}

{F/32}


{F/6.3}

{F/6.3}

{F/22}

{F/22}

Communion Portrait

COMMUNION PORTRAIT

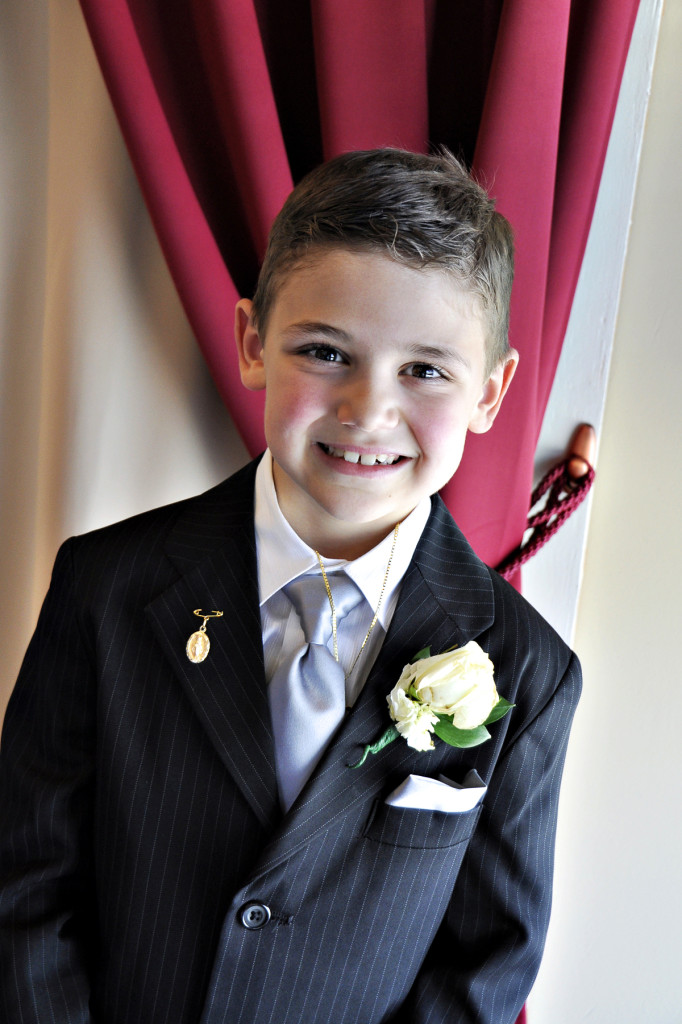
I love window light. In the Italian restaurant where we celebrated this boy’s first holy communion, a bank of windows with translucent shades was near the kids table. I asked him to take a minute and stand near the windows, using the wall treatments as a colorful and classic background that leads your eyes right to the subject’s face. I set the camera to aperture priority and dialed in the widest aperture opening I could (F/4.2). The ISO was set at 400. And since the light was low, I turned on the anti-stabilizer on the lens and was able to get a sharp image at 1/30th of a second (gotta love that VC!). The natural light really lets you see the details in his dapper suit and his beautiful rose corsage. And his dark eyes sparkle from the window light. It took more than a few shots to get a natural smile, and I did it by asking him to close his eyes real tight and then open them. He giggled after making a goofy face and I was able to catch a pretty natural smile.

To Tilt or Not To Tilt Your Photos

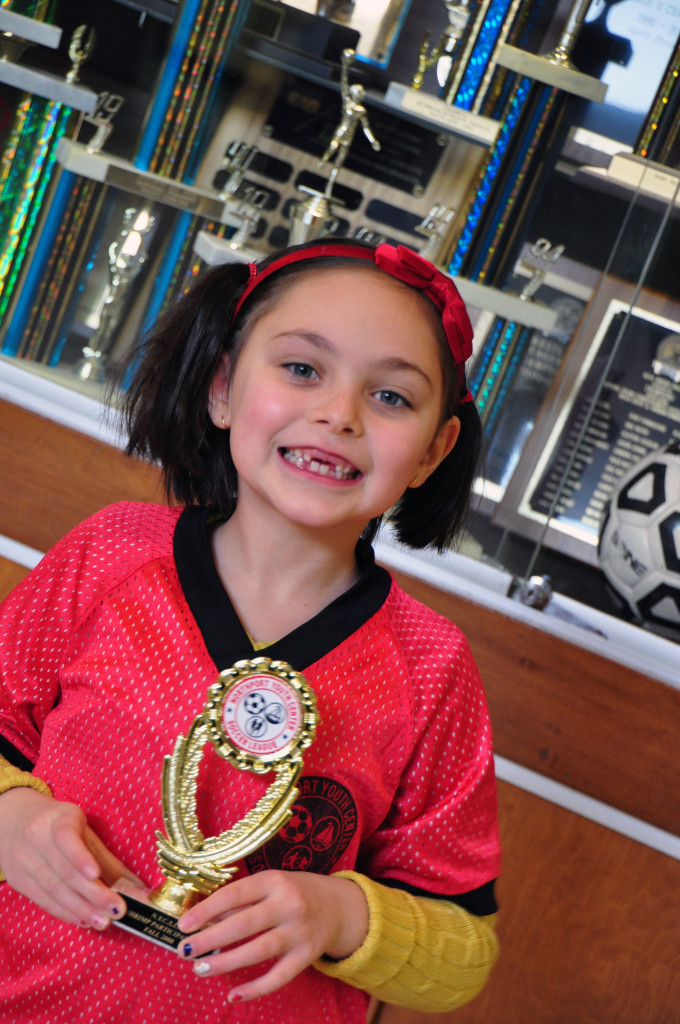
DSC_0439_soccer-awards

I admit it. I am a tilter. I just love the little feeling you get that this is a moment captured rather than a posed shot (even when it is, like this one after she got her 6th sequential soccer award–well, every player gets one every season, but special to her nonetheless). To me, slightly or moderately tilting the camera gives the picture energy. The other benefit of tilting is that if you, like me, hardly ever hold the camera really straight (making my images sometimes look a bit “off”) no one notices that the image wasn’t straight to begin with. So I just go with my natural tendency to tilt and use it for effect. Now many people feel tilting is over-done. And it can be. And there is certainly a time when it is not appropriate and can ruin an image. But I like it. And I’m sticking with it. For now. (ISO 800; 55mm; F/4.8; no flash; program mode; auto white balance). PS-can you see the catch light in her eyes? It’s coming from an overhead skylight! So look around for a light source when you are figuring out where you want your subject to stand.

Overcast Days Make Great Photos

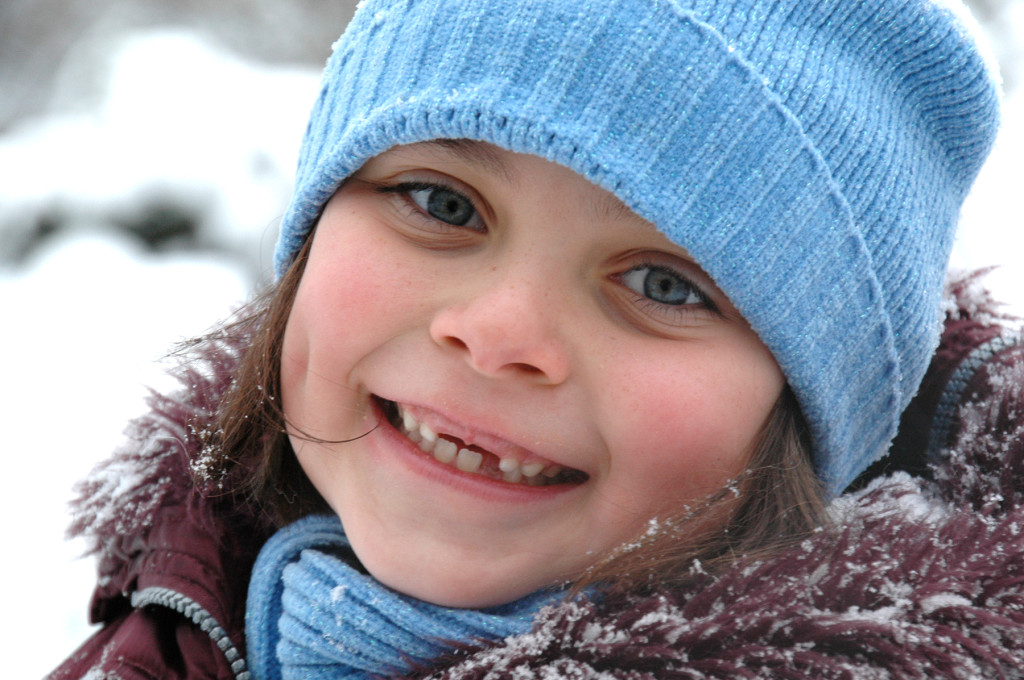
DSC_4173_RT_4x6

The lighting on an overcast day, even at midday, is ideal for natural and easy candid portraits. My daughter played in the snow, got her cheeks all rosy, and then stopped for a minute for me to grab a couple of shots. I stood back and zoomed in to 120mm to blur out the background and I had no worries about the “raccoon eyes” you might get midday on sunny days since the snow acted as a natural reflector and bounced light back into her beautiful face.

Gotta Love A Big Window

Love this photo of my niece. She’s so sweet and I just want to kiss that face. Seated in a restaurant on an overcast day, soft light poured in the large window to the right. As she conversed with her mom and dad, I shot at a wide F/3.5 aperture setting with the vibration compensation turned on to accommodate the slow 1/25th sec shutter speed. Only when her face was turned slightly towards the window did I get that twinkle in her eyes. Tip: Look for north facing window and position your subject’s cheek toward the window. You’ll get nice side lighting that gives dimension to the face and highlights in the eyes.