Rule of Thirds in a Coastal Landscape Image

It’s been some time since I blogged photography tips for you. I am not sure why I got away from it, but I have a renewed interest in trying to help beginners take better photos. This may be inspired by the great number of people who have discovered photography as a new hobby during the pandemic and have recently invested in camera gear to take better photos. So whether it is with your phone or your new camera, I hope my tips will give you inspiration and guidance the next time you’re out taking photos. Today’s post discusses one of the most basic rules of composition.

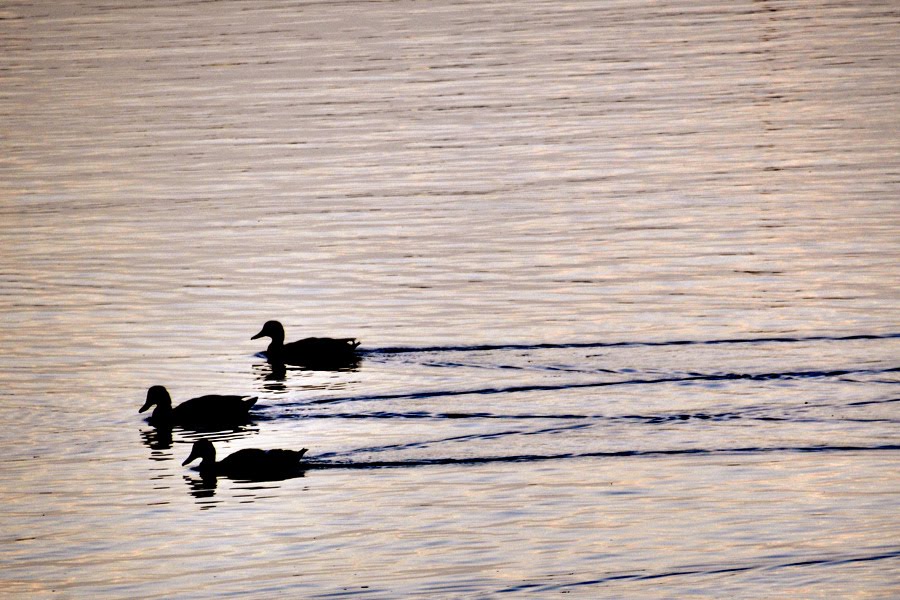
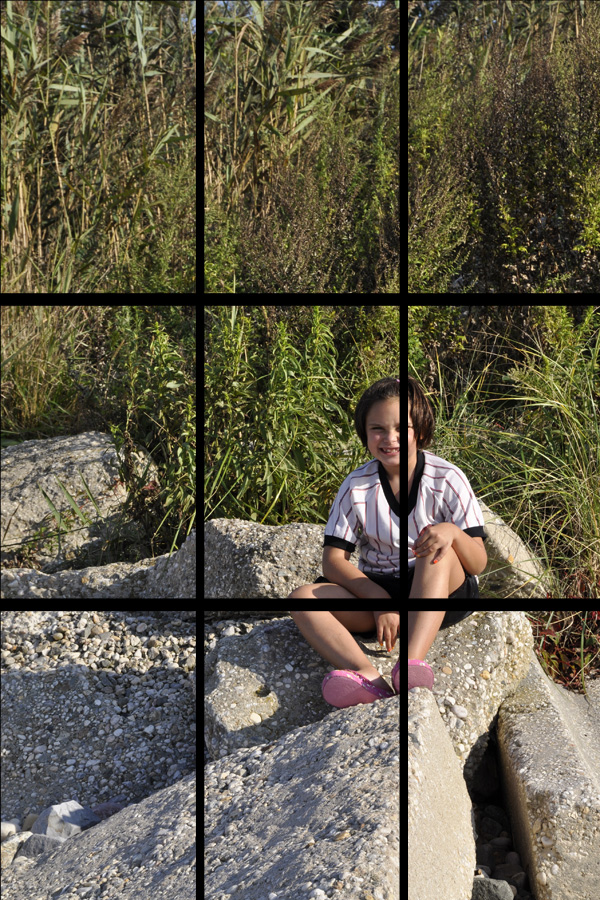
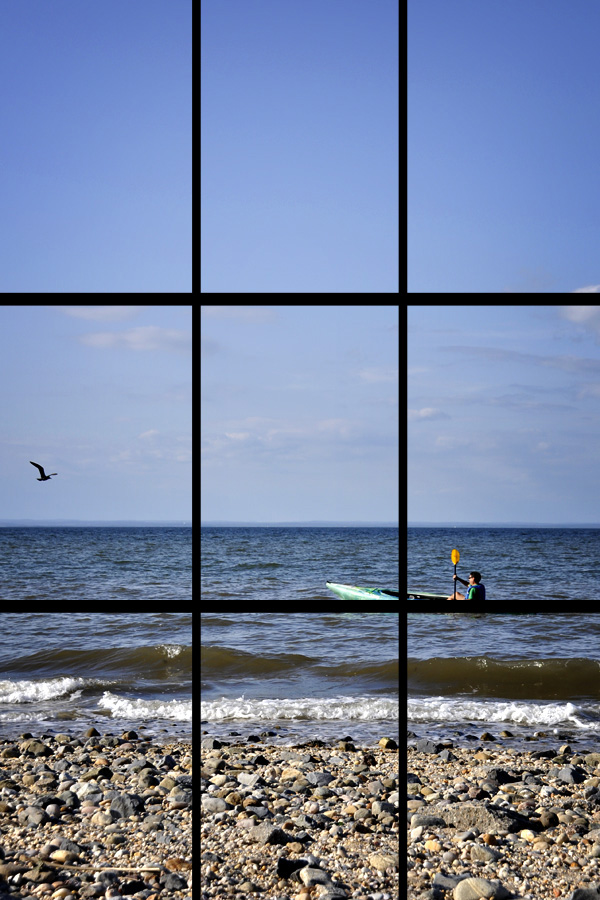
The Rule of Thirds is a powerful rule, but keep in mind it can always be broken if not applying the rule make a better photo. The Rule states that if elements in your composition are placed left or right, or above or below, the center, you will have a stronger composition.

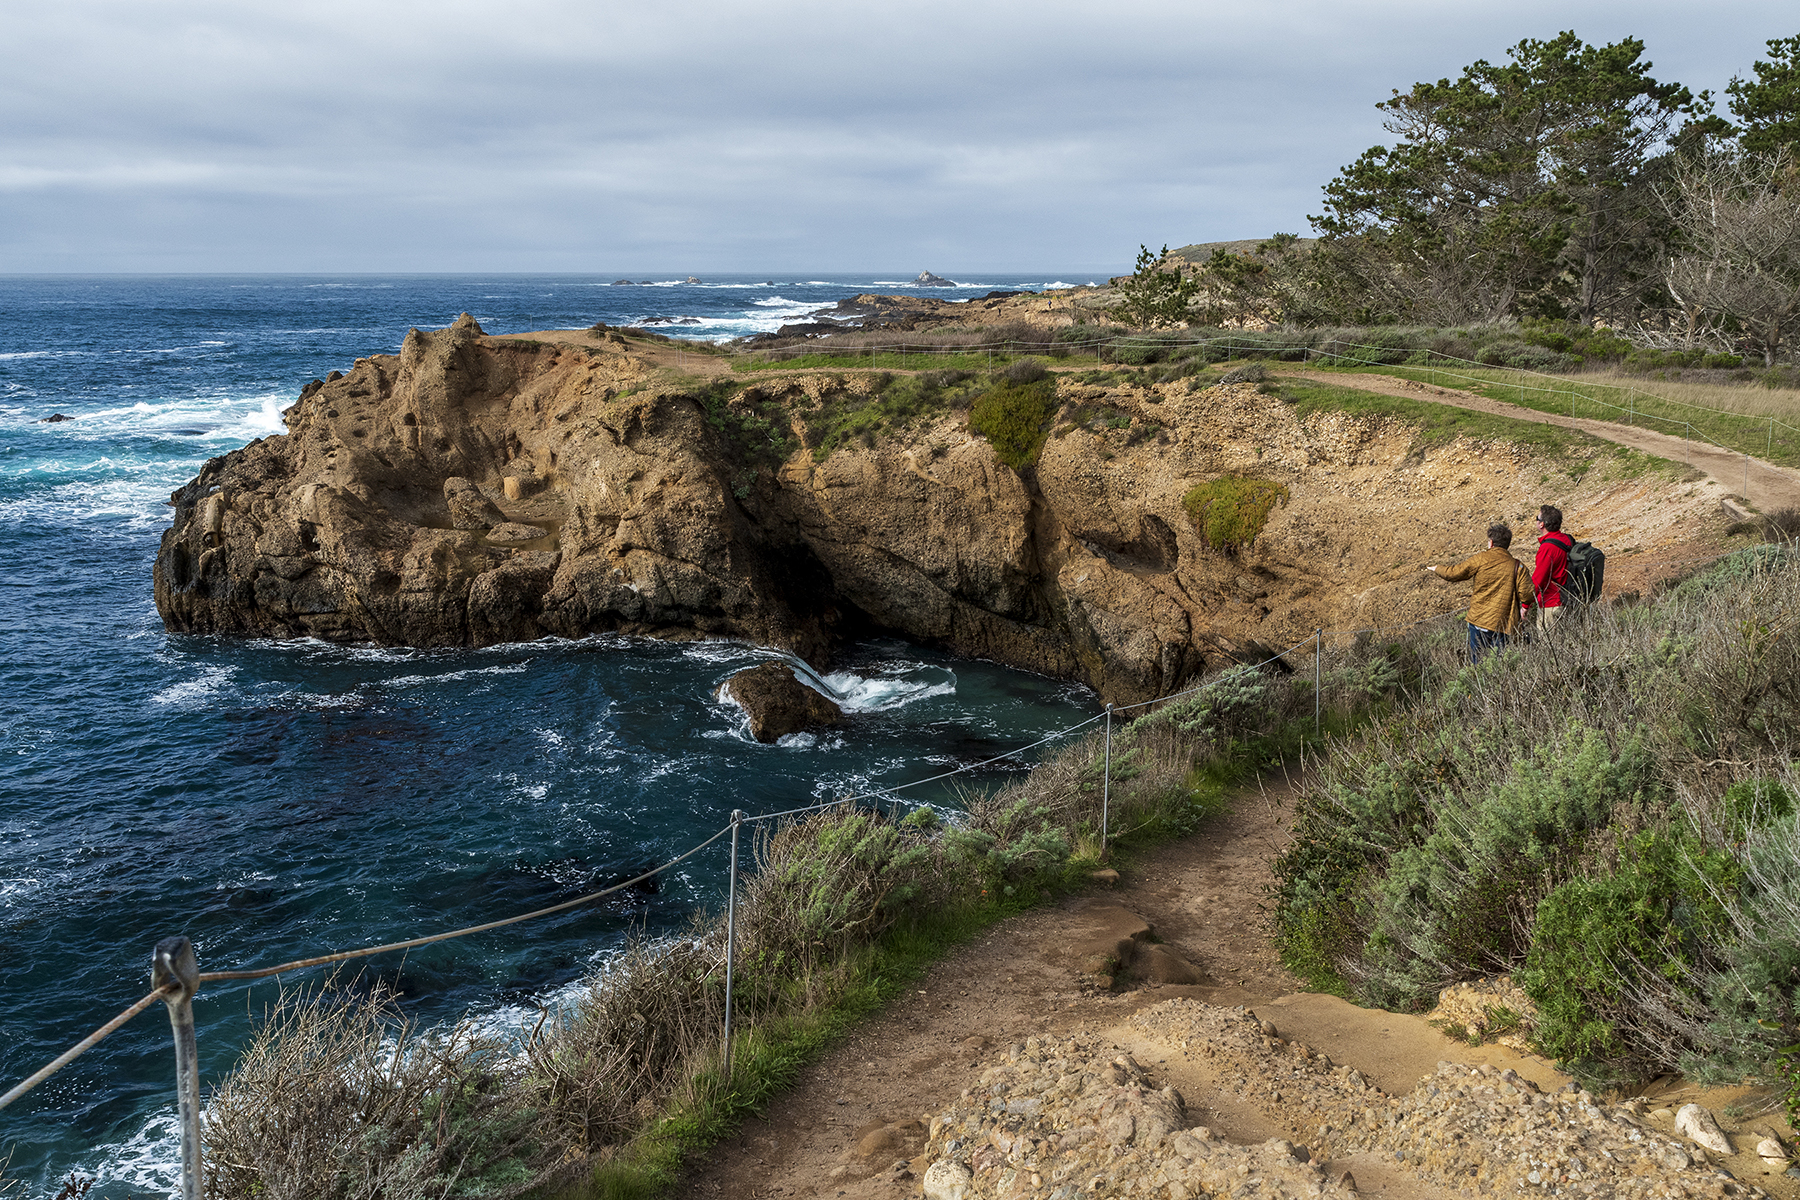
In the image above taken at Point Lobos, CA in January 2020, my subjects along the path are in fact centered horizontally, but pushed to the far right. The bulk of the landscape falls below the center, and the horizon line is above the center. Many readers and viewers tend to read text or an image from left to right in Z pattern, so the viewer’s eye is naturally drawn along the path to land on my subjects. The pop of the red sweatshirt also stands in contrast to the blue, green and brown landscape to inform that the subjects, my two dear photography mentors Ken and Andre, are an important focus within the image of this beautiful coastal landscape we were visiting during a photo workshop.

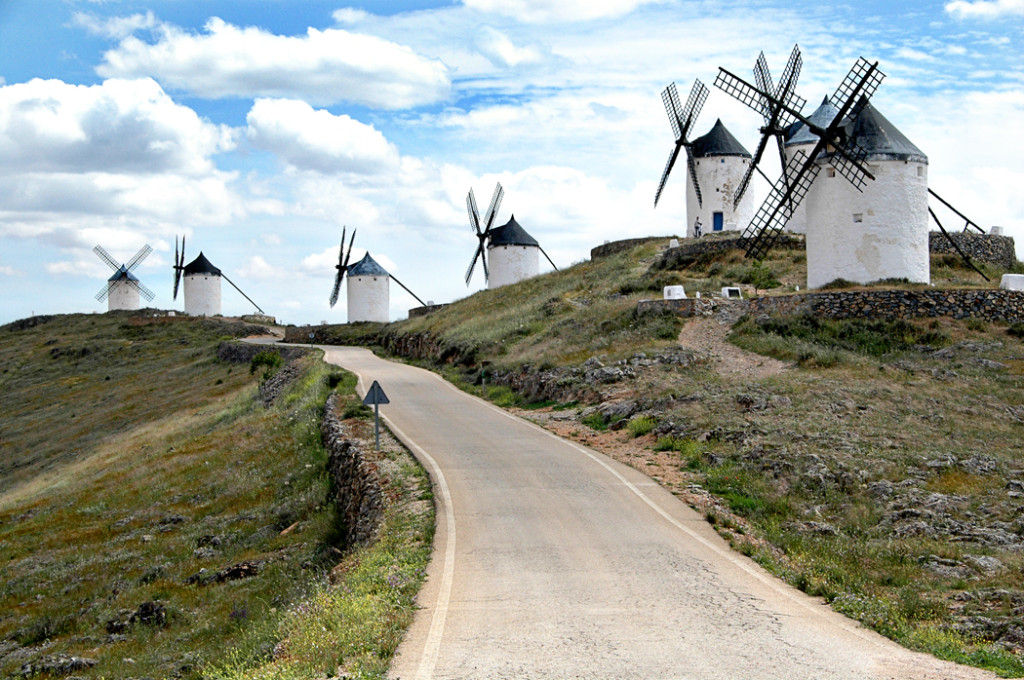
For further discussion fo the Rule of Thirds, read this post here that demonstrates this rule with a grid overlay on images and encourages you to take shots with various compositions to see how one may be stronger than another, or tell a different story based on your composition within the grid.

Rule of Thirds Example

ducks
Here’s another quick example of the rule of thirds. I love its simplicity. I called it heading home on my Project 365 blog. The main subjects are located in roughly the lower left third of the grid. Read more about the rule of thirds here, and here.

Take a Photo that Demonstrates the Rule of Thirds

_DSC4304_RT_150

The rule of thirds is one of the most powerful creative options you have when composing your photograph. A photo that has the important element of the photo at an intersecting point of a “tic tac toe” board, or in one of the right or left, top or bottom thirds of the photo, is one that is more compelling  than a shot with the subject centered.

_DSC4304_RT_150_wgridMost often, you don’t want to position your subject smack dab in the center of the frame. It’s boring. Although, this rule, like all rules, can be broken very effectively. That really depends on the shot. But if you start to think about not putting you subject in the center of the frame, you will train your eye to see better shots. For example, the eye closest to the camera should hit one of the intersecting points. Or the critical part of the landscape should be in the top third or bottom third, left third or right third. My shot here shows the subject off to the right slightly and in the lower portion of the frame. This gives the subject breathing room in the frame, the “white space” (which does not have to be white, but rather unimportant or non-distracting space in the frame) gives your eye a place to rest and then come back to the subject, and by positioning the subject as I did, you get a feeling of where she is and that where she is important to me and therefore should be to the viewer as well. Below is another example. This time a vertical landscape that also adheres to the rule of thirds. I added the tic tac toe board to both images also so that you can get a better idea of where the intersecting points or thirds of a frame are.
_DSC4279_RT_150 _DSC4279_RT_150_wgrid

Photo Composition from Malta

_DSC2098_boost

I have three minutes left on my internet token. So a quick “rule of thirds” example from Malta. The colorful Maltese boat is positioned in the upper third, a very straight forward example. With business meetings completed, tomorrow we tour this tiny, over populated island and I hope to have some more composition tips for you.

Photographing the Windmills in LaMancha

DSC_2812

I travel a lot for work and get to sightsee for one day on many of these trips. While I am sometimes sad I am seeing the world without my family (I’ve created a scrapbook page called My Travels Without You), I am grateful for the chance to experience other cultures, food, history and more. Last year I went to Madrid. It’s a year already! I leave for this year’s trip to Malta next week. We visited the sight were Don Quixote “battled” windmills. This shot was one of many from different angles as we walked around the property. It’s one of the few that did not have other tourists in the background, a frequent issue when shooting on vacation. The best tip for that problem is patience! But I post this one for three reasons:

1) I am sure you are sick of seeing so many photos of my built-in model;

2) It’s a good example of the rule of thirds;

3) It’s also an example of leading lines. When taking photos, imagine that there is a tic tac toe board on your screen. Put the main interest of your subject (like eyes, or head, or Disney Castle) at one of the intersecting points, or in the upper or lower third, or the right or left third. This makes a more exciting photo than when the subject is smack in the middle. So always try to offset in some way. But remember, rules are made to be broken and sometimes the middle is the best way for a particular shot, especially if you are trying to create exact symmetry in your image. In this shot, the horizon and the windmills are positioned from middle to the upper third of the image. And the road is a good example of a leading line that guides your eye right to the first windmill and then the windmills themselves guide you right through the rest of the shot.

Look for shots from Malta next week.

I Love a Parade, But They’re Hard to Shoot

PARADE_1

Shooting a parade is really not that easy. There is so much going on. And it goes by pretty quickly. And someone always moves into your frame before you get the shot. Well, at least that’s what always happens to me. So shooting the Memorial Day parade was a practice session for me with the hope that I have honed my rusty parade-shooting skills a little bit before our “big” July 4th parade (I say big, but it’s less than 1/2 mile and lasts all of 30 minutes). Anyway, since there was no one in the parade itself that I was trying to capture, and I was not shooting for any newspaper, I wanted to be sure the reasons for me even being at the parade, my model and her friends, were in my shots. So I crouched a little and captured them in the corner of the frame as they watched our terrific high school marching band pass by. I used a wideangle setting and shot it horizontally to capture as many band members as possible.

But of course, there were fire trucks and flags galore. To capture the reaction of a whistle-blowing fire truck that just went by (yeah, if I wasn’t shooting, I’d be holding my ears , too!), I turned the camera vertically, took a few steps back and zoomed in to frame the image nicely without any wideangle distortion. PARADE_2Here, a vertical orientation works to capture the kids in the lower foreground with the parade blurred out in the background. The background drops out since I had the aperture set wide (F/3.5) which gives a shallow depth of field. But I was also using a medium tele setting (100mm). When you use a tele setting and are close to your subject, you get shallow depth of field (blurry backgrounds) like this. I really like the result. There’s no doubt where we are and I feel like I am there just looking at the photo. I hear it too!

So as you get ready to shoot your next parade, try to a) get there early to stake out an up-front spot; b) stand on the side of the street with light so your camera has an easier time getting a proper exposure; c) use the rule of thirds to place your own little parade watchers in the frame (position them in the bottom, left or right third of the frame rather than the middle); d) use different zoom settings; and e) take lots of shots!