Capture Silky Smooth Moving Water

Water is a compelling photographic subject. And how you capture it makes an impression on the viewer. Freezing the action for crystal clear water droplets from a crashing wave or pool splashes conveys power and energy. Slowing the motion down to create a milky white stream of water creates a more serene picture.
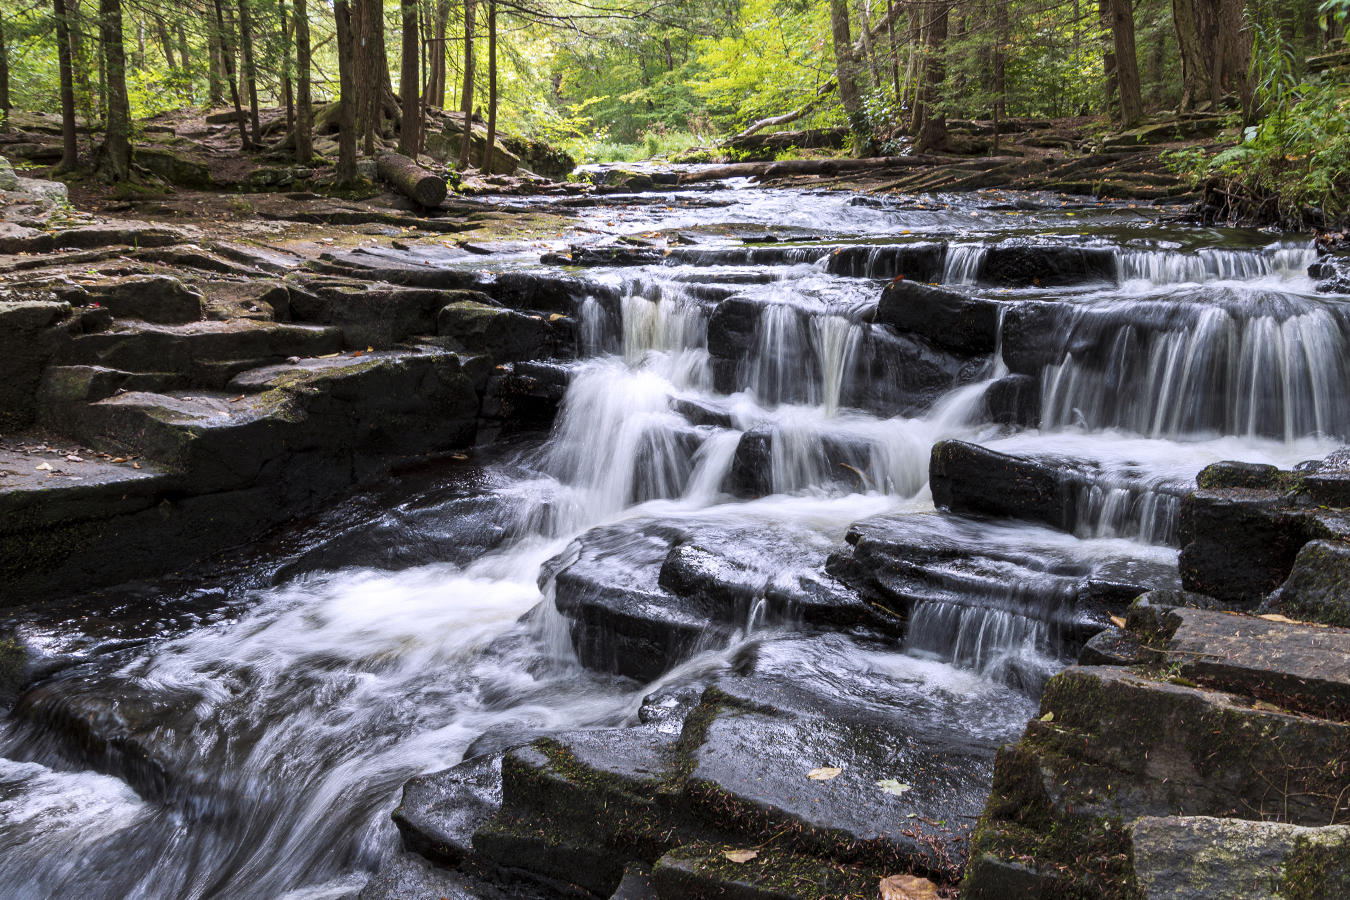
In this photo taken on the Little Falls Trail in Promised Land State Park, Poconos, PA, I hiked in mid-morning with my 18-400mm all-in-one lens as well as an electronics cable release designed for your camera and my travel tripod, two must-have accessories to create silky water fall action. Getting as close down and into the flowing water as possible creates a more dramatic perspective.

Settings are very important. First, set your camera to aperture priority and choose an aperture that will give you deep depth of field (between F11-F22 is ideal) so that your foreground to background will be in focus. I used F11 here. Next, select ISO 100. Now look thru the viewfinder and see if your shutter speed is below 1/15th second (I shot my image above at 1/6th second). You can change your aperture to make the shutter speed faster or slower. If you move the aperture from F11 to F16, the shutter speed be slower. If you open up your aperture to F8 to let light more light in, the shutter speed will be faster. Start shooting to see your effect and change your aperture until the image looks the way you want it to.

Since you will be shooting at slow shutter speeds below 1/60th second, you will not be able to handhold the camera. You must use a sturdy tripod and a cable release to ensure there is no camera shake.

The three settings involved in creating an image of a waterfall are referred to as the exposure triangle. The ISO, the aperture and the shutter speed all work in concert to create the effect. So your constant will be your ISO. The second that you will work with is your aperture. Opening or closing the aperture will change the shutter speed to be faster or slower. The shutter speed is ultimately the setting that will either freeze the water (faster shutter speed) or create the silky effect (slower shutter speed).

And the last tip for any landscape photo is to focus about a third of the way into the scene. This will give you the best results for foreground to background focus.

This tip is a good self-assignment for any season. So, find a park with waterfalls within driving distance and head out with your wide-angle lens, tripod and cable release.

Rule of Thirds in a Coastal Landscape Image

It’s been some time since I blogged photography tips for you. I am not sure why I got away from it, but I have a renewed interest in trying to help beginners take better photos. This may be inspired by the great number of people who have discovered photography as a new hobby during the pandemic and have recently invested in camera gear to take better photos. So whether it is with your phone or your new camera, I hope my tips will give you inspiration and guidance the next time you’re out taking photos. Today’s post discusses one of the most basic rules of composition.

The Rule of Thirds is a powerful rule, but keep in mind it can always be broken if not applying the rule make a better photo. The Rule states that if elements in your composition are placed left or right, or above or below, the center, you will have a stronger composition.

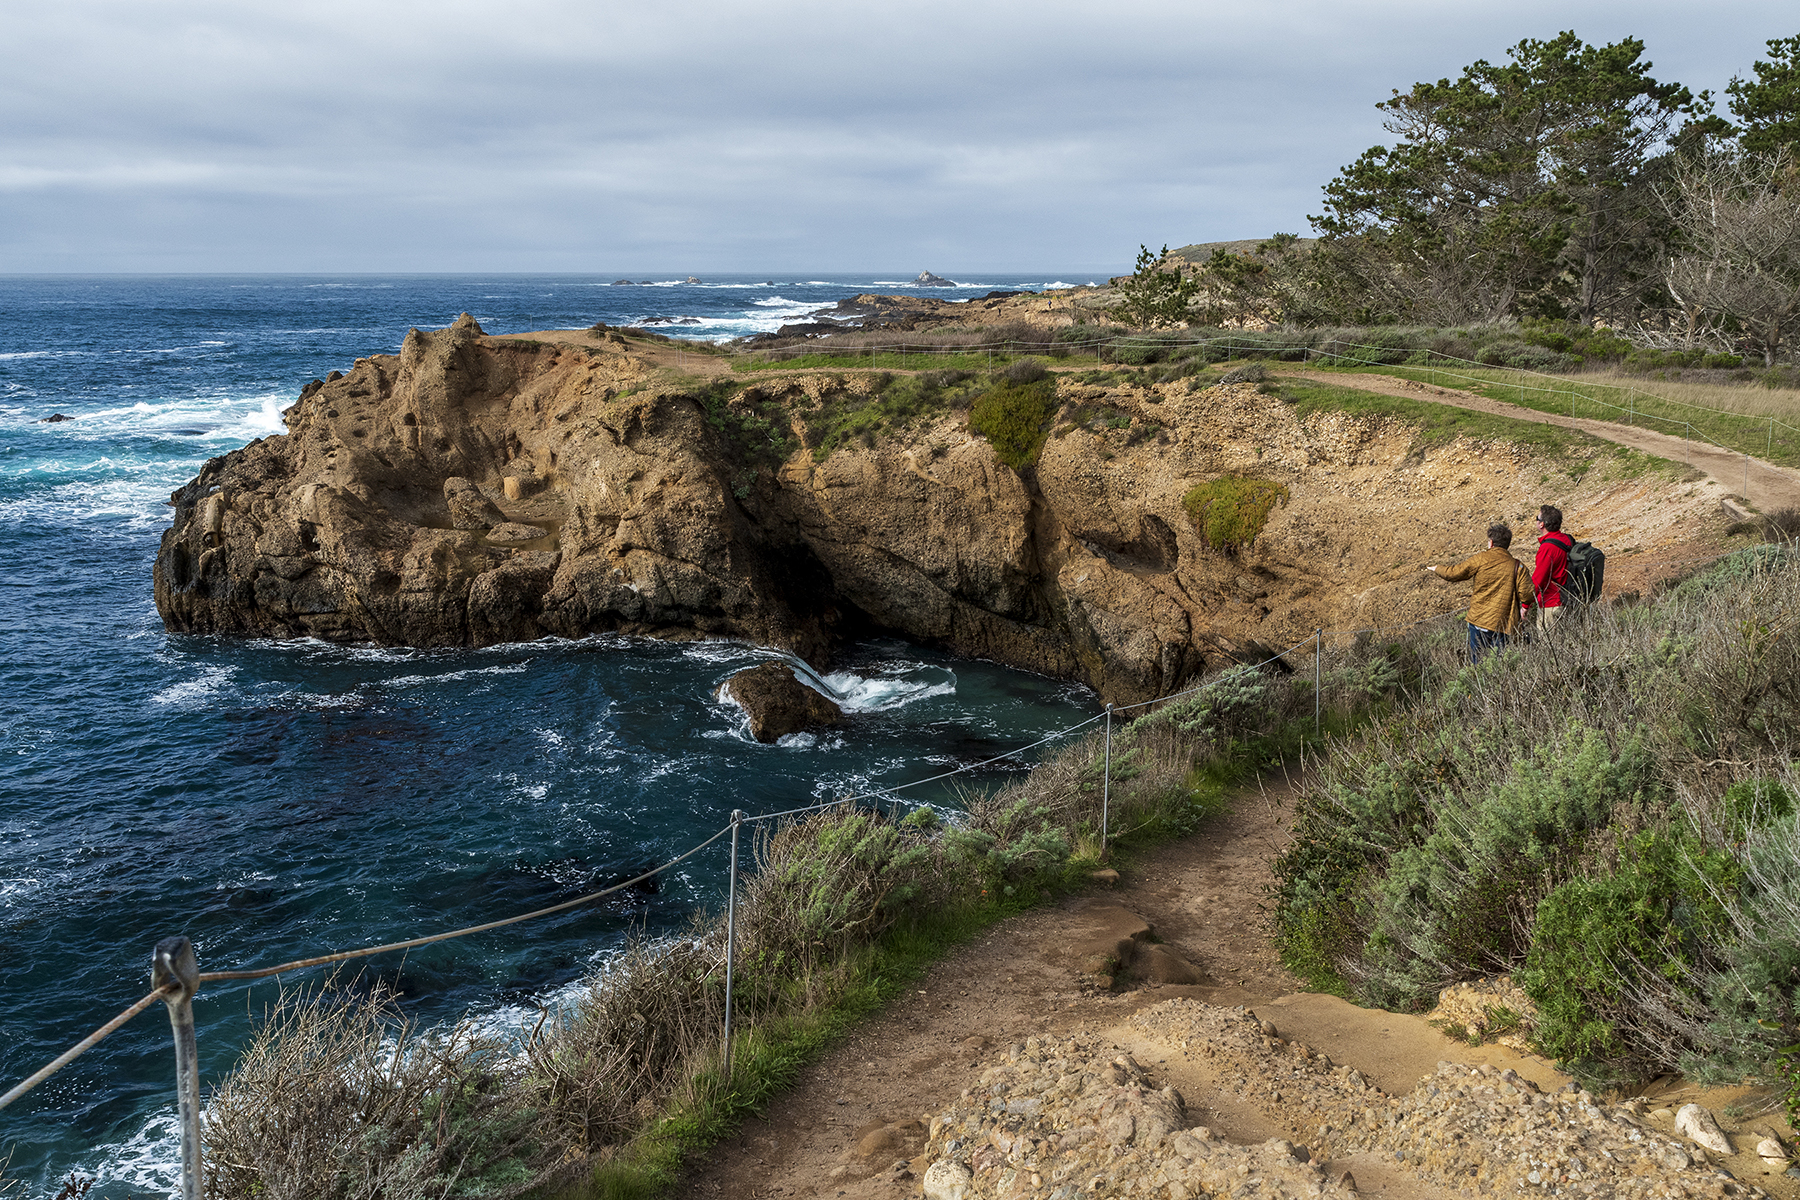
In the image above taken at Point Lobos, CA in January 2020, my subjects along the path are in fact centered horizontally, but pushed to the far right. The bulk of the landscape falls below the center, and the horizon line is above the center. Many readers and viewers tend to read text or an image from left to right in Z pattern, so the viewer’s eye is naturally drawn along the path to land on my subjects. The pop of the red sweatshirt also stands in contrast to the blue, green and brown landscape to inform that the subjects, my two dear photography mentors Ken and Andre, are an important focus within the image of this beautiful coastal landscape we were visiting during a photo workshop.

For further discussion fo the Rule of Thirds, read this post here that demonstrates this rule with a grid overlay on images and encourages you to take shots with various compositions to see how one may be stronger than another, or tell a different story based on your composition within the grid.

You Never Know When the Photo of the Day will Happen

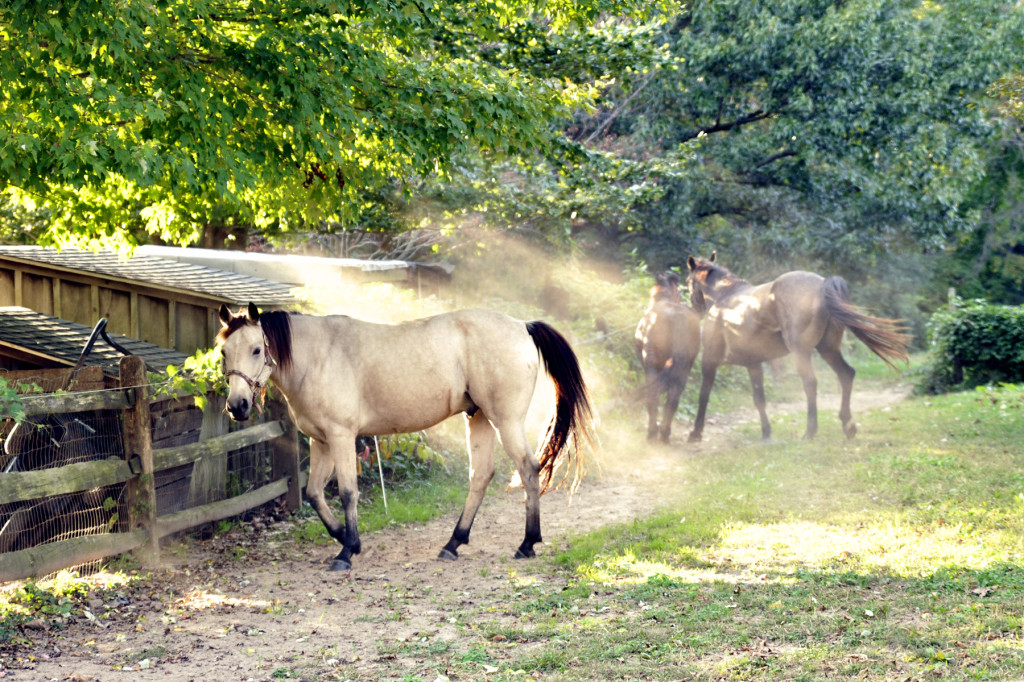
Yardley, PA, 2012

We all know it– have your camera ready at all times because you just never know when the right moment will strike to capture your favorite photo of the day. On a recent day of apple-picking in Pennsylvania, such a moment happened. I watched as a man walked a horse back into the horse corral and followed behind him. I quickly zoomed in on the horses already in the corral, but as soon as the new horse entered, they galloped off leaving a cloud of dust that reflected in the low sun streaming through the trees. I snapped off three images, and then this horse just looked at me for a second, and then he galloped off right behind his friends, two more shots. This was the last one. I had no time to think about settings, so whatever my camera was set on from my previous shots was what I caught this image at. I usually keep my camera in aperture priority in the F/5.6-F/8 range and my ISO is almost always at 400. So for this shot, the shutter speed was just fast enough to freeze the action.So the lesson today? Look around you for activity beyond what you came to shoot and watch for those special moments. Try to anticipate a shot when you see some activity around you. And when out for the day, keep your camera handy. If my camera was in my gadget bag, I would have missed this altogether. My favorite shot of the day.

A Little Tilt of the Camera Can Convey Energy and Motion

Tilting of the camera is something we see a lot of today. It can work particularly well for portraits, especially when the subject is expressing emotion, like a couple of laughing teens. But this technique can also work for street scenes to convey a sense of movement and energy. Recently, on a trip to London, I took hundreds of photos of Big Ben. Wanting to capture the feeling of really being there, I stood in the middle of Westminster Bridge looking towards Big Ben and Parliament and waited for the iconic red bus to come into the scene. By slightly tilting the camera, I feel the shot does not feel static, but instead energetic, bringing me back to the moment of standing almost in the road and the traffic rushing by. Tilting the camera is not right for every shot, and sometimes you just have to experiment with a straight on shot (see last shot in the post to compare) and one that has a tilt to it, to discover which shot you like best. Try tilting the camera both left and right to see which is the better angle for the shot. I used this technique quite a bit on the trip, and when looking at them scattered throughout my digital photo book I am creating on Blurb.com, I feel it helped to capture the whirlwind that was my three-day London vacation.
A straight on view. Compare to the main photo at the top of the post.

This slideshow requires JavaScript.

One Location. Two Entirely Different Photos.

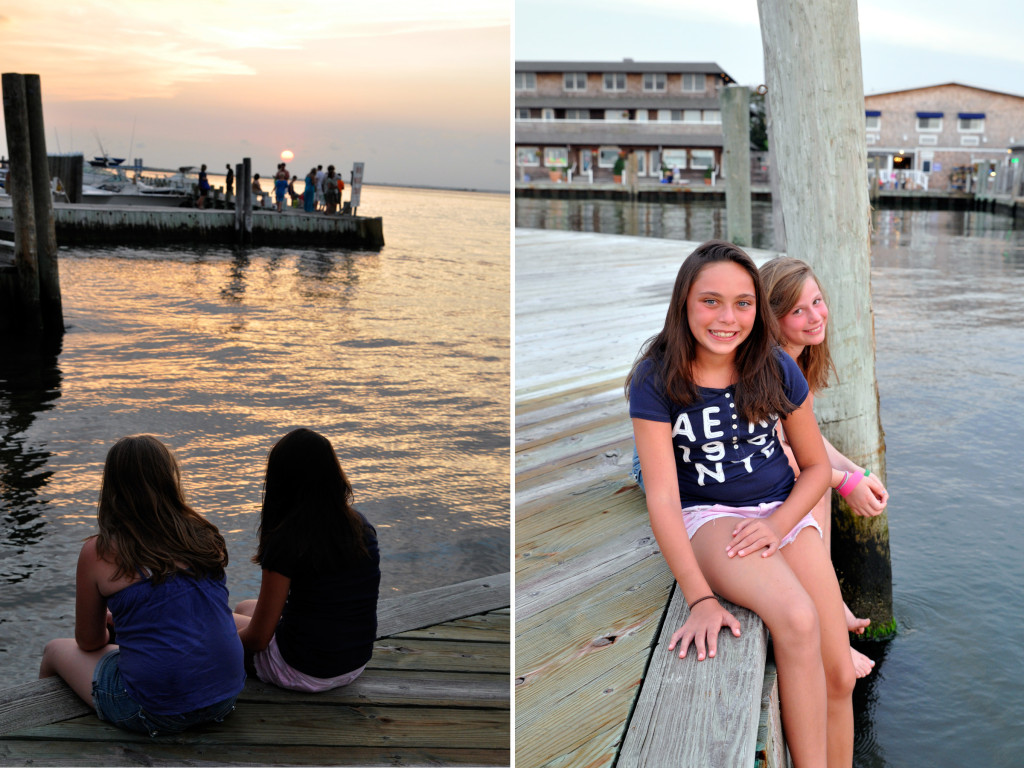
Change your position_compSometimes we take the shot we had in mind and call it a day. But when the light is so beautiful at sunset, it pays to take a few steps around just to check out how the sun is lighting your subject. The photo on the left was the one I was after: two girls watching the sunset, captured in near silhouette as the center-weighted meter gave an exposure for the bright setting sun and made most of the other parts of the shot go dark. Just what I wanted. But then I sat down next to the girls to watch the sunset with them, and wow, was the light across their faces gorgeous. So of course I snapped away while the sun set! Because the light was low, I boosted my ISO to 640 and got a shutter speed of 1/100th sec at F/5.0 aperture. If I had unlimited cooperation from my two subjects, I would have boosted the ISO to 1000 and shot more photos at F/8 so that the girl further back would be in sharper focus. When shooting more than one person, either try to get them on the same plane of focus, or deepen your depth of field by using a smaller aperture like F/8. Not always possible, as was the case here, but the sweet expressions and the light make the shot a perfect one for me.

Shoot From below for Dynamic Images that Capture the Whole Scene

TheGirls
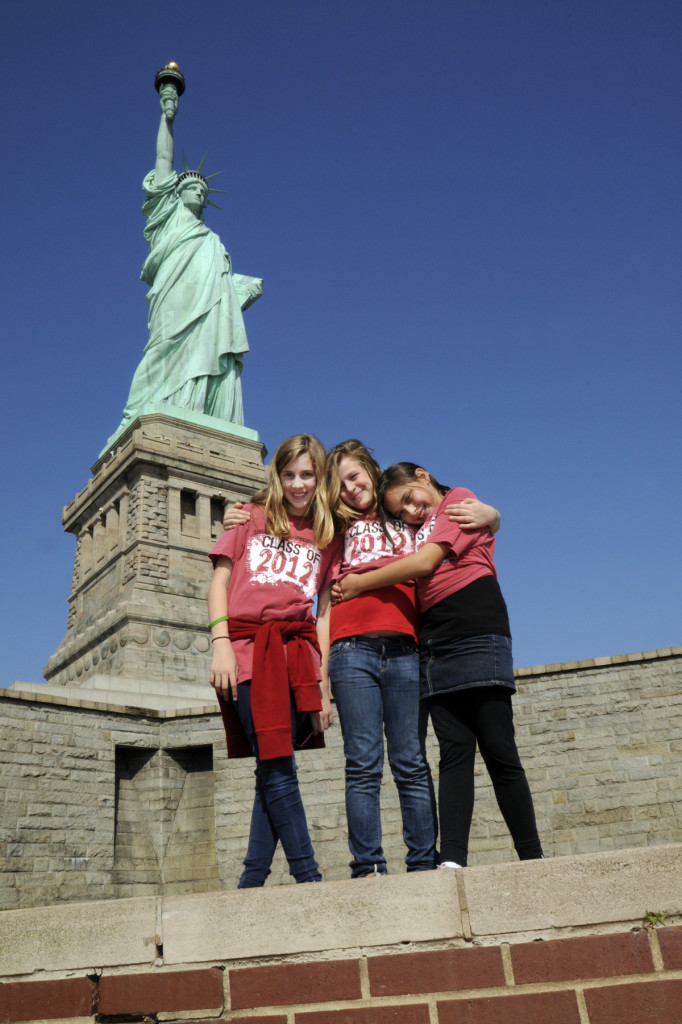
I was literally laying on the ground with my head in the lap of another mom when I shot this photo of the girls under the Statue of Liberty on a recent field trip. While it will be a year or so before you can visit the inside of the Statue due to its closing for repairs, you can still visit Liberty Island and get this shot. And this low angle can and should be used for holiday picture-taking, winter vacations, and more. Here are just a few ideas:

-A tall public Christmas tree
-The Eiffel Tower
-A lighthouse
-The Disney castle
-A snowman
-Your house
-Skyscrapers
-An amusement park ride
-Mountains

Get down low, shoot up and use a wide angle setting on your zoom lens. Be sure to meter on the subject, not the sky or the background or else your subject’s face will be under-exposed. To do this, 1) set your camera to spot meter mode (see your instruction manual, but it’s easy); 2) put the small circle in your frame on your subject so that the camera can read the exposure of your subject and not the background; 3) press your shutter release button down halfway to lock-in that exposure; 4) re-compose your shot as you like; and 5) press the shutter button the rest of the way to take your shot.

Shoot From a Different Angle for a Meaningful Perspective

_DSC2061_RTWhile visiting Boston over the Memorial Day weekend, we experienced a moving memorial to the fallen soldiers of Boston: 20,000 flags in the middle of The Boston Commons. Each flag represented a Massachusetts citizen who died in wars and military conflicts during the last 100 years. By shooting low (with the camera nearly on the ground as I knelt in front of the first line of flags) I was able to eliminate the distracting background of visitors and keep the focus on this sea of flags that really puts into perspective the staggering number of lives lost. The 50mm focal length setting combined with a wider open aperture of f/5.3 helped to compress the flags to give the image a painterly feeling as the seemingly never-ending rows of flags dissolves into the background.

Shoot Wide and Close to Eliminate Distracting Backgrounds in Your Photos

_DSC0984_RT

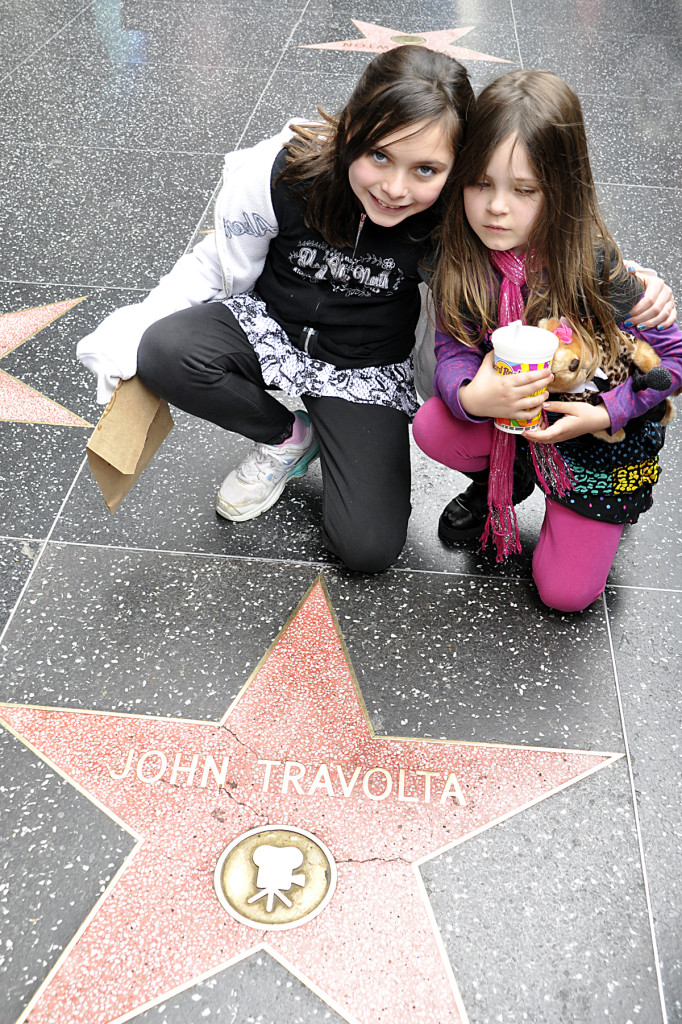
During winter break, we spent a few days in sunny and warm California. Our trip to Hollywood was brief and pictures were difficult with so many people on the crowded boulevard that was in full set-up mode for the Academy Awards. And with two kids all too anxious to see the sights, I had just a moment to capture a “we are here” photo in front of a star on the Hollywood Walk of Fame. By setting my lens to a 23mm wideangle setting, getting close to them and tilting down on the scene, I was able to quickly eliminate the people in the background while still capturing their expressions and John Travolta’s star. I used a slightly small F/6.3 aperture, that when combined with the wide focal length, kept both the star and the kids in focus. Be sure to focus on the subjects eyes and then tilt down for your best exposure and to keep the most important focus point sharp. (Note: I did Photoshop out one lingering foot of a Storm Trooper from the upper right side of the frame. Don’t be afraid to crop or retouch to make your photo even better before posting, framing, scrapbooking or adding to an album).

Isolate Details for a Different Look at Landscapes

Nikko

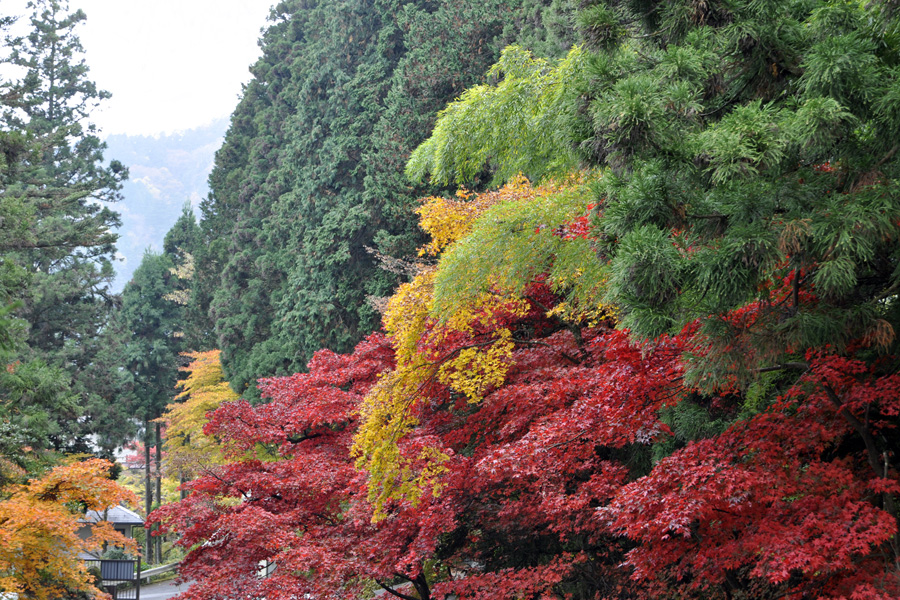
When you say “landscape” I’m sure the vision you have in your mind is a panorama of a sprawling field, distant mountains or grand canyons taken with a super wide angle setting on your zoom lens. However, telephoto zoom settings can also be used effectively for landscape photos. When you zoom in on the details of your landscape, you can bring out something special. Here, in Nikko, Japan, I captured the majesty of the not-quite peaked fall season by isolating a few brilliantly colored trees clustered together in the still mostly green landscape. The resulting picture says “fall” unlike the wide angle shot I could have taken. Next time you’re shooting landscapes, zoom in and see what interesting detail you can find: a single tree, a mountain peak, a reflection in the lake, and more. When you use the telephoto setting, you compress the distance between objects and achieve a flat, almost painterly 2-D effect.

Take a Photo from A Worm’s Eye

_DSC4840_RT

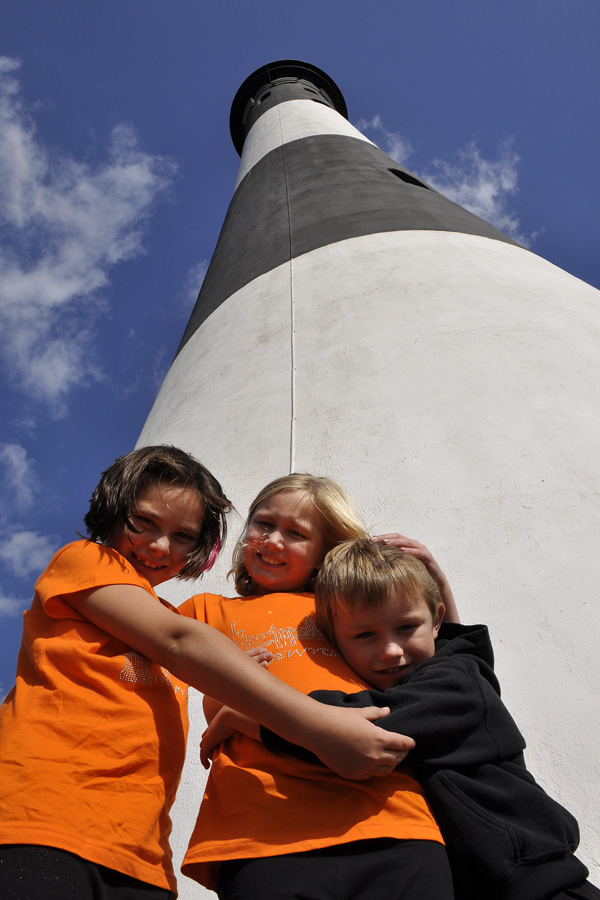
Getting low on the ground and shooting up towards your subject can create a dramatic effect. This is called a “worm’s eye view” since you are essentially viewing the subject just as a worm would. As opposed to a bird’s eye view, well, you get the picture. Now, I literally laid down on the ground and shot up to make sure I could get the full length of the lighthouse in my shot. However, crouching down can achieve the effect. So can raising your subject. For example, your subject is up on a ladder, or porch, and you are on the ground. Use your imagination to get below your subject. You will see how you can crop out distracting backgrounds, include more sky, or incorporate something special in the photo. You can also give the illusion of height, power, strength and more when you shoot upwards.