Windows Are Your Best Friends for Better Portraits

As we start to move towards reuniting with families, consider a more formal portrait of your long-awaited get togethers.

Many of my portraits, candid or posed, are taken by big bright windows as they provide a beautiful soft light on my subjects. And, because I really have a love/hate relationship with my flash and try to avoid using it when much better light is available.

In this photo, the grandchildren gathered around grandma facing the window straight on. Even the dog got in on the action at the moment I clicked the shutter release, but due to my slower shutter speed of 1/25th sec, she is blurry, but I like the story behind it, so I do not mind. I was fairly close them, standing between them and the window, so I used a wide focal length of 32mm. Because of the focal length setting, and stopping down slightly to f/4, I was able to keep the boys behind grandma in relative sharp focus. Stopping down yet again to f/5.6 or even f/8 would make them 100% sharp.

I love the bright eyes that the window light provides as they looked up slightly to my camera lens. It really makes their eyes and smiles pop!


Using a Telephoto Lens to “Flatten the Image”

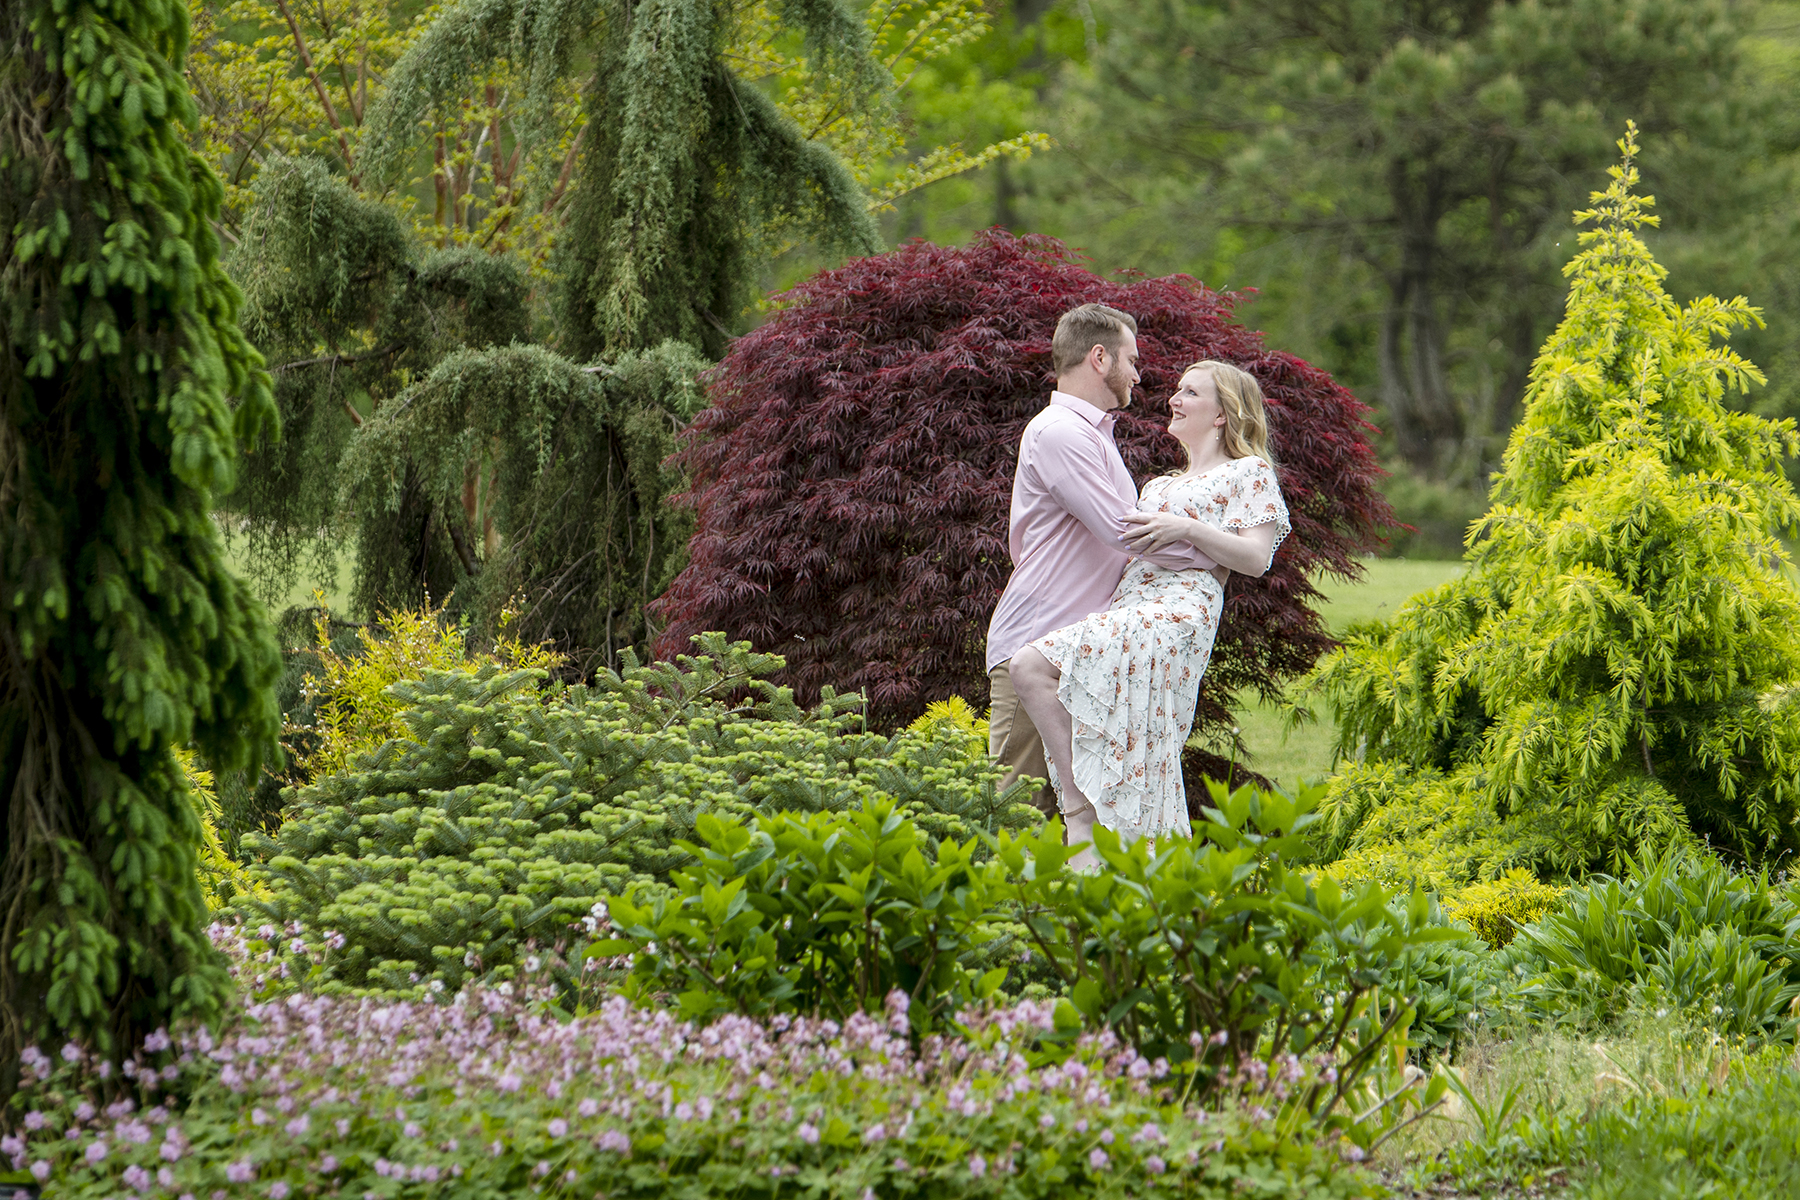
Flattening the image, or compressing the image, is a nice result achieved when you use a telephoto lens and are situated a distance from your subject. I used this effect to make a romantic engagement photo in the Bayard Cutting Arboretum of my newly engaged niece and her fiancé.

The trees in the distance appear much closer than they actually are. And all the “layers” of background objects appear large and stacked closed together. The closest and furthest objects fall out of focus due to the depth-of-field. I like the compression effect as it gives a very clean and almost painterly feeling to the background that might otherwise be too distracting and take away from the subjects in the frame.

This post by photographylife.com has a great explanation of the effect: “This combination of long lens and camera-to-subject distance gives the viewer the impression that distant objects are larger than they actually are. As a result, it gives the appearance that the background is pulled in closer to the subject. The opposite effect occurs when you use a wide angle lens. When we use a wide lens, we tend to stand much closer to our subjects compared to a telephoto lens. Because of this relative closeness, near objects will look proportionally larger than objects in the distance. As a result, the background elements become much smaller and seem farther away.”

I used a moderate telephoto lens, the Tamron 70-210mm F4, on a crop-sensor camera at 170mm, so my effective focal length was 255mm. I stood a distance away and actually used hand signals as they couldn’t hear me. The effect will be more dramatic by standing even further away and using a 300mm or longer telephoto setting. Next time you are headed out to shoot, bring along your tele lens to experiment with compressing the image.

Whenever There’s Good Light, Seize the Moment

You’ll find I use window light quite a lot to take posed and candid portraits of my friends and family. I find window light is easier to manage for me than flash. And it’s very easy to find. I am sure you have a favorite spot in your house that gets nice light during certain times of the day without being too harsh, or that is filtered by a white gauzy curtain.

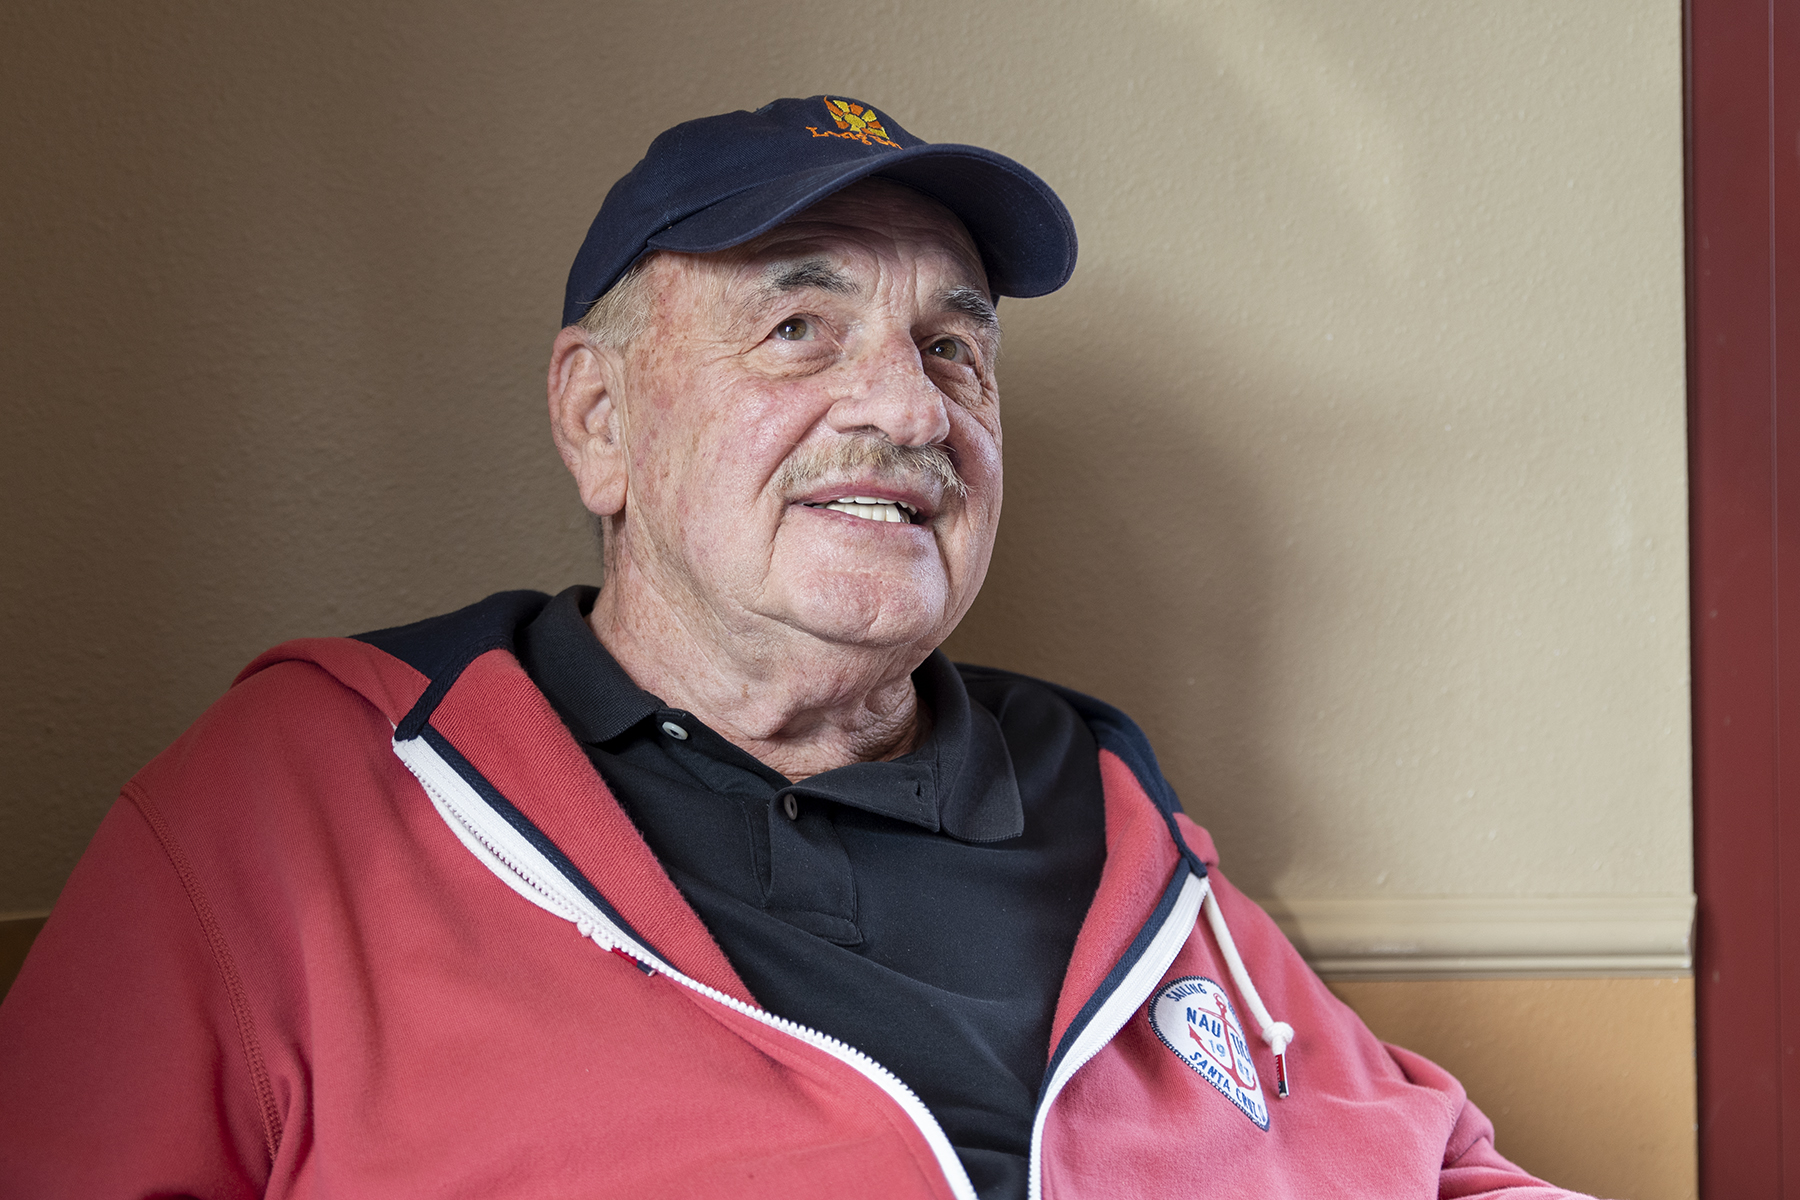
I was with my father in a coffee shop when I noticed the window at my left shoulder and the window at his left should were both wrapping a very even, natural light around him and made his navy cap and reddish sweatshirt pop. So I took several shots (see two more below), but really liked the natural easy expression here as he watched my sister with my niece interacting. For me, the soft shadows make the setting feel very real and comfortable.

When using window light, you may find you need to increase your ISO to 400 or 800, depending on just how bright the light is. You can shoot in program (not green box mode which may make your ISO too high for a pleasing portrait), or in aperture priority mode like I selected here. I shot wide open at f/2.8, 400 ISO, and my shutter speed then defaulted to an easy to hand-hold 125th sec.

Here are a few posts that also discuss window light:

Take in the Scene with a Slower Shutter Speed

Window Light Portraits

Lighting Diagrams for Window Light Photos

Environmental Portraits

Recently, a friend asked me to take a portrait of her in her office for professional use. We started behind the desk, but I didn’t feel that location captured her and the inviting warmth of her office and professional style. So we moved to a chair where she normally talks with clients, which was conveniently located by a window that let me avoid using a flash to maintain the natural feel of the office environment. I used a very fast lens (Tamron’s SP 35mm F/1.8) with a wide open aperture of F/2.2. This allowed me to capture my subject in sharp focus while blurring the background of the desk, laptop and books that let the viewer know the subject is in her office.

Blur Your Travel Snapshot Background

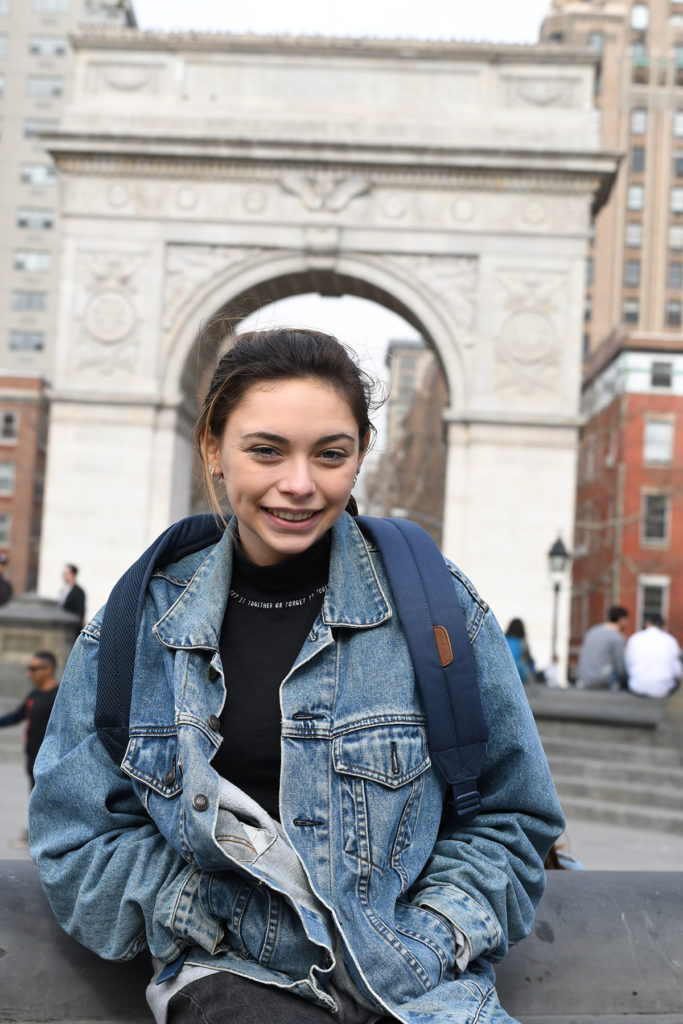
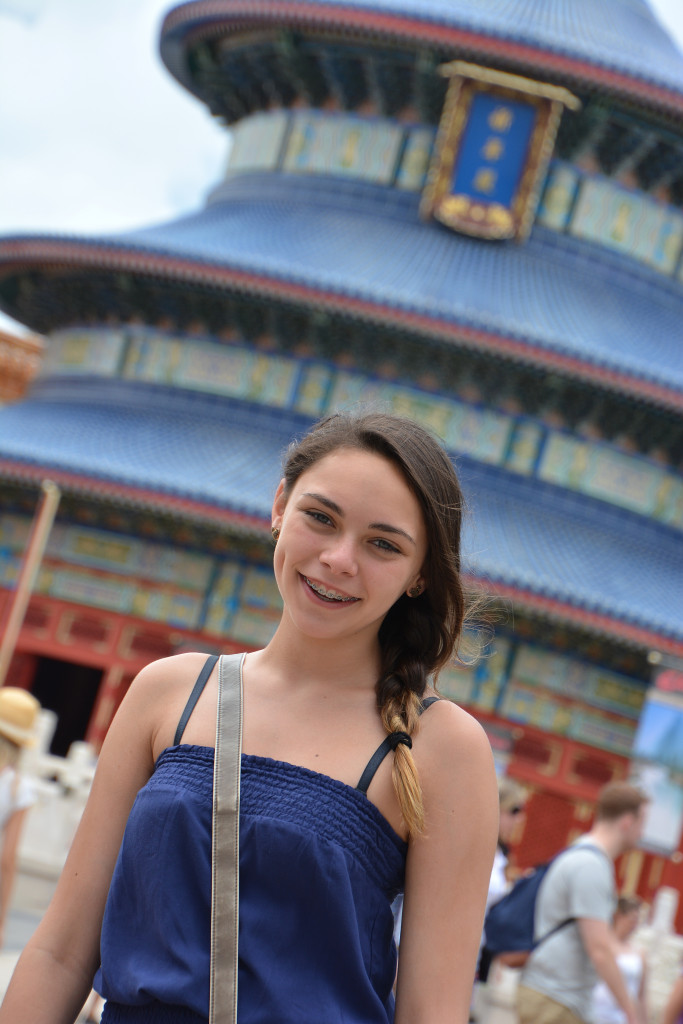
As travelers and vacationers, we want the “we are here” photo memories, but they do not need to be quick cell phone grabs, selfies or images that are just flat documentation of our sojourns. Blurring the background elevates your travel snapshots and is simple to do. Set your camera to aperture-priority mode and choose a wider aperture like F/5 or F/6.3. If you are nervous about using a non-program mode, set your camera to the “portrait” mode, which will automatically set your camera to deliver similar results. The sharp subject pops off of the softer background canvas that still lets the viewer know where we are, but feels more professional in nature. In this case, the girl is framed by the Washington Square Arch in Washington Square Park located within the NYU campus area. The arch is blurred out, but identifiable. And the bonus is that all of the distractive elements in the background are also blurred to put our focus on the subject. Try this technique when posing your child or family in front of an iconic structure on your next vacation.

{38mm, F/5, 1/500th sec., ISO200}

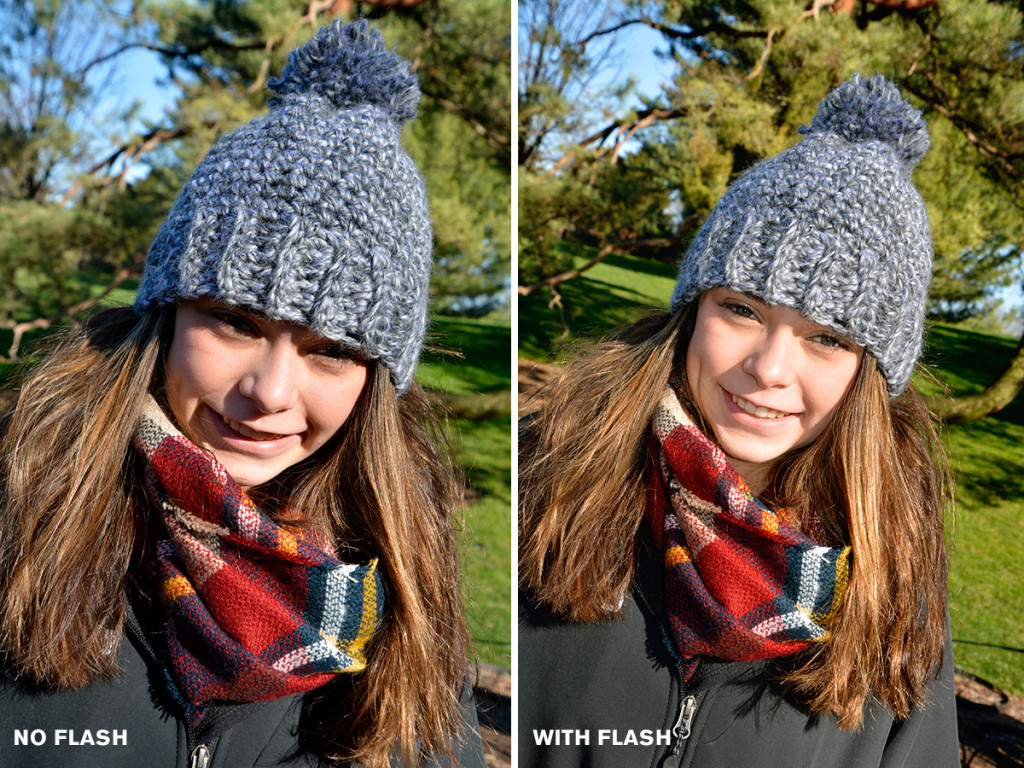
For Better Outdoor Portraits, Add a Little Flash-Even in Winter

Blog Post_2-4-16

In the photo on the left, I did not use a flash. There are harsh shadows all over the girl’s face, to the point where you cannot even see her eyes. By popping up the flash, even outdoors in winter, you can eliminate the harsh shadows on a bright sunny day and capture a much more flattering portrait of your subject. This is called fill flash. I had my camera in regular program (not green box) mode and popped up my flash to get the photo on the right. Now there’s the eyes! And notice how the camera/flash system automatically balances the daylight with the flash to maintain the saturation in the blue sky, brown trees and green grass.

Fall Foliage Background Perfect for Photo Portraits

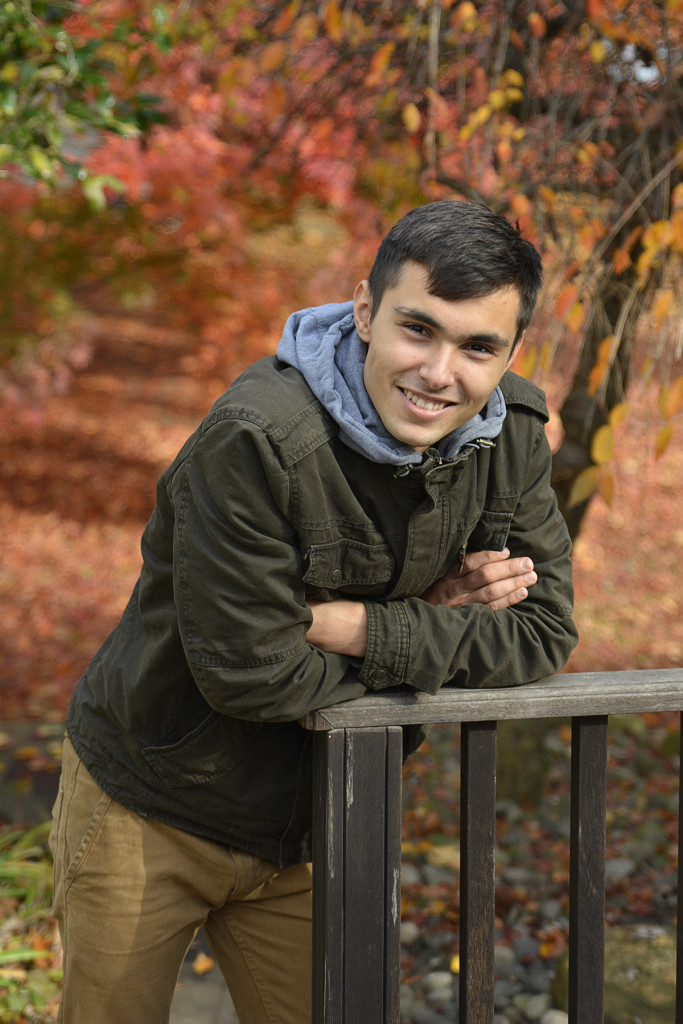
When sunlight hits colorful fall foliage, it makes a stunning backdrop for your impromptu family portraits. The trick to getting the painterly background look that makes the subject pop off the background is to use a wide open aperture. The portrait here was taken at 70mm with an aperture setting of F/2.8. Focusing on the eyes, the background drops out due to the shallow depth of field into a painterly sparkle of fall colors. If your lens does not open to a fast aperture like F/2.8, use your telephoto lens at its maximum zoom, set the camera to aperture priority and choose the widest aperture opening (most likely F/5.6 or F/6.3) and step in a little bit closer. That combination will drop out the background for a similar look that makes a beautiful portrait suitable for framing and display on your mantle. 

Shooting Sample Images to Learn How to Achieve Shallow Depth of Field

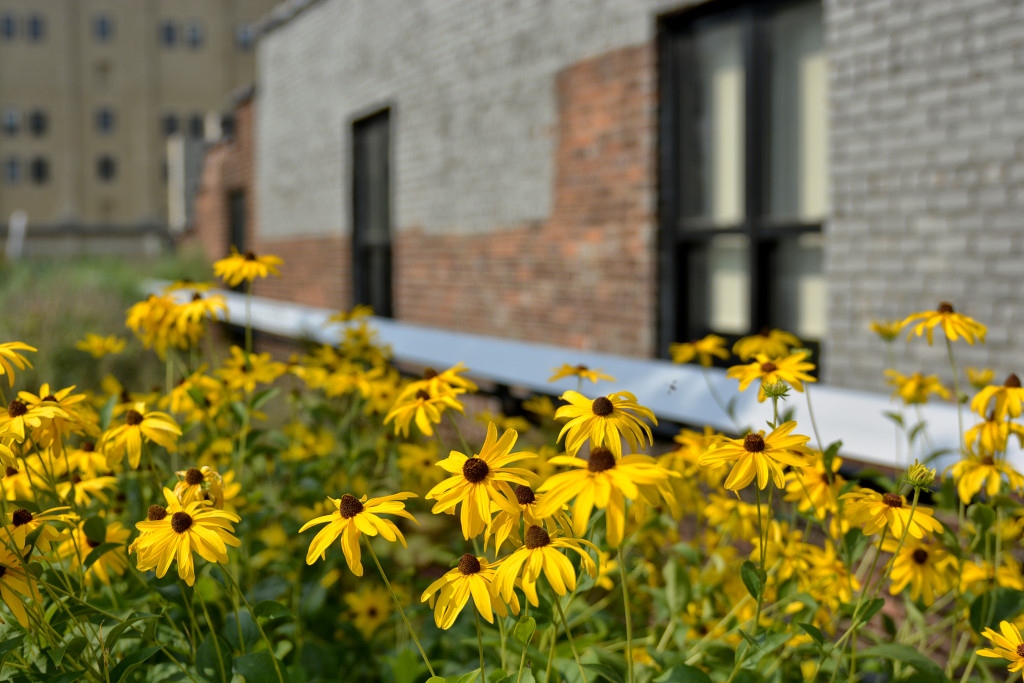
I find that the best way to make aperture-setting selections stick in your mind to be able to achieve a desired effect is to shoot sample images at two aperture extremes. Start by putting your camera into the aperture-priority mode (A on Nikon cameras; AV in Canon cameras). Then set your aperture to the widest setting (like F/2.8, F/3.5, etc.) and take a photo. This will be your sample A (see my sample below). Then move your aperture to its smallest setting (like F/22, F/32). This is your sample B. Then study the difference between the shots.

{Sample A} Wide Open Aperture (F/2.8 – 1/1000th sec shutter speed – 34mm)

{Sample B} Smallest Aperture (F/22 – 1/125th sec shutter speed – 34mm)

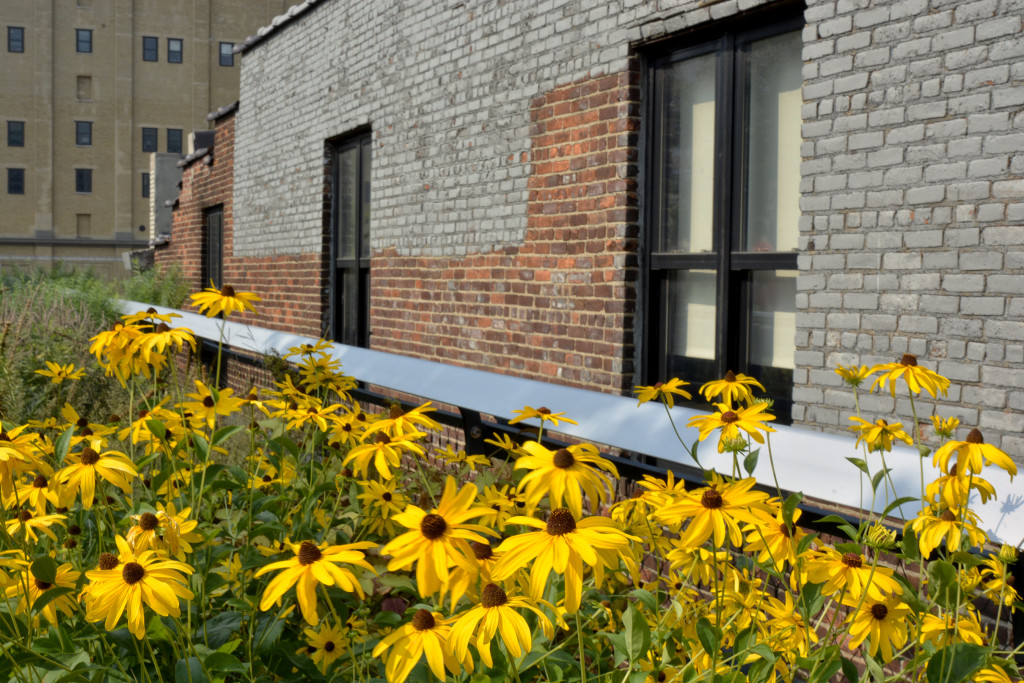
Now, to make things confusing, your results will vary depending on your widest aperture setting, focal length setting and how close you are to the subject. In my sample shots above, I was very close to the flowers I focused on and my aperture was F/2.8 in the first, so the brick building in the background is out of focus perhaps more so or less so than your sample shots may show.

If you keep making samples for yourself like this, eventually it will become second nature when you are shooting to select the appropriate aperture to get the photo you have in mind (with out of focus background or sharp background).

Typically you will want to blur the background a little for portraits for a more professional look; or if the background is very distracting; or if you want the viewers of your photos to be drawn to so a very specific part of the shot.

Photographers will use a smaller aperture to get the foreground to background in focus for landscapes, and sometimes for shots that tell a story of where you are. For example, you may want a store name to be in sharp focus so that it is legible. Or you may want the details of a landmark to be in sharp focus as well as your family standing in front of it.

However, sometimes landmarks, such as the Disney Castle, are so recognizable, that having the castle slightly out of focus works really well to give you a “here we are” shot that is elevated to a more professional looking image. Below is a sample from Epcot’s China Pavilion.

A slightly wider open aperture.


One Location. Two Entirely Different Photos.

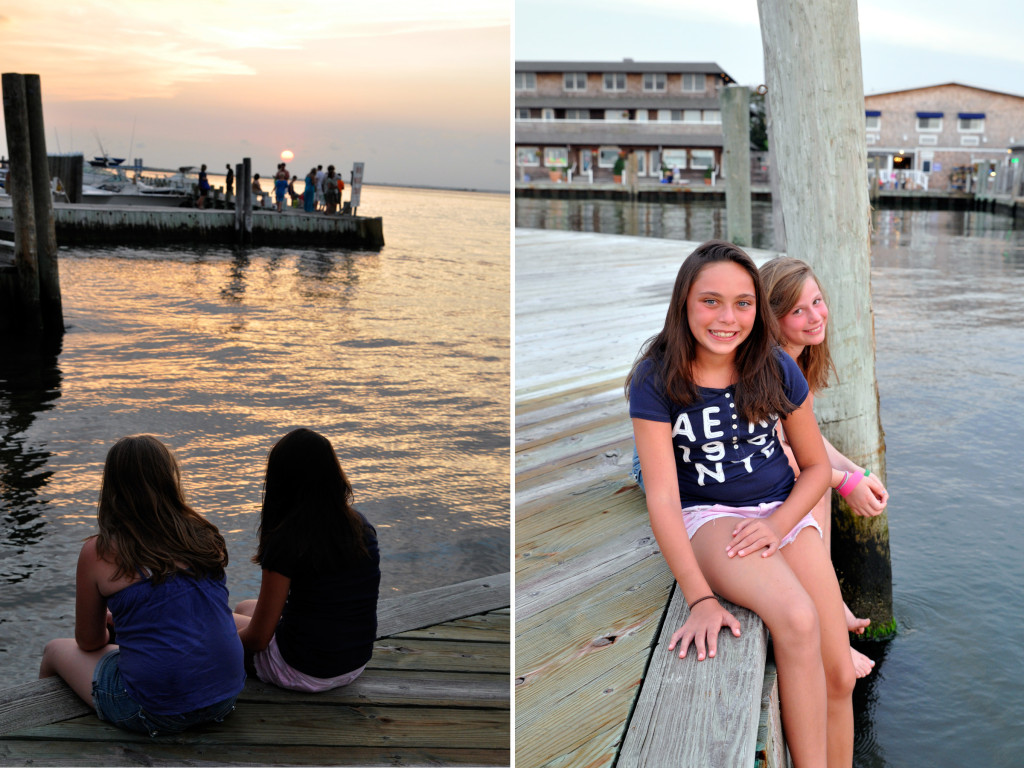
Change your position_compSometimes we take the shot we had in mind and call it a day. But when the light is so beautiful at sunset, it pays to take a few steps around just to check out how the sun is lighting your subject. The photo on the left was the one I was after: two girls watching the sunset, captured in near silhouette as the center-weighted meter gave an exposure for the bright setting sun and made most of the other parts of the shot go dark. Just what I wanted. But then I sat down next to the girls to watch the sunset with them, and wow, was the light across their faces gorgeous. So of course I snapped away while the sun set! Because the light was low, I boosted my ISO to 640 and got a shutter speed of 1/100th sec at F/5.0 aperture. If I had unlimited cooperation from my two subjects, I would have boosted the ISO to 1000 and shot more photos at F/8 so that the girl further back would be in sharper focus. When shooting more than one person, either try to get them on the same plane of focus, or deepen your depth of field by using a smaller aperture like F/8. Not always possible, as was the case here, but the sweet expressions and the light make the shot a perfect one for me.

For Great Candid Photos, Keep Your Distance

Keep Your Distance

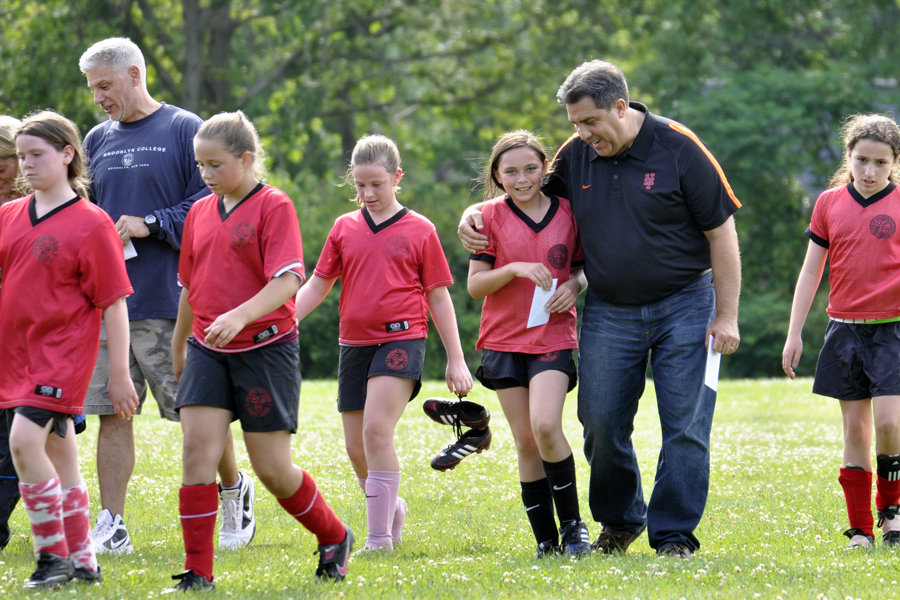
As all of the school year activities wind down, and some fun summer times begin, take a step back from it all and zoom in on the moments with your telephoto zoom lens. Not only will you get some more natural expressions, but your subjects will really stand out from the background with your tele lens setting. At the end of the last soccer game of the season, I remained at the side lines while the coaches gave encouragement and praise to their players and zoomed in. I caught a very natural expression on both coach and player. Additionally, while outdoors this summer, pay attention to where the sun is. Try to shoot later in the day when the sun is not so harsh. And look where the sun is hitting your subjects. Here, the sun is lower in the sky and behind the team, which adds a nice rim light to their hair and shoulders. In this lighting situation, set your camera to spot meter, as I did here, to be sure the camera gives the proper exposure for your subjects, and does not “put on sunglasses” because of the bright light behind and make your subjects darker than desired. Look for the metering button on your camera and turn it to spot. When you look through your viewfinder, you will see a the smallest of circles in the center of the frame (see below). Be sure this circle is on your subject, press and hold your shutter release button half way to lock in both focus and exposure, adjust your composition if necessary, and then take the shot by pressing the button the rest of the way.