Getting Bright White Snow-Day Photos

A common problem when taking photos in the snow is that they come out a little grey and dreary. This is because the camera sees such brightness that it tries to compensate almost as if putting on sunglasses; and the white balance tries to make white a neutral grey. One way to fix this is with exposure compensation which adds light to the scene.

By adding exposure to the scene, you force the camera to overexpose just a bit. I usually start with +0.7 in snow and then either go up to +1.0 or down to +0.3.

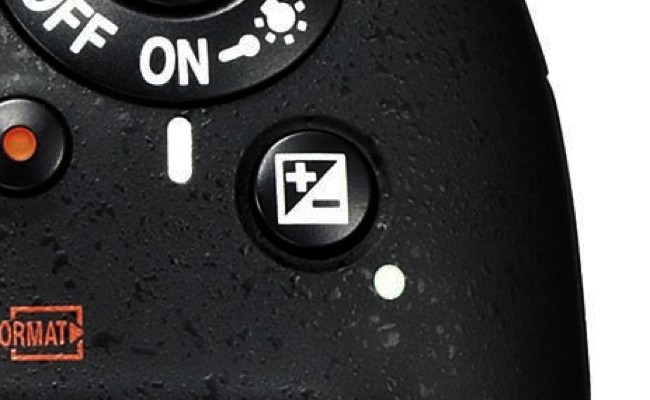
The exposure compensation dial on your DSLR or mirrorless camera can be used in any mode except “green box” program. It is usually found on top of the camera and shows +/-. Simply hold it down and move the thumb wheel left or right to add (+) or subtract (-) light. On your iPhone, touch the screen on the subject’s face and slide the sun icon up a bit to add light to make the shot a less grey. BTW, this tip also works at the beach.

In photoshop, I may brighten the image by about 10-20%. Another trick to ensure white is white in photoshop is to use image>adjustment>levels. Then select the eye-dropper on the right (white) and click on something in your image that should be 100% white. This is a great way to correct images where the color isn’t just right and I find it really helps with skin tones.

Another way to get brighter winter portraits is to use flash. I will cover this next week. Enjoy the snow days of February and March!


Whenever There’s Good Light, Seize the Moment

You’ll find I use window light quite a lot to take posed and candid portraits of my friends and family. I find window light is easier to manage for me than flash. And it’s very easy to find. I am sure you have a favorite spot in your house that gets nice light during certain times of the day without being too harsh, or that is filtered by a white gauzy curtain.

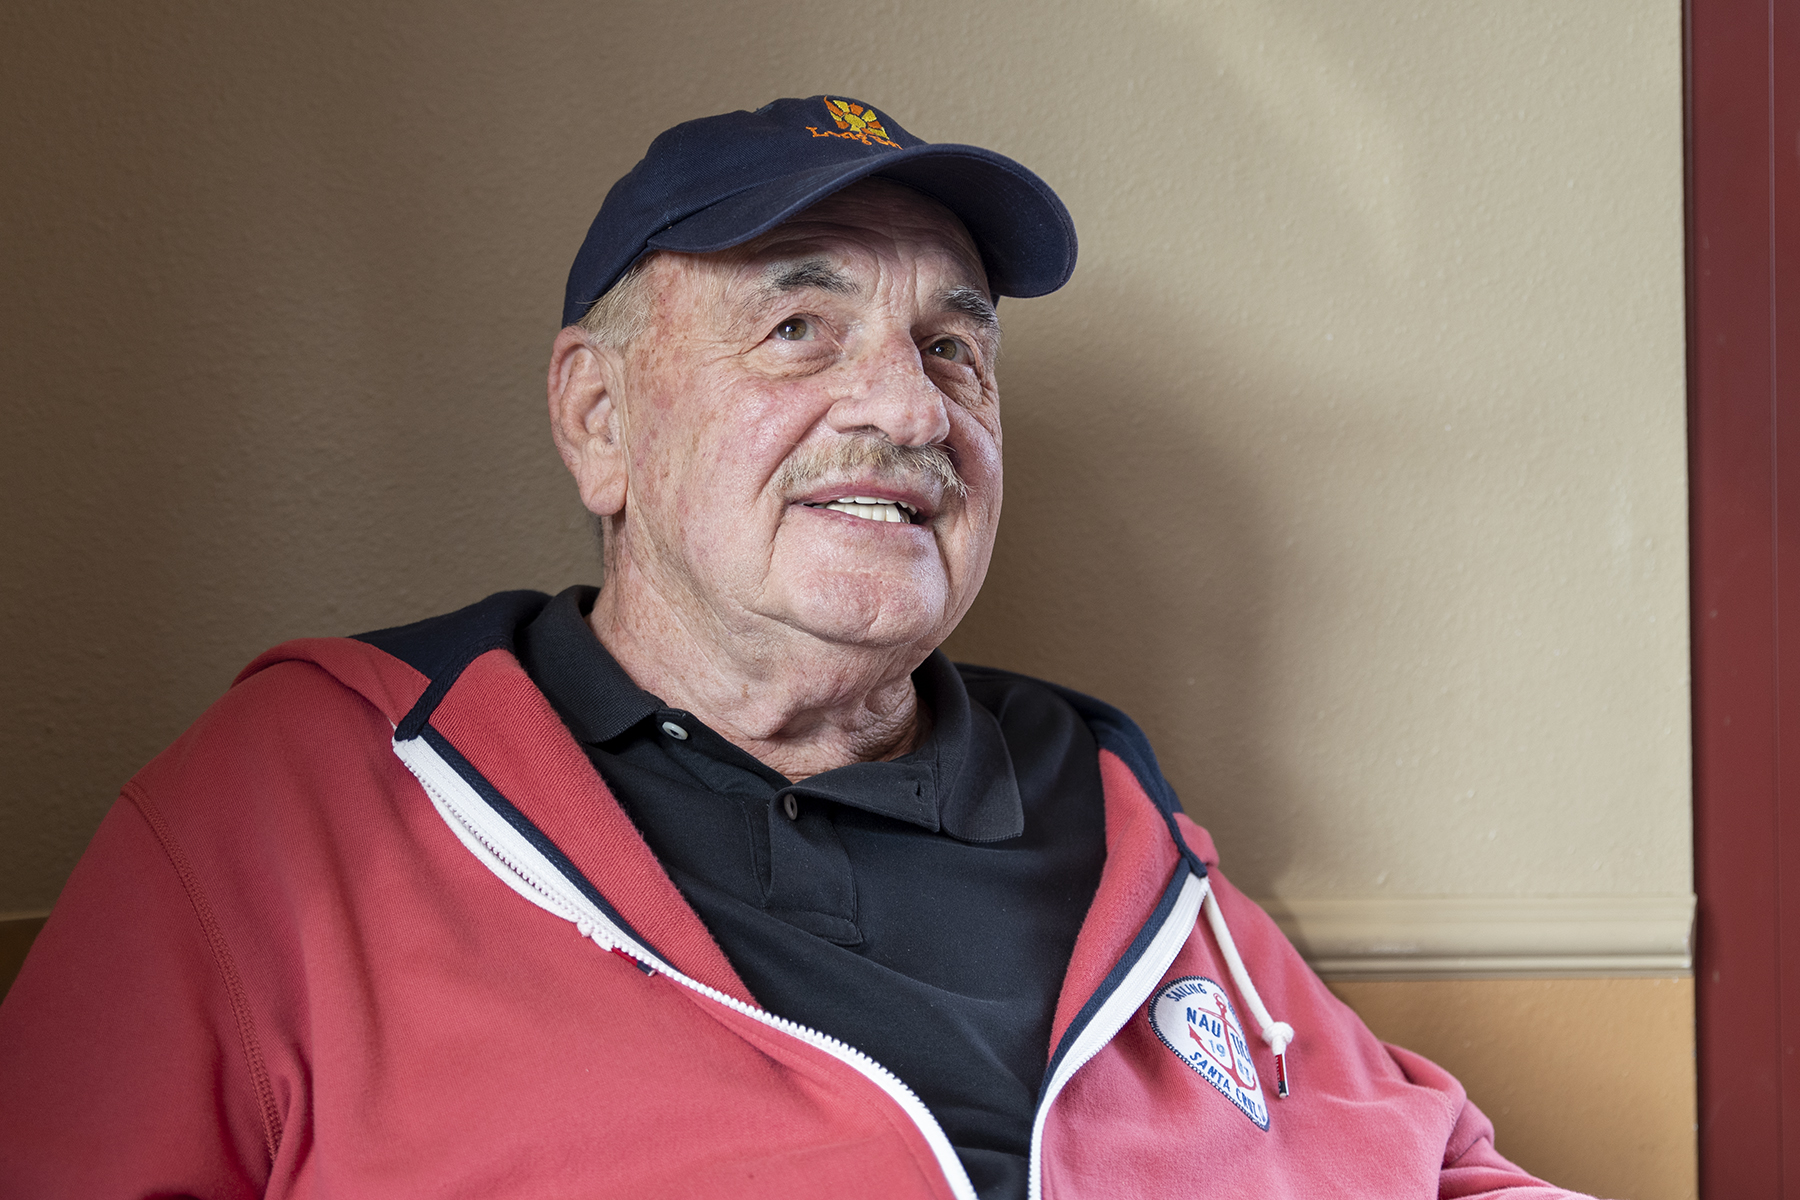
I was with my father in a coffee shop when I noticed the window at my left shoulder and the window at his left should were both wrapping a very even, natural light around him and made his navy cap and reddish sweatshirt pop. So I took several shots (see two more below), but really liked the natural easy expression here as he watched my sister with my niece interacting. For me, the soft shadows make the setting feel very real and comfortable.

When using window light, you may find you need to increase your ISO to 400 or 800, depending on just how bright the light is. You can shoot in program (not green box mode which may make your ISO too high for a pleasing portrait), or in aperture priority mode like I selected here. I shot wide open at f/2.8, 400 ISO, and my shutter speed then defaulted to an easy to hand-hold 125th sec.

Here are a few posts that also discuss window light:

Take in the Scene with a Slower Shutter Speed

Window Light Portraits

Lighting Diagrams for Window Light Photos

Fall Foliage Background Perfect for Photo Portraits

When sunlight hits colorful fall foliage, it makes a stunning backdrop for your impromptu family portraits. The trick to getting the painterly background look that makes the subject pop off the background is to use a wide open aperture. The portrait here was taken at 70mm with an aperture setting of F/2.8. Focusing on the eyes, the background drops out due to the shallow depth of field into a painterly sparkle of fall colors. If your lens does not open to a fast aperture like F/2.8, use your telephoto lens at its maximum zoom, set the camera to aperture priority and choose the widest aperture opening (most likely F/5.6 or F/6.3) and step in a little bit closer. That combination will drop out the background for a similar look that makes a beautiful portrait suitable for framing and display on your mantle. 

For Great Candid Photos, Keep Your Distance

Keep Your Distance

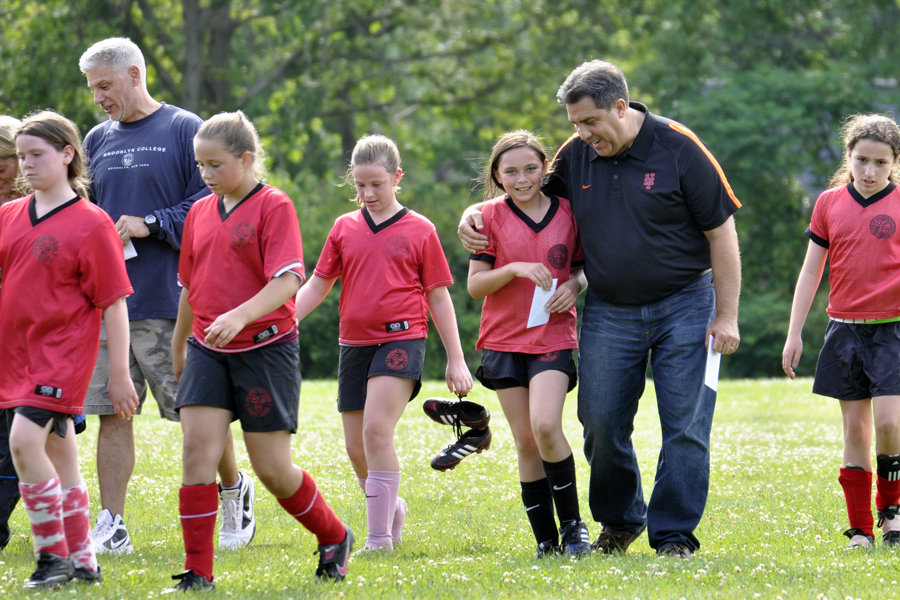
As all of the school year activities wind down, and some fun summer times begin, take a step back from it all and zoom in on the moments with your telephoto zoom lens. Not only will you get some more natural expressions, but your subjects will really stand out from the background with your tele lens setting. At the end of the last soccer game of the season, I remained at the side lines while the coaches gave encouragement and praise to their players and zoomed in. I caught a very natural expression on both coach and player. Additionally, while outdoors this summer, pay attention to where the sun is. Try to shoot later in the day when the sun is not so harsh. And look where the sun is hitting your subjects. Here, the sun is lower in the sky and behind the team, which adds a nice rim light to their hair and shoulders. In this lighting situation, set your camera to spot meter, as I did here, to be sure the camera gives the proper exposure for your subjects, and does not “put on sunglasses” because of the bright light behind and make your subjects darker than desired. Look for the metering button on your camera and turn it to spot. When you look through your viewfinder, you will see a the smallest of circles in the center of the frame (see below). Be sure this circle is on your subject, press and hold your shutter release button half way to lock in both focus and exposure, adjust your composition if necessary, and then take the shot by pressing the button the rest of the way.

Take in the Scene with a Slower Shutter Speed

_DSC1573_RT

It’s very hard to catch him smiling naturally. So, as I did in this restaurant during lunch, I often snap a few photos in a row hoping for that “in-between” moment when he’s more relaxed. I think I got it here! This photo has a nice natural background since I used only the light from the window my subject was facing for lighting, rather than using my flash. And since my ISO was set to 400, my shutter speed was a slower 1/50th of a second (I turned on the anti-shake on the lens to eliminate any blur that might have occurred from hand-shake). That slower shutter speed allows the shutter to remain open long enough to capture the ambient light in the background, also lit by the large bright windows. The result is a nice shot that shows the whole scene. So when indoors, ask for a seat near a window and capture the ambiance of the whole scene.

"My Photo Are Too Dark" — Solutions for Common Problems: Part 2

_DSC8231_RT

In my last post (so long ago, I apologize but summer seemed to have gotten in the way), I covered easy solutions for blurry photos. The next most common problem is dark photos (i.e., under-exposed). While the most logical answer is there just is not enough light, there are other reasons for dark photos.

Problem: You are using the flash but the subject is still dark. Reason: The subject is too far away. The built-in flash on your camera can safely cover a distance of about 10 feet or so. If your subject is well beyond that, chances are it cannot be lit by your flash. Solution: The answer in this case would be to move a little closer. (You can also try raising your ISO to give your flash some more distance coverage).

Problem: The background is really bright and the camera’s meter is fooled. This is called a “back-lit” situation. The meters in today’s cameras are excellent, and you have the choice of several metering patterns to help you achieve your desired result. However, there are still situations like back-lit where you camera’s meter is fooled and gives you the wrong exposure for your subject. When the background is overly bright, the camera “puts on a pair of sunglasses” by closing the aperture down a little to let in less light, resulting in a nicely exposed background and a darker subject.

Examples of back lit situations:

  • in front of a picture window
  • at the beach or pool
  • on snow
  • when shooting from below up against a bright sky, etc.
  • under an overhang (like a stadium with field in the background)
  • The sun is behind your subject

Solution: 1 My favorite option is to use the + exposure compensation (covered here and here). This +/- button usually positioned near your thumb is one of my often used adjustments since you can quickly darken or lighten a subject. By adding (+) .3 to 1 full stop of light by dialing towards the plus side (see your instruction manual to see just how your camera works), you can trick your camera into removing the sunglasses and get a perfect exposure on your subject. By bracketing (taking several shots at several different exposure compensation settings) you are sure to get the proper exposure.

Solution 2: A second solution is to pop up the flash and fill in the subject.

Solution 3: Another way to get a good exposure in a precise area is to switch the camera’s metering pattern to spot metering. Most of the time, you are most likely shooting in the camera’s matrix mode that reads several areas of the image and gives you an exposure based on a lot of data built into the camera. This pattern works well much of the time. But the camera also has a center metering pattern where a smaller area is read and the exposure is based on that area. And even smaller sliver of the image can be measured by suing the spot metering mode (the rectangle with a small dot in the middle is the symbol for this pattern). Make sure the dot lays over the area of your subject you want properly exposed and then take the shot. If you need to recompose your image after taking the reading (dot on subject), then hold in the AE lock button located near the +/- button until you have finished taking the photo. Breaking out your camera’s instruction manual will give you the exact steps to set spot metering and to use AE lock.

In my example above (a perfect shot to end the summer), the child’s face my have been under-exposed, or dark, due to the brightness of the sky, surf and sand. But by adding 2/3-stop of light using the +/- feature, I was able to get a great exposure on her cute face.

Don’t Let Bright Sun Ruin a Candid Portrait- Move into the Open Shade

Open_shade_sun_comparison
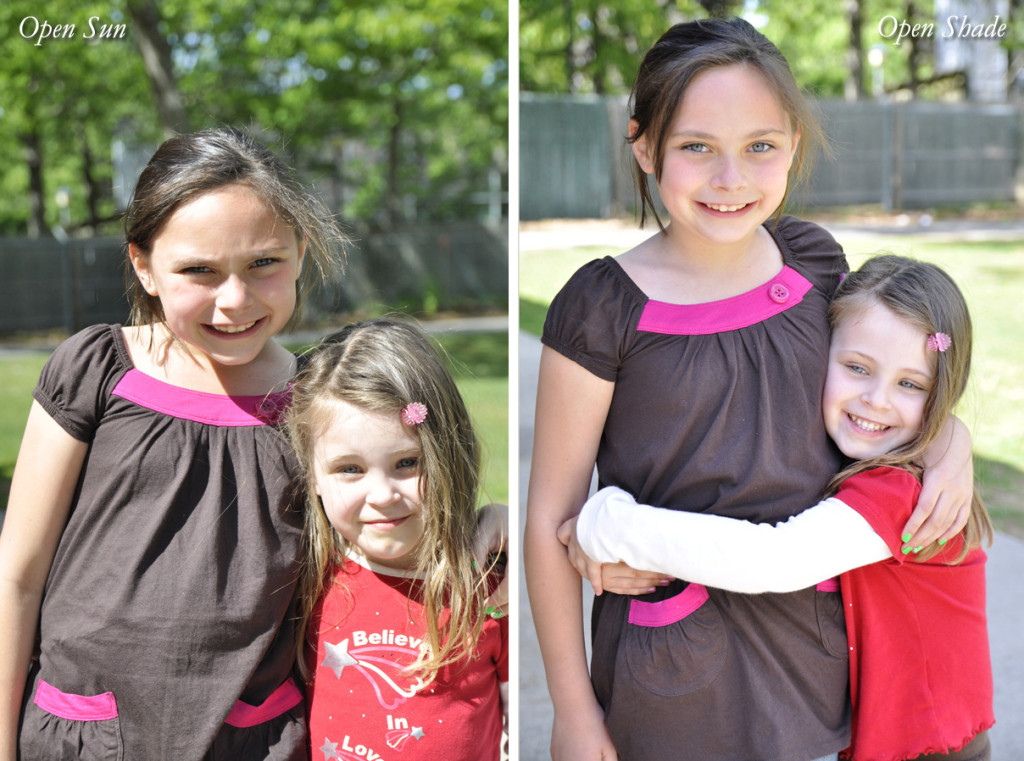
We are not nocturnal by nature, so our photo-taking time is usually during the day. And now that it is almost summer, there will be plenty of bright sunny days on which you want to take photos of vacationing kids and visiting guests. So what do we need to do to get a decent outdoor portrait? The simplest solution is to look for open shade. Open shade is the step you take back from the sunny to the shady. It can be just under a tree. Or a step inside a door frame or porch. Or a tent or any overhang. The open shade eliminates all of the contrasty shadows that appear on the face and clothing of a subject standing in the sun. Look at the side by side comparison, especially the eyes and the shirt of the girl on the left. (Pls ignore the color as I did not reset my white balance from sunny to shade and consequently have some funky color going on; pls be sure to set the WB to auto or shady). Below is a shot that shows you the line between a good and poor candid portrait. The girls were first on the sunny side of the line, and then took a step back into the shade. I love how the light catches in their eyes when you shoot in open shade. For more on open shade, see this post too.
shadow line

Take a Candid Holiday Portrait by Window Light, and Add a Prop!

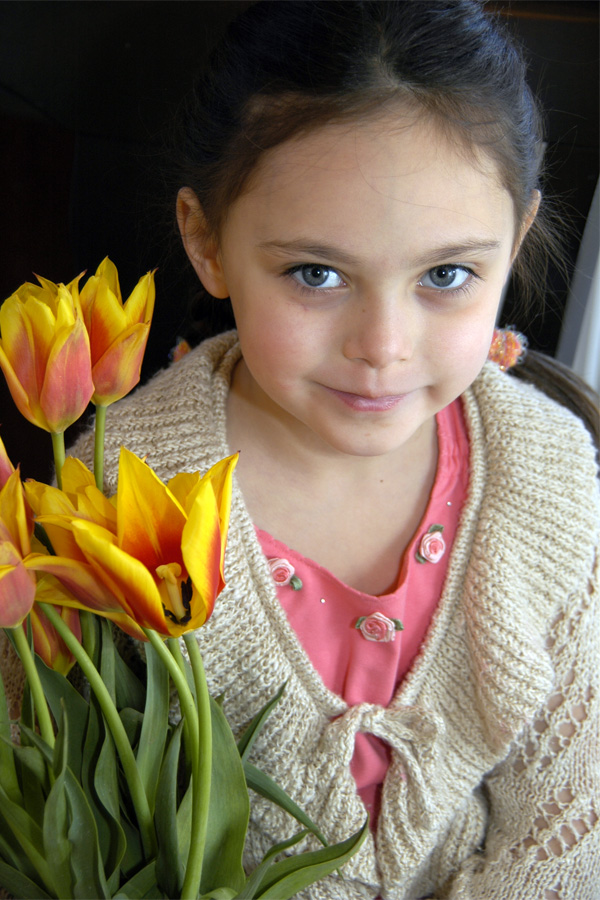
easter_portrait_1The window is your best photo accessory for portraits. It’s so easy to use, always there, you don’t need an assistant to hold anything, and you don’t have to pull out your auxiliary flash. I just love the light that streams through my windows in several rooms. Positioning your subject very close to the window, like in the shot at left from early Easter mornning, can give you a nice dramatic light since the light falls off the opposite side of the face quickly and the eyes have a nice sparkle from the window catchlights. To get more of an even light, move your subject just a further away from the window (as in the first photo below- the subject was across the room from the window), or, face your subject perpendicular to the window instead of parallel. In this case, you can actually stand right in front of the window with your subject in turn in front of you and you will not block the light! See this post here for an example of this type of positioning. You can also “fill in” the other side of the face with a pop of the flash as you can see in the second photo below. If you find there is still a slight “artificial” feeling, you can adjust how much light the flash puts out by adjusting the flash +/- button usually found near the flash. Hold the button in and dial it towards the minus side. Perhaps -.7 or -1.0. Review the flash section in your camera manual to see exactly how to set this on your camera. And don’t foget to add a prop that gives your portrait a sense of time. In my case, the tulips scream spring and the eggs of course will remind me this was Easter time when we look back at these photos years from now. (Watch for a forthcoming download card with lighting diagrams for window light positioning).
easter_portrait_3

Bring a Symbol of the Holiday Into Focus

_DSC6274_RT

I have made this same picture over and over and I still love it. Birthday cupcakes with lit candle, a number of fingers held up to signify a birthday year, a lottery ticket, a dyed Easter egg, and more. This time it’s the four leaf clover my subject plucked from a pot in the yard (look closely since at first glance it looks like three, but it is four). I was actually taking pictures of her cute Valentine’s outfit when she found the clover and held it out to me to inspect. The resulting image is really cute and the clover pops out not only because my aperture was set wide open at F/2.8 and I focused on the clover (thus blurring the background), but also because of the contrast of the green against the red and white of her clothing. So whether it’s your child’s favorite stuffed animal, a perfect test score, or a special holiday object, this effect is a great way to bring focus to the event or milestone while still keeping the subject’s face present in your photos.

Take a Portrait With Shallow Depth of Field

earring_F6_150

This is a repeat, but one that needs repeating since I think we all want to achieve great portrait shots— even when it’s just a quick candid shot we’re grabbing before the cake is served or before the kids are leaving for school. And using shallow depth of field is a key to great portraits (along with expression, lighting, angle). Shallow depth of field, when the parts of the image in front of and behind the subject are out of focus, makes your subject pop off the image. The example here (a repost from the summer), for instance, shows the eye and smile in sharp focus, yet the tip of the nose, ear and hair are out of focus. Another advantage of shallow depth of field is that you can eliminate distracting backgrounds like indoor clutter, foliage, cars on the street, etc., It makes the background less defined with soft colors.

To get shallow depth of field, the key is to set your camera to the “A” mode: Aperture-Priority. You can leave your ISO setting at 200 or 400 (or higher if the lighting conditions are low) and leave your camera in autofocus. You will then use your thumb-wheel to dial in the smallest number you can, like F/2.8, F/3.5, F/5.6. Focus on the eyes of your subject, or the eye that is closest to the camera. Depending on how close you are to your subject and what lens you are using (telephoto lenses and closer proximity make the effect even more apparent), you will notice that the background is just soft to almost unrecognizable. If you want the photo to have some context of where you are (like cooking in the kitchen), then maybe F/5.6 is a better choice. But if you want the crowd in the background to go really soft, “open the lens wider” to F/3.5 or F/2.8 if you can.Please review the aperture download card here.