Freeze the Action in Your Summer Water Shots

RT_DSC8372

During the summer, we find ourselves in or near water a good part of the time. It’s always fun to capture the moment and freeze every water droplet, too. When trying to freeze motion, you need a fast shutter speed. Usually 1/1000th sec or higher will guarantee crisp sharp water droplets as well as a sharp fast-moving subject like this wake-boarder. Here, I used a tele zoom positioned at 95mm off the back of a boat. I also used a higher ISO of 400, even though the sun was shining brightly, to ensure I could get a very fast shutter speed. The exposure setting for this shot was F/9 aperture at 1/1250th sec shutter speed. You can set your camera to the action icon and the camera will take over all settings to give you the fastest shutter speed possible for your lighting situation. Or you can set your camera to “A” for aperture-priority and adjust your aperture until you see a desirable shutter speed when you look through your viewfinder at the settings along the bottom or when you look on your LCD panel on your camera. Next time the kids are splashing around at the pool or under a sprinkler, or you’re capturing tubing or wake boarding from a boat, set your camera to the fastest shutter speed you can to freeze the action. (Note: This will be the same setting you will use to freeze any sports motion).RT_DSC8263

Take a Stop Action Photo

DSC_3800_RT

Freezing a droplet of water or a smiling face zipping past you on a bike both require using a fast shutter speed and usually a higher ISO setting. I prefer to set my camera on aperture priority in order to prevent under-exposing my shot. In this shooting mode, using a wide open aperture like F/2.8, F/3.5 or F/5.6 will let a lot of light into the camera, and the camera will then automatically choose the fastest shutter speed it can—given the ISO setting and your lighting conditions. If it is a bright day, the shutter speed will be higher in this mode when using a wide aperture. And the higher you set your ISO, the higher the resulting shutter speed will be. So start with your camera in the “A” or “AV” mode, set the aperture to a wide open setting, and set your ISO at 400. Look thru the camera and see what shutter speed your camera says it will use. If it is slower than 1/500th of a second, then boost your ISO to 800, or 1000. Keep in mind that if your subject is moving very fast, you may need a very high shutter speed, like 1/1000th or 1/1250th in order to freeze the motion. To refresh your memory about aperture priority, take a look at the aperture download card posted here. Take a break from raking leaves, grab the camera and take a few shots of autumn fun. Or, if it is already snowing in your part of the country, take some creative snowball fight shots. Use a fast shutter speed to capture sports action, falling confetti, sprinkler water and more.

Sideline Shooting

SOCCER_2
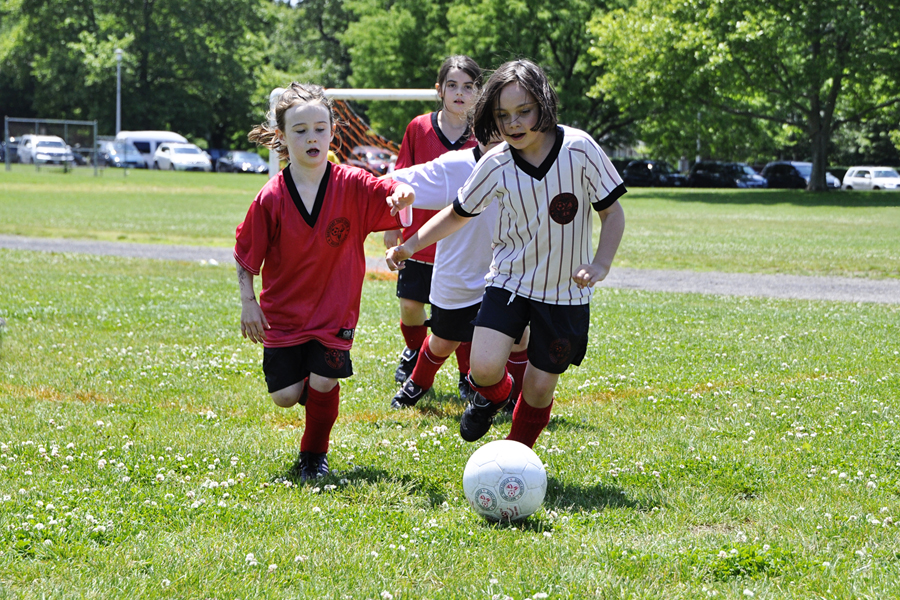
Today was her last game of the season (they tied 1-1). And today was the first time I shot a game this season. Shooting any sport from the sidelines can be challenging. But I’ve found a few of the following tips to be useful. First, make sure your camera is set to aperture priority and select the widest aperture you can with your lens. This way, your camera will always choose the fastest shutter speed for you. Plus, you’ll bring the focus on your subject since the background will then blur out a little.

SOCCER_1

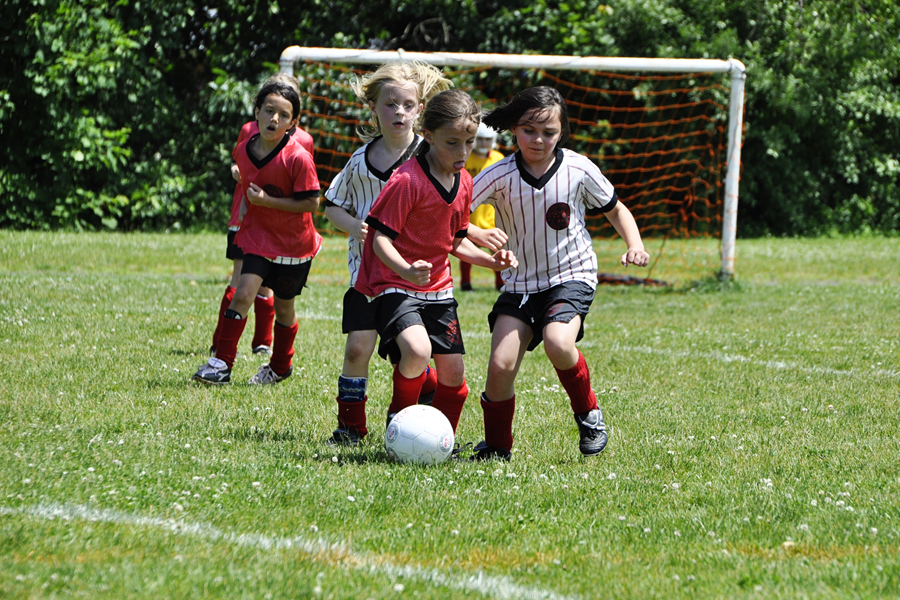
Set your ISO a little higher (400 or 800 if sunny; 1000 if overcast) to ensure faster shutter speeds to stop the action. (If you have a point and shoot camera, try setting the camera on the sports mode). Next, put your camera on both the continuous auto focus and continuous shooting mode. If you have to lift your finger after each shot to take the next, you’re guaranteed to miss something. If you’ve ever had the opportunity to watch a pro shoot, you’ll remember that their finger stays on the shutter release until the ball is out of play! You almost feel as if you’re watching a video when you review their thousands of shots. For sure, knowing the game is a big help since you can anticipate where the action will be. But, if you’re sports-challenged like me, then following the ball through your viewfinder will naturally keep you where the action is and then start pressing the shutter as soon as your child enters the frame. You may also choose to follow your child, but then you sort of miss the game. Another good tip is to not stay in one place. If your child plays on the same side as where you are seated (left wing, e.g.), you may wind up shooting a lot of his or her back. If you venture to the opposing side, on your team’s goal end, you may have a better chance at getting a shot of them facing you rather than the back of their jersey. And of course, your positioning may need to change throughout the game, so be prepared to walk/run the field on a day you plan to take lots of photos. Crouch down once in a while to get a different perspective, and zoom in on details like cleats and balls to make a full story for your album, photo book, scrapbook or digital frame. And last but truly not least, make sure you have a lens that can zoom over a wide range so you can get in close when the action is far down the field (a lens that goes up to around 300mm on a digital SLR is ideal) and you can capture it all as the action gets close to the sidelines by zooming out to a wide angle setting. Additionally, while you still may want to crop in a little closer later on, the closer you are to start, the better quality your cropped photo will be in the end. (ISO 400; 232mm; 1/1250 sec; F/6.3)