End of Summer Photo Lesson: Shooting in Open Shade

_DSC4032_RT

When the sun is really harsh, you can still get wonderful portraits by placing your subjects just inside a shady area. This might be just under an umbrella (like my example of these gorgeous siblings), inside a garage door, inside your house door, under the slide at the park, under the light of the first tree, etc. The key is to not position your subject too deep into the shade. You want all of the light that is just behind you to spill softly onto your subjects. This will give even lighting across the face(s) as well as great light in the eyes. (65mm -cropped; F/5.6; ISO 400).

BONUS Lesson: This second photo was also taken in the open shade of a small umbrella on a very bright beach. Here you can actually see just how close they are positioned to the edge of the shade. But I am throwing this in to illustrate leading lines. Your eye naturally goes to the boy first and follows down the line to the sitting girl, but notice how the lines of the table push your eye right back up again. This is a great way to keep your viewer engaged within the image.(55mm; F/5.6; ISO 400)_DSC4035_RT

Photographing the Windmills in LaMancha

DSC_2812

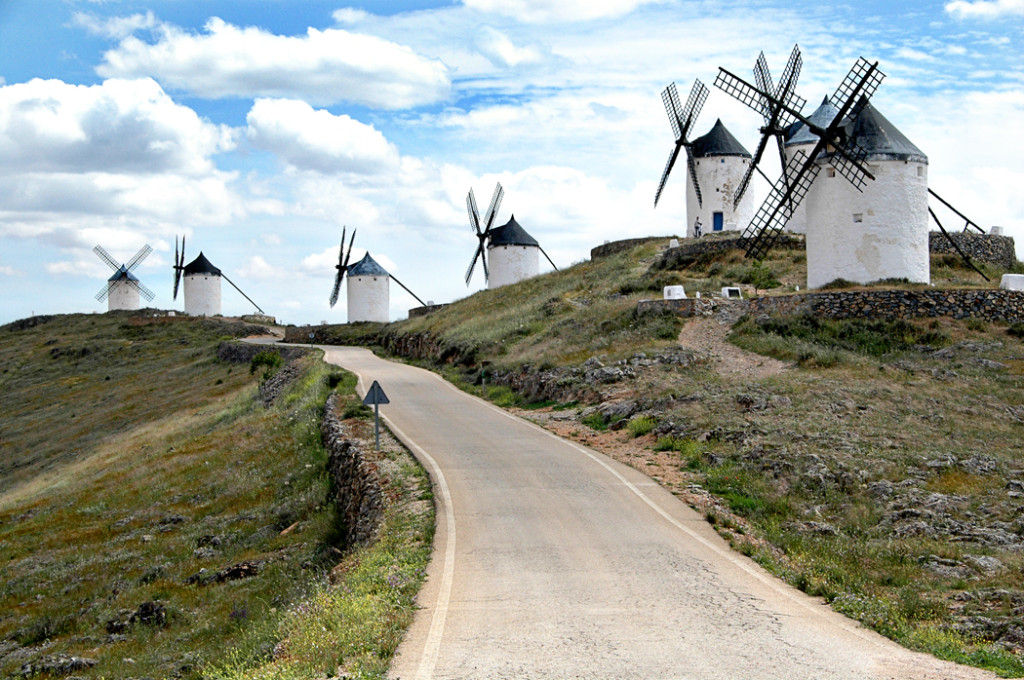
I travel a lot for work and get to sightsee for one day on many of these trips. While I am sometimes sad I am seeing the world without my family (I’ve created a scrapbook page called My Travels Without You), I am grateful for the chance to experience other cultures, food, history and more. Last year I went to Madrid. It’s a year already! I leave for this year’s trip to Malta next week. We visited the sight were Don Quixote “battled” windmills. This shot was one of many from different angles as we walked around the property. It’s one of the few that did not have other tourists in the background, a frequent issue when shooting on vacation. The best tip for that problem is patience! But I post this one for three reasons:

1) I am sure you are sick of seeing so many photos of my built-in model;

2) It’s a good example of the rule of thirds;

3) It’s also an example of leading lines. When taking photos, imagine that there is a tic tac toe board on your screen. Put the main interest of your subject (like eyes, or head, or Disney Castle) at one of the intersecting points, or in the upper or lower third, or the right or left third. This makes a more exciting photo than when the subject is smack in the middle. So always try to offset in some way. But remember, rules are made to be broken and sometimes the middle is the best way for a particular shot, especially if you are trying to create exact symmetry in your image. In this shot, the horizon and the windmills are positioned from middle to the upper third of the image. And the road is a good example of a leading line that guides your eye right to the first windmill and then the windmills themselves guide you right through the rest of the shot.

Look for shots from Malta next week.

Communion Portrait

COMMUNION PORTRAIT

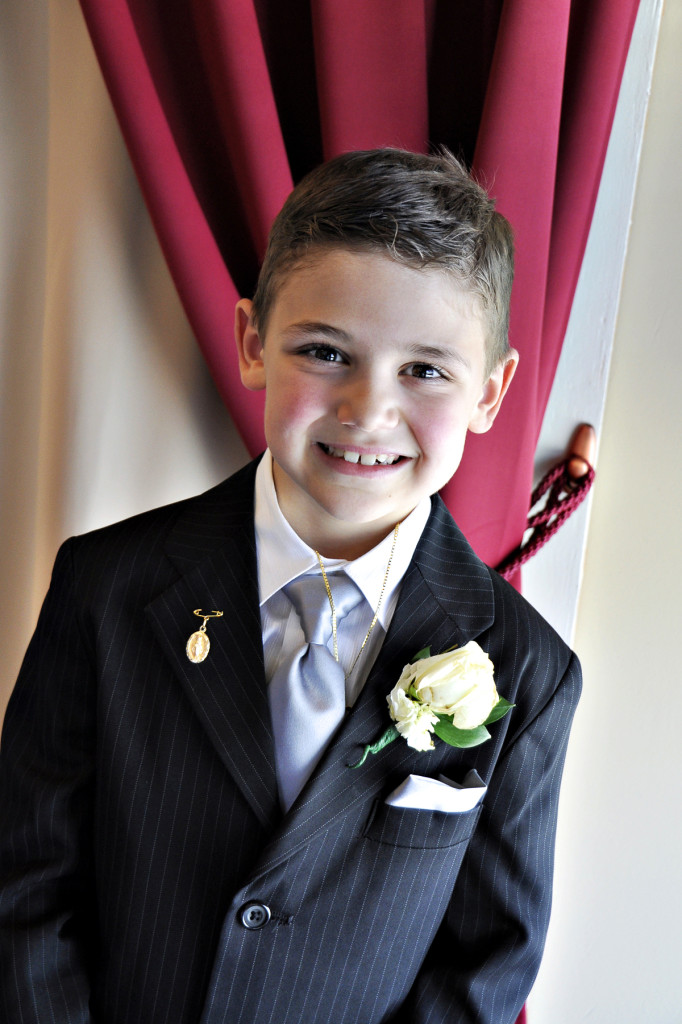
I love window light. In the Italian restaurant where we celebrated this boy’s first holy communion, a bank of windows with translucent shades was near the kids table. I asked him to take a minute and stand near the windows, using the wall treatments as a colorful and classic background that leads your eyes right to the subject’s face. I set the camera to aperture priority and dialed in the widest aperture opening I could (F/4.2). The ISO was set at 400. And since the light was low, I turned on the anti-stabilizer on the lens and was able to get a sharp image at 1/30th of a second (gotta love that VC!). The natural light really lets you see the details in his dapper suit and his beautiful rose corsage. And his dark eyes sparkle from the window light. It took more than a few shots to get a natural smile, and I did it by asking him to close his eyes real tight and then open them. He giggled after making a goofy face and I was able to catch a pretty natural smile.