Getting Bright White Snow-Day Photos

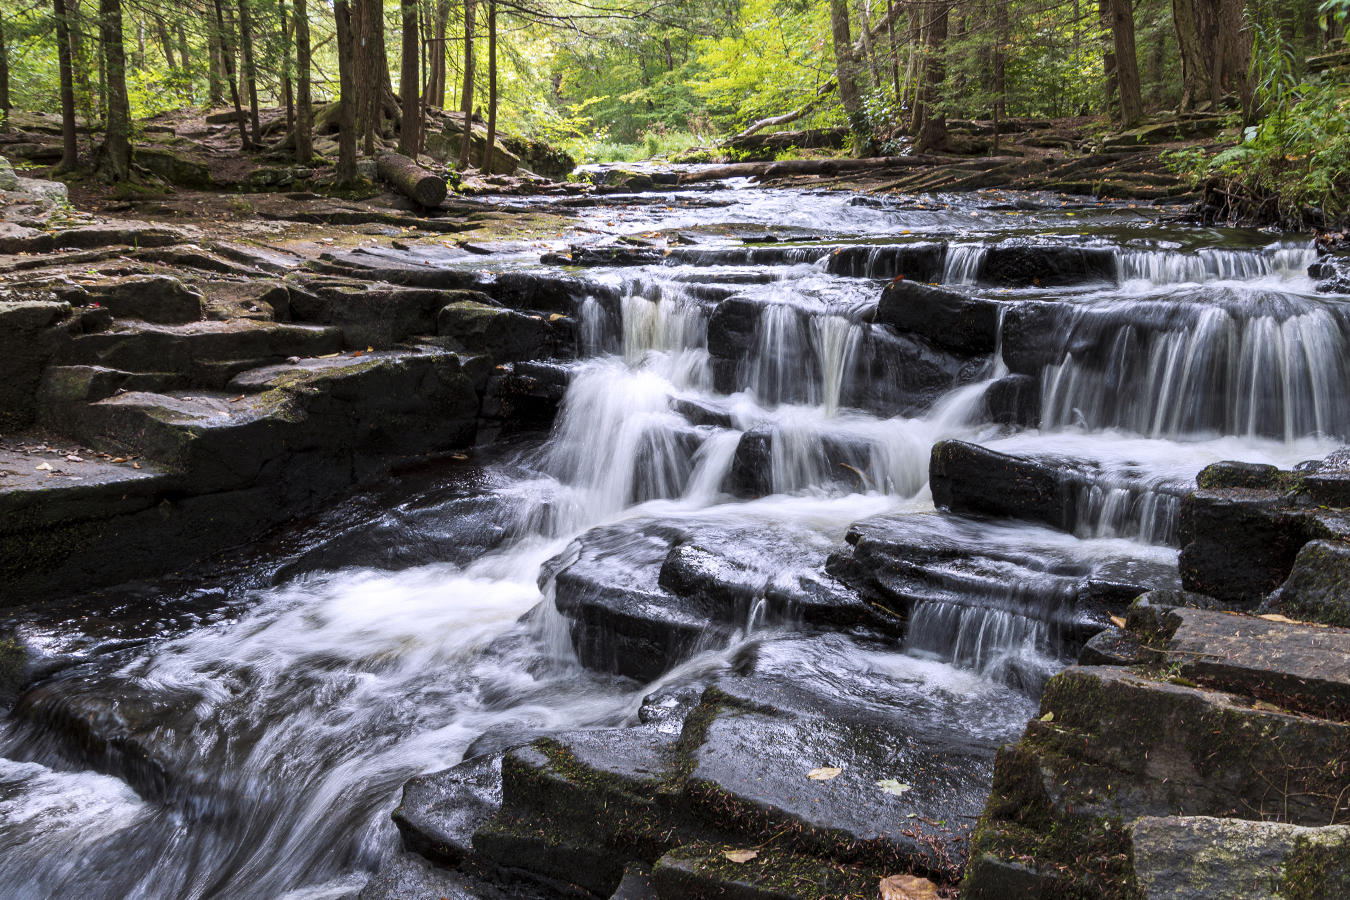
A common problem when taking photos in the snow is that they come out a little grey and dreary. This is because the camera sees such brightness that it tries to compensate almost as if putting on sunglasses; and the white balance tries to make white a neutral grey. One way to fix this is with exposure compensation which adds light to the scene.

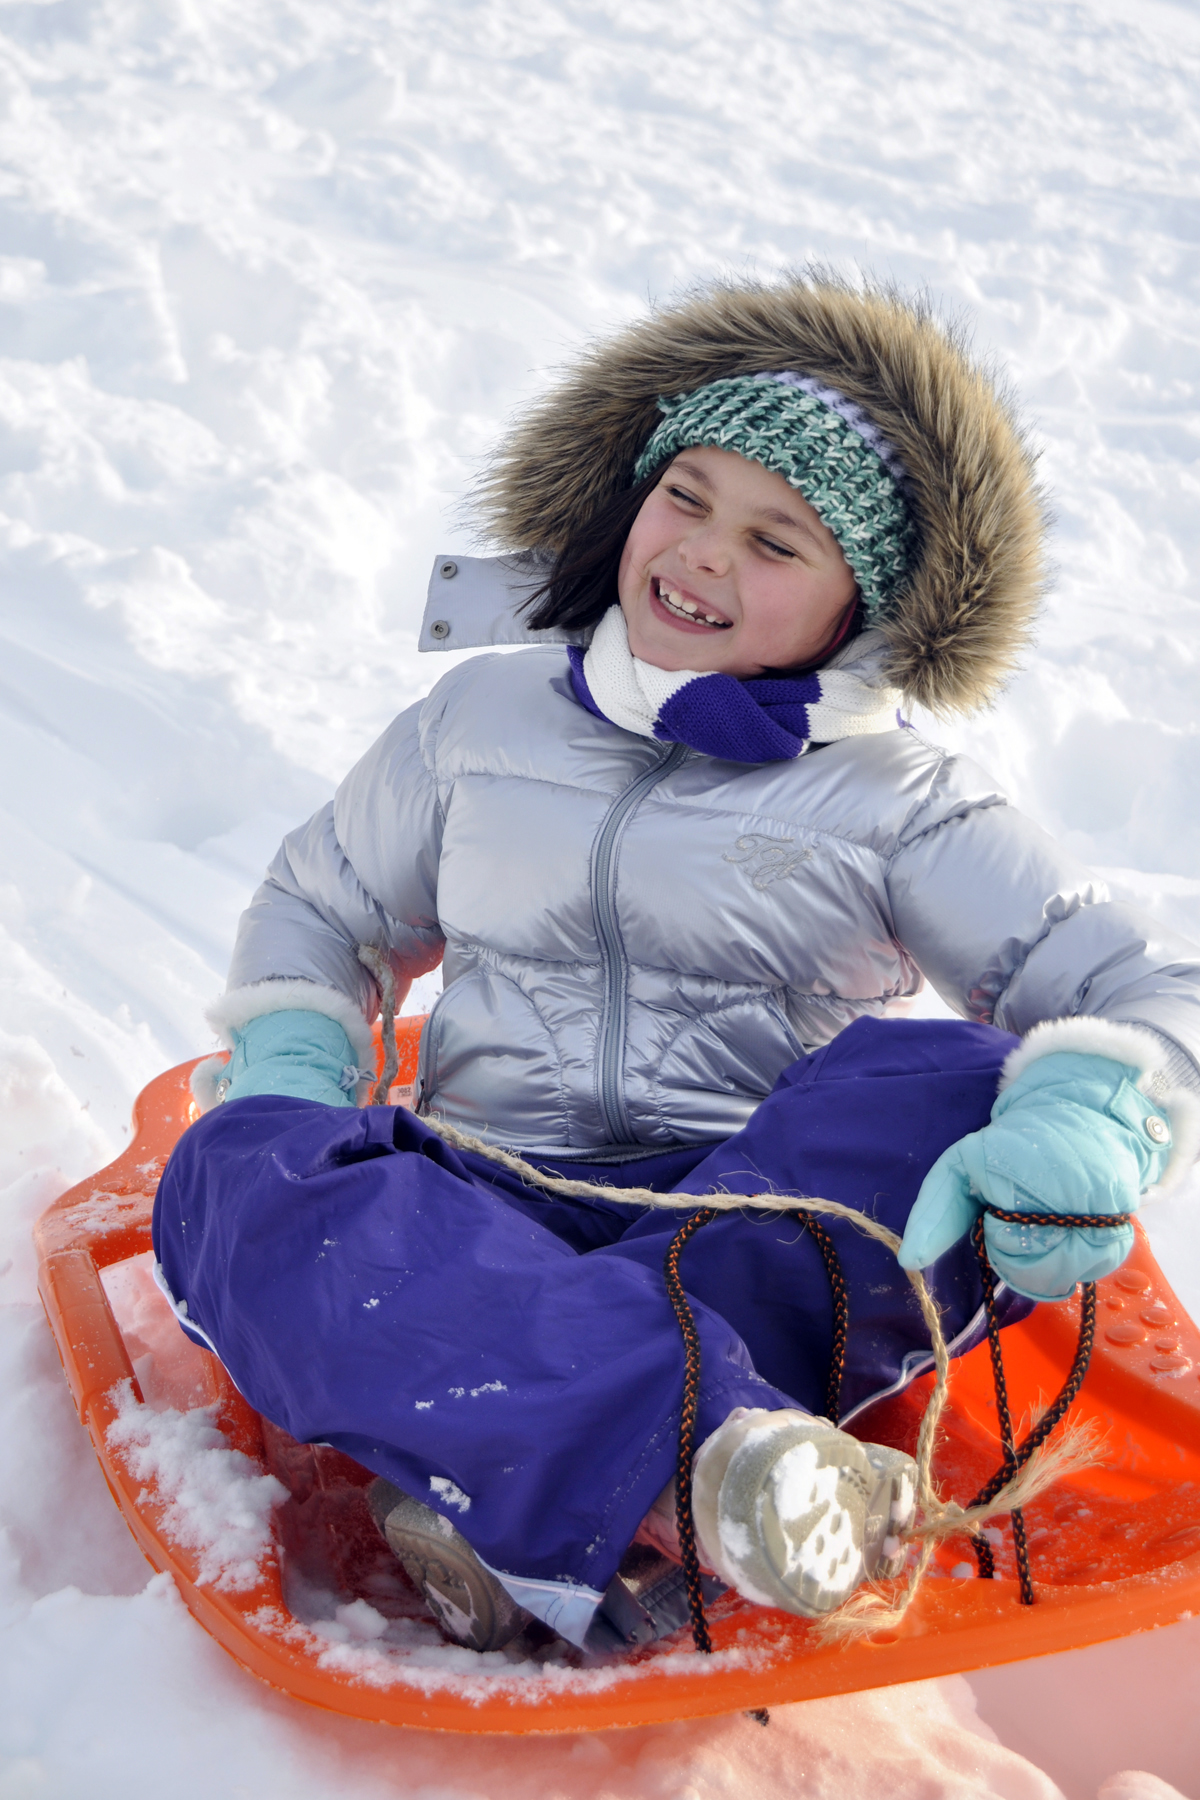
By adding exposure to the scene, you force the camera to overexpose just a bit. I usually start with +0.7 in snow and then either go up to +1.0 or down to +0.3.

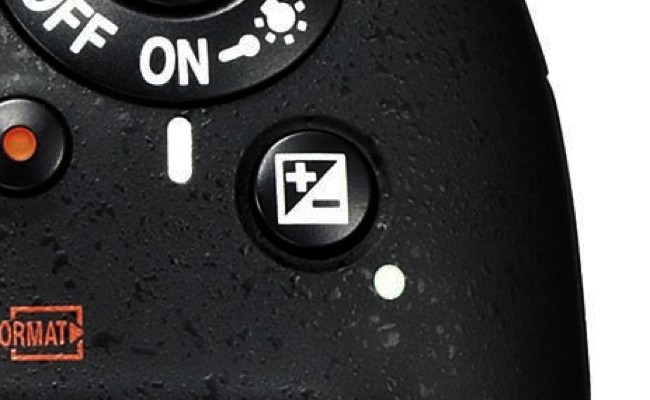
The exposure compensation dial on your DSLR or mirrorless camera can be used in any mode except “green box” program. It is usually found on top of the camera and shows +/-. Simply hold it down and move the thumb wheel left or right to add (+) or subtract (-) light. On your iPhone, touch the screen on the subject’s face and slide the sun icon up a bit to add light to make the shot a less grey. BTW, this tip also works at the beach.

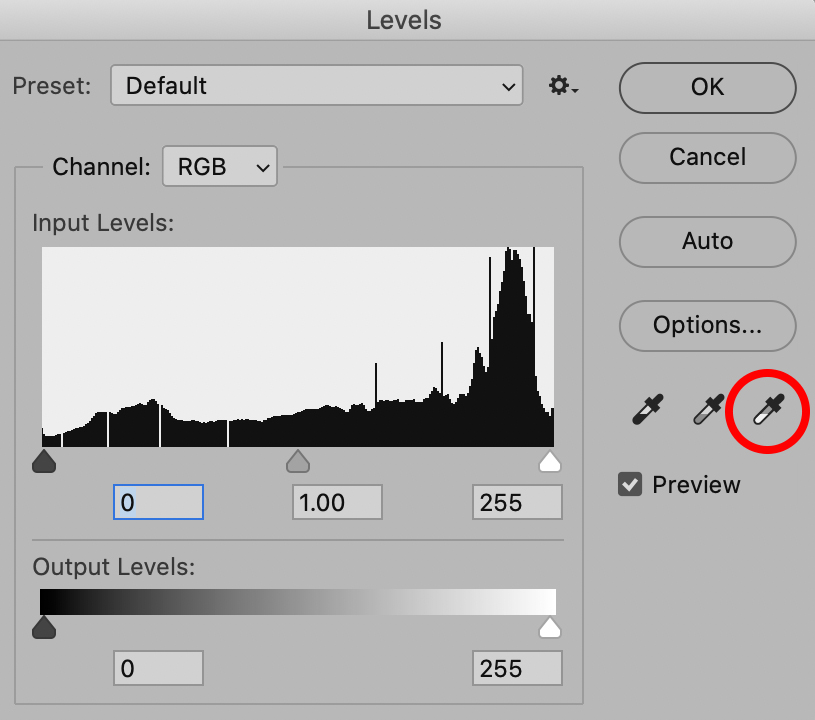
In photoshop, I may brighten the image by about 10-20%. Another trick to ensure white is white in photoshop is to use image>adjustment>levels. Then select the eye-dropper on the right (white) and click on something in your image that should be 100% white. This is a great way to correct images where the color isn’t just right and I find it really helps with skin tones.

Another way to get brighter winter portraits is to use flash. I will cover this next week. Enjoy the snow days of February and March!


Capture Silky Smooth Moving Water

Water is a compelling photographic subject. And how you capture it makes an impression on the viewer. Freezing the action for crystal clear water droplets from a crashing wave or pool splashes conveys power and energy. Slowing the motion down to create a milky white stream of water creates a more serene picture.

In this photo taken on the Little Falls Trail in Promised Land State Park, Poconos, PA, I hiked in mid-morning with my 18-400mm all-in-one lens as well as an electronics cable release designed for your camera and my travel tripod, two must-have accessories to create silky water fall action. Getting as close down and into the flowing water as possible creates a more dramatic perspective.

Settings are very important. First, set your camera to aperture priority and choose an aperture that will give you deep depth of field (between F11-F22 is ideal) so that your foreground to background will be in focus. I used F11 here. Next, select ISO 100. Now look thru the viewfinder and see if your shutter speed is below 1/15th second (I shot my image above at 1/6th second). You can change your aperture to make the shutter speed faster or slower. If you move the aperture from F11 to F16, the shutter speed be slower. If you open up your aperture to F8 to let light more light in, the shutter speed will be faster. Start shooting to see your effect and change your aperture until the image looks the way you want it to.

Since you will be shooting at slow shutter speeds below 1/60th second, you will not be able to handhold the camera. You must use a sturdy tripod and a cable release to ensure there is no camera shake.

The three settings involved in creating an image of a waterfall are referred to as the exposure triangle. The ISO, the aperture and the shutter speed all work in concert to create the effect. So your constant will be your ISO. The second that you will work with is your aperture. Opening or closing the aperture will change the shutter speed to be faster or slower. The shutter speed is ultimately the setting that will either freeze the water (faster shutter speed) or create the silky effect (slower shutter speed).

And the last tip for any landscape photo is to focus about a third of the way into the scene. This will give you the best results for foreground to background focus.

This tip is a good self-assignment for any season. So, find a park with waterfalls within driving distance and head out with your wide-angle lens, tripod and cable release.

Environmental Portraits

Recently, a friend asked me to take a portrait of her in her office for professional use. We started behind the desk, but I didn’t feel that location captured her and the inviting warmth of her office and professional style. So we moved to a chair where she normally talks with clients, which was conveniently located by a window that let me avoid using a flash to maintain the natural feel of the office environment. I used a very fast lens (Tamron’s SP 35mm F/1.8) with a wide open aperture of F/2.2. This allowed me to capture my subject in sharp focus while blurring the background of the desk, laptop and books that let the viewer know the subject is in her office.

Shooting Sample Images to Learn How to Achieve Shallow Depth of Field

I find that the best way to make aperture-setting selections stick in your mind to be able to achieve a desired effect is to shoot sample images at two aperture extremes. Start by putting your camera into the aperture-priority mode (A on Nikon cameras; AV in Canon cameras). Then set your aperture to the widest setting (like F/2.8, F/3.5, etc.) and take a photo. This will be your sample A (see my sample below). Then move your aperture to its smallest setting (like F/22, F/32). This is your sample B. Then study the difference between the shots.

{Sample A} Wide Open Aperture (F/2.8 – 1/1000th sec shutter speed – 34mm)

{Sample B} Smallest Aperture (F/22 – 1/125th sec shutter speed – 34mm)

Now, to make things confusing, your results will vary depending on your widest aperture setting, focal length setting and how close you are to the subject. In my sample shots above, I was very close to the flowers I focused on and my aperture was F/2.8 in the first, so the brick building in the background is out of focus perhaps more so or less so than your sample shots may show.

If you keep making samples for yourself like this, eventually it will become second nature when you are shooting to select the appropriate aperture to get the photo you have in mind (with out of focus background or sharp background).

Typically you will want to blur the background a little for portraits for a more professional look; or if the background is very distracting; or if you want the viewers of your photos to be drawn to so a very specific part of the shot.

Photographers will use a smaller aperture to get the foreground to background in focus for landscapes, and sometimes for shots that tell a story of where you are. For example, you may want a store name to be in sharp focus so that it is legible. Or you may want the details of a landmark to be in sharp focus as well as your family standing in front of it.

However, sometimes landmarks, such as the Disney Castle, are so recognizable, that having the castle slightly out of focus works really well to give you a “here we are” shot that is elevated to a more professional looking image. Below is a sample from Epcot’s China Pavilion.

A slightly wider open aperture.


Quick Silhouette

Exp Comp(-2.0)_SAE_3640There are several ways to capture silhouettes. I find one of the easiest is to use your exposure compensation function, the same feature discussed in the previous post. The image above was shot at -2.0, under-exposing the image by two stops. The sky is a rich color, and the couple on the beach swing is completely black. Below, you will see variations of compensation (0, -1.0 -2.0 and -3.0) of the same scene. Next time you’re shooting around sunset, take several images of your subject that has strong identifiable lines at different exposure compensation settings until you find the one that best suits your vision.

Exp Comp(0)_SAE_3637

Exposure Compensation 0

Exp Comp(-1.0)_SAE_3639

Exposure Compensation -1.0

Exp Comp(-2.0)_SAE_3640

Exposure Compensation -2.0

Exposure Compensation -3.0

Exposure Compensation -3.0


My Picture is Too Dark

There is a quick fix when you feel your photos are too dark. The +/- exp on the top of your camera lets you add or subtract light from the photo. This button is called the Exposure Compensation Button and is the fastest way to adjust the exposure of your image. Most cameras can do this in small stops of .33 at a time. Hold the button down while turning the wheel at your thumb (or forefinger depending on your camera model) and dial towards plus (+) to add light to the image if it is too dark and towards minus (-) to subtract light if the image is over-exposed.

Look at the first photo below. It was shot normal, no exposure compensation. Since the subject on the table was backlit by the window, the image is slightly dark. By adding a bit of light with the +/- button, I can brighten up the image.

0 Exp Comp_SAE_3512

The photo below shows a real difference at +1.33. I added more than I really normally would have for demonstration purposes so that you can see the difference.

+ 1.33 Exp Comp_SAE_3514