Using a Telephoto Lens to “Flatten the Image”

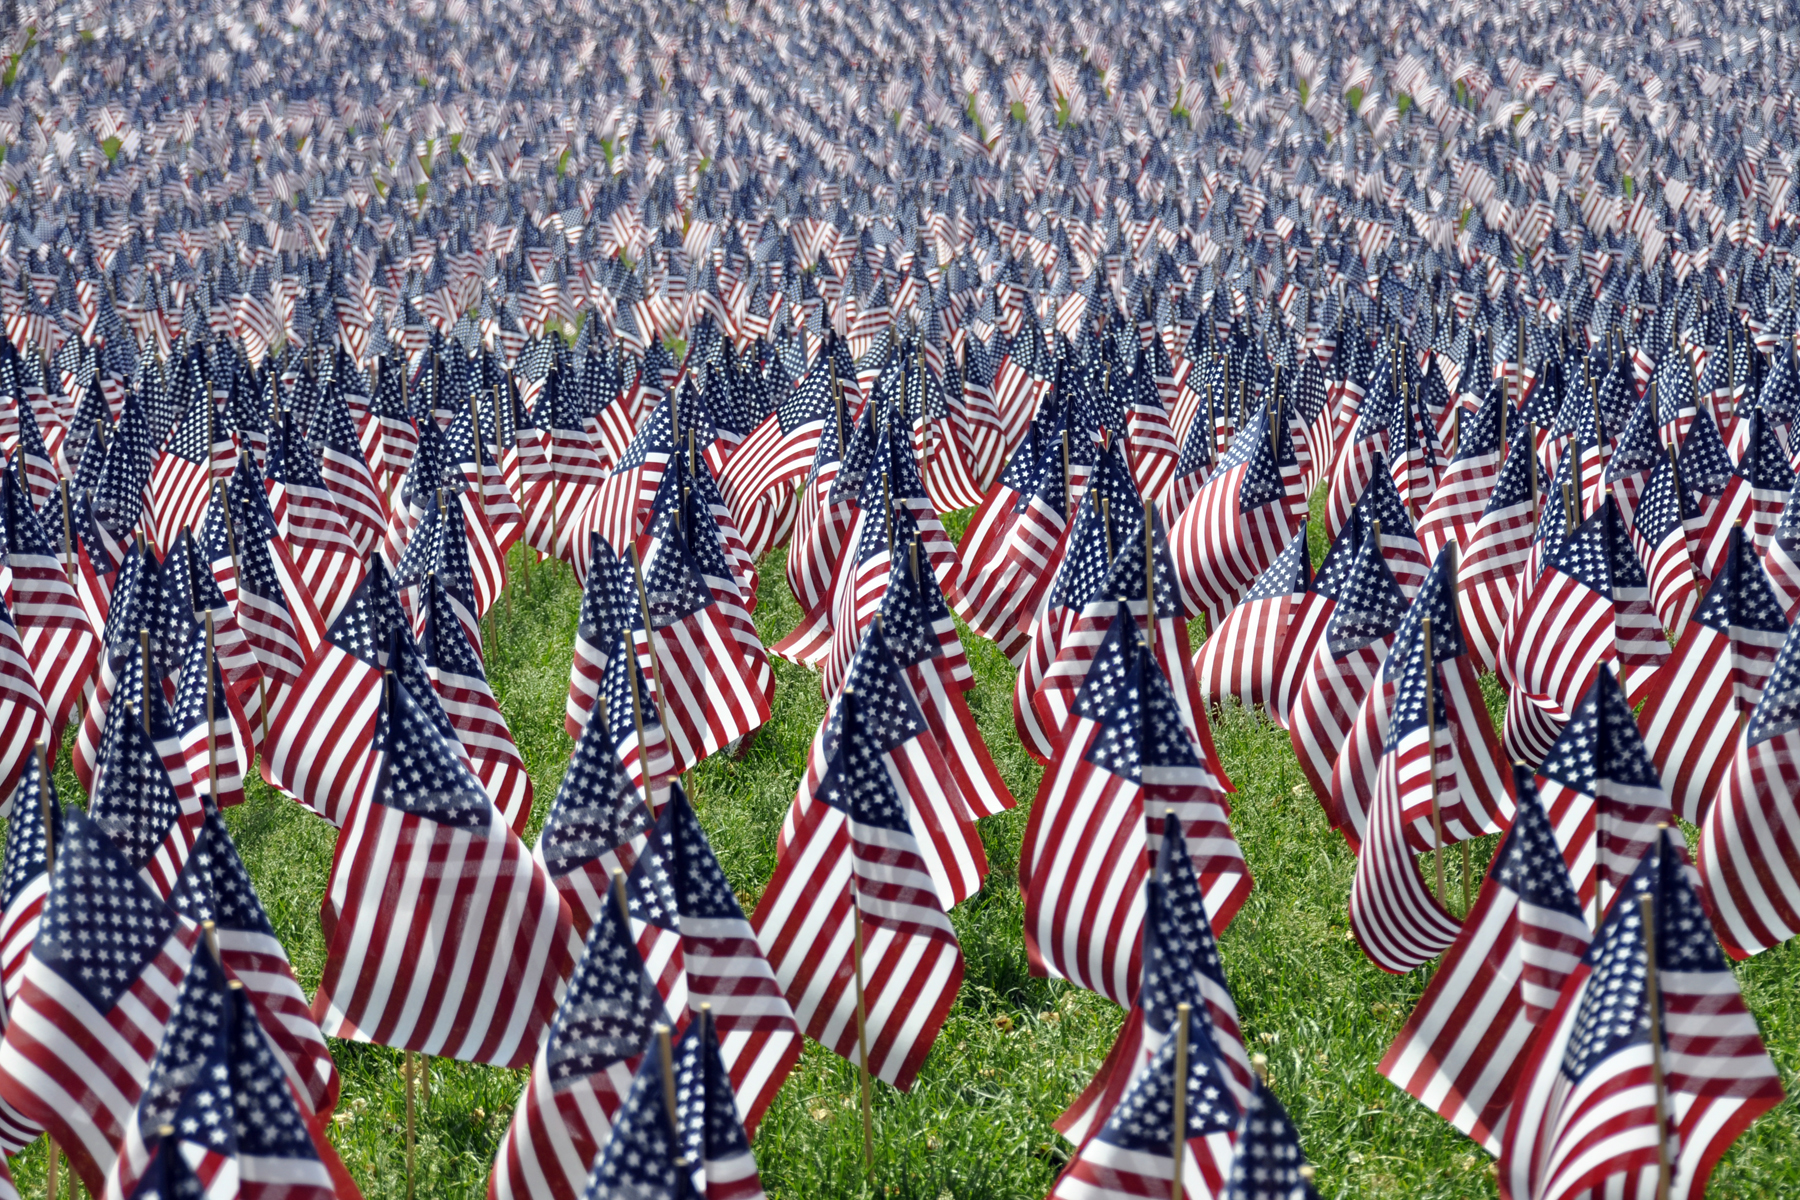
Flattening the image, or compressing the image, is a nice result achieved when you use a telephoto lens and are situated a distance from your subject. I used this effect to make a romantic engagement photo in the Bayard Cutting Arboretum of my newly engaged niece and her fiancé.

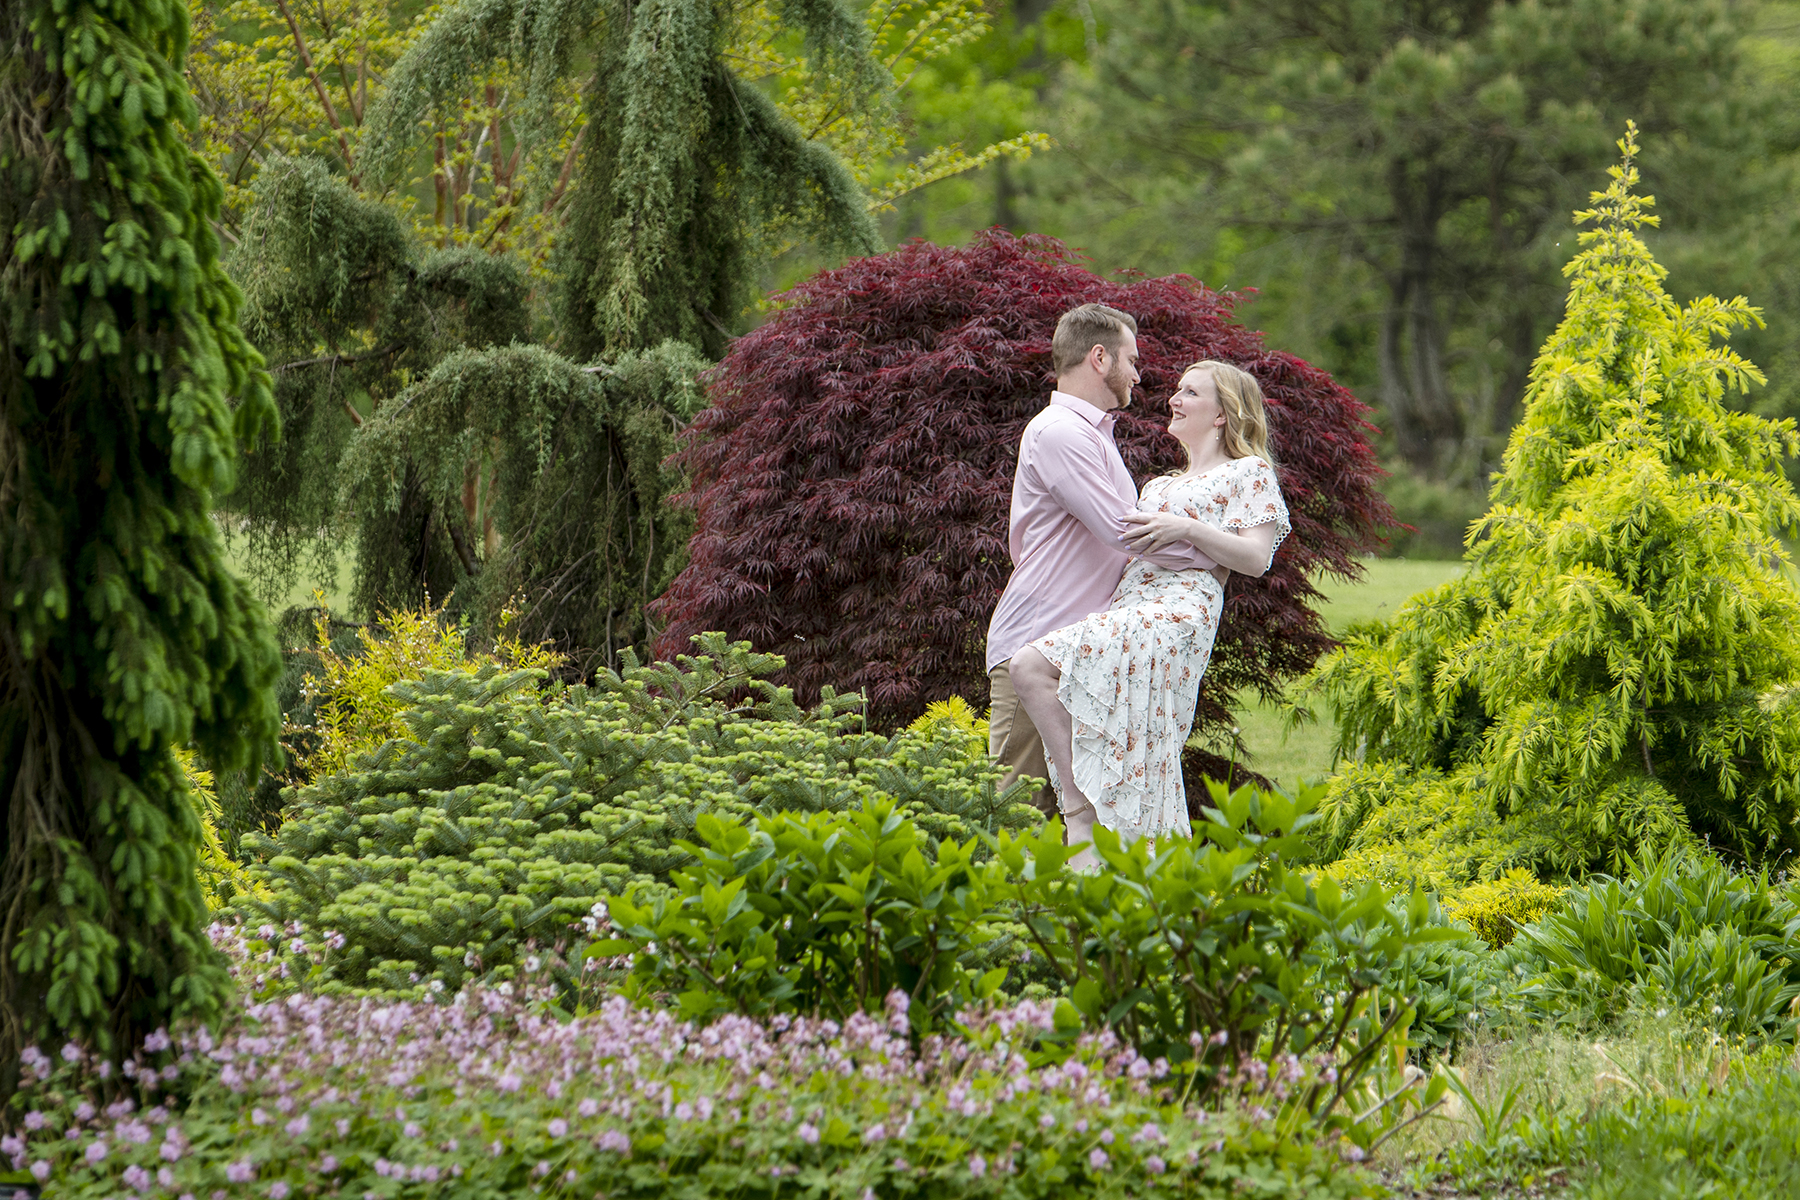
The trees in the distance appear much closer than they actually are. And all the “layers” of background objects appear large and stacked closed together. The closest and furthest objects fall out of focus due to the depth-of-field. I like the compression effect as it gives a very clean and almost painterly feeling to the background that might otherwise be too distracting and take away from the subjects in the frame.

This post by photographylife.com has a great explanation of the effect: “This combination of long lens and camera-to-subject distance gives the viewer the impression that distant objects are larger than they actually are. As a result, it gives the appearance that the background is pulled in closer to the subject. The opposite effect occurs when you use a wide angle lens. When we use a wide lens, we tend to stand much closer to our subjects compared to a telephoto lens. Because of this relative closeness, near objects will look proportionally larger than objects in the distance. As a result, the background elements become much smaller and seem farther away.”

I used a moderate telephoto lens, the Tamron 70-210mm F4, on a crop-sensor camera at 170mm, so my effective focal length was 255mm. I stood a distance away and actually used hand signals as they couldn’t hear me. The effect will be more dramatic by standing even further away and using a 300mm or longer telephoto setting. Next time you are headed out to shoot, bring along your tele lens to experiment with compressing the image.

Rule of Thirds in a Coastal Landscape Image

It’s been some time since I blogged photography tips for you. I am not sure why I got away from it, but I have a renewed interest in trying to help beginners take better photos. This may be inspired by the great number of people who have discovered photography as a new hobby during the pandemic and have recently invested in camera gear to take better photos. So whether it is with your phone or your new camera, I hope my tips will give you inspiration and guidance the next time you’re out taking photos. Today’s post discusses one of the most basic rules of composition.

The Rule of Thirds is a powerful rule, but keep in mind it can always be broken if not applying the rule make a better photo. The Rule states that if elements in your composition are placed left or right, or above or below, the center, you will have a stronger composition.

In the image above taken at Point Lobos, CA in January 2020, my subjects along the path are in fact centered horizontally, but pushed to the far right. The bulk of the landscape falls below the center, and the horizon line is above the center. Many readers and viewers tend to read text or an image from left to right in Z pattern, so the viewer’s eye is naturally drawn along the path to land on my subjects. The pop of the red sweatshirt also stands in contrast to the blue, green and brown landscape to inform that the subjects, my two dear photography mentors Ken and Andre, are an important focus within the image of this beautiful coastal landscape we were visiting during a photo workshop.

For further discussion fo the Rule of Thirds, read this post here that demonstrates this rule with a grid overlay on images and encourages you to take shots with various compositions to see how one may be stronger than another, or tell a different story based on your composition within the grid.

Blur Your Travel Snapshot Background

As travelers and vacationers, we want the “we are here” photo memories, but they do not need to be quick cell phone grabs, selfies or images that are just flat documentation of our sojourns. Blurring the background elevates your travel snapshots and is simple to do. Set your camera to aperture-priority mode and choose a wider aperture like F/5 or F/6.3. If you are nervous about using a non-program mode, set your camera to the “portrait” mode, which will automatically set your camera to deliver similar results. The sharp subject pops off of the softer background canvas that still lets the viewer know where we are, but feels more professional in nature. In this case, the girl is framed by the Washington Square Arch in Washington Square Park located within the NYU campus area. The arch is blurred out, but identifiable. And the bonus is that all of the distractive elements in the background are also blurred to put our focus on the subject. Try this technique when posing your child or family in front of an iconic structure on your next vacation.

{38mm, F/5, 1/500th sec., ISO200}

Change Your Position to Eliminate Distractions in Your Photo

RT_SAE_3490Sometimes when you travel to busy tourist areas, like Connecticut’s Mystic Seaport, the idea you have for a photo may seem impossible because of the distractions like signage and people. One way to eliminate the distractions, especially when there is not enough time to wait it out or come back when it is not so busy, is to change your position. In this case, I crouched down very low and shot upward towards the lighthouse, which helped to hide some of the more distracting words on the door of the lighthouse. This position also allowed me to use the flowering bush to hide the people standing next to the lighthouse. Another advantage? The small lighthouse (a replica of the Brant Point Lighthouse on Nantucket) appears taller than it actually is and the sky becomes a beautiful background against which the lighthouse stands.

A Little Tilt of the Camera Can Convey Energy and Motion

Tilting of the camera is something we see a lot of today. It can work particularly well for portraits, especially when the subject is expressing emotion, like a couple of laughing teens. But this technique can also work for street scenes to convey a sense of movement and energy. Recently, on a trip to London, I took hundreds of photos of Big Ben. Wanting to capture the feeling of really being there, I stood in the middle of Westminster Bridge looking towards Big Ben and Parliament and waited for the iconic red bus to come into the scene. By slightly tilting the camera, I feel the shot does not feel static, but instead energetic, bringing me back to the moment of standing almost in the road and the traffic rushing by. Tilting the camera is not right for every shot, and sometimes you just have to experiment with a straight on shot (see last shot in the post to compare) and one that has a tilt to it, to discover which shot you like best. Try tilting the camera both left and right to see which is the better angle for the shot. I used this technique quite a bit on the trip, and when looking at them scattered throughout my digital photo book I am creating on Blurb.com, I feel it helped to capture the whirlwind that was my three-day London vacation.
A straight on view. Compare to the main photo at the top of the post.

This slideshow requires JavaScript.

Shoot From below for Dynamic Images that Capture the Whole Scene

TheGirls
I was literally laying on the ground with my head in the lap of another mom when I shot this photo of the girls under the Statue of Liberty on a recent field trip. While it will be a year or so before you can visit the inside of the Statue due to its closing for repairs, you can still visit Liberty Island and get this shot. And this low angle can and should be used for holiday picture-taking, winter vacations, and more. Here are just a few ideas:

-A tall public Christmas tree
-The Eiffel Tower
-A lighthouse
-The Disney castle
-A snowman
-Your house
-Skyscrapers
-An amusement park ride
-Mountains

Get down low, shoot up and use a wide angle setting on your zoom lens. Be sure to meter on the subject, not the sky or the background or else your subject’s face will be under-exposed. To do this, 1) set your camera to spot meter mode (see your instruction manual, but it’s easy); 2) put the small circle in your frame on your subject so that the camera can read the exposure of your subject and not the background; 3) press your shutter release button down halfway to lock-in that exposure; 4) re-compose your shot as you like; and 5) press the shutter button the rest of the way to take your shot.

Shoot From a Different Angle for a Meaningful Perspective

_DSC2061_RTWhile visiting Boston over the Memorial Day weekend, we experienced a moving memorial to the fallen soldiers of Boston: 20,000 flags in the middle of The Boston Commons. Each flag represented a Massachusetts citizen who died in wars and military conflicts during the last 100 years. By shooting low (with the camera nearly on the ground as I knelt in front of the first line of flags) I was able to eliminate the distracting background of visitors and keep the focus on this sea of flags that really puts into perspective the staggering number of lives lost. The 50mm focal length setting combined with a wider open aperture of f/5.3 helped to compress the flags to give the image a painterly feeling as the seemingly never-ending rows of flags dissolves into the background.

Shoot Wide and Close to Eliminate Distracting Backgrounds in Your Photos

_DSC0984_RT

During winter break, we spent a few days in sunny and warm California. Our trip to Hollywood was brief and pictures were difficult with so many people on the crowded boulevard that was in full set-up mode for the Academy Awards. And with two kids all too anxious to see the sights, I had just a moment to capture a “we are here” photo in front of a star on the Hollywood Walk of Fame. By setting my lens to a 23mm wideangle setting, getting close to them and tilting down on the scene, I was able to quickly eliminate the people in the background while still capturing their expressions and John Travolta’s star. I used a slightly small F/6.3 aperture, that when combined with the wide focal length, kept both the star and the kids in focus. Be sure to focus on the subjects eyes and then tilt down for your best exposure and to keep the most important focus point sharp. (Note: I did Photoshop out one lingering foot of a Storm Trooper from the upper right side of the frame. Don’t be afraid to crop or retouch to make your photo even better before posting, framing, scrapbooking or adding to an album).

Isolate Details for a Different Look at Landscapes

Nikko

When you say “landscape” I’m sure the vision you have in your mind is a panorama of a sprawling field, distant mountains or grand canyons taken with a super wide angle setting on your zoom lens. However, telephoto zoom settings can also be used effectively for landscape photos. When you zoom in on the details of your landscape, you can bring out something special. Here, in Nikko, Japan, I captured the majesty of the not-quite peaked fall season by isolating a few brilliantly colored trees clustered together in the still mostly green landscape. The resulting picture says “fall” unlike the wide angle shot I could have taken. Next time you’re shooting landscapes, zoom in and see what interesting detail you can find: a single tree, a mountain peak, a reflection in the lake, and more. When you use the telephoto setting, you compress the distance between objects and achieve a flat, almost painterly 2-D effect.

Take a Photo from A Worm’s Eye

_DSC4840_RT

Getting low on the ground and shooting up towards your subject can create a dramatic effect. This is called a “worm’s eye view” since you are essentially viewing the subject just as a worm would. As opposed to a bird’s eye view, well, you get the picture. Now, I literally laid down on the ground and shot up to make sure I could get the full length of the lighthouse in my shot. However, crouching down can achieve the effect. So can raising your subject. For example, your subject is up on a ladder, or porch, and you are on the ground. Use your imagination to get below your subject. You will see how you can crop out distracting backgrounds, include more sky, or incorporate something special in the photo. You can also give the illusion of height, power, strength and more when you shoot upwards.