Windows Are Your Best Friends for Better Portraits

As we start to move towards reuniting with families, consider a more formal portrait of your long-awaited get togethers.

Many of my portraits, candid or posed, are taken by big bright windows as they provide a beautiful soft light on my subjects. And, because I really have a love/hate relationship with my flash and try to avoid using it when much better light is available.

In this photo, the grandchildren gathered around grandma facing the window straight on. Even the dog got in on the action at the moment I clicked the shutter release, but due to my slower shutter speed of 1/25th sec, she is blurry, but I like the story behind it, so I do not mind. I was fairly close them, standing between them and the window, so I used a wide focal length of 32mm. Because of the focal length setting, and stopping down slightly to f/4, I was able to keep the boys behind grandma in relative sharp focus. Stopping down yet again to f/5.6 or even f/8 would make them 100% sharp.

I love the bright eyes that the window light provides as they looked up slightly to my camera lens. It really makes their eyes and smiles pop!


Using a Telephoto Lens to “Flatten the Image”

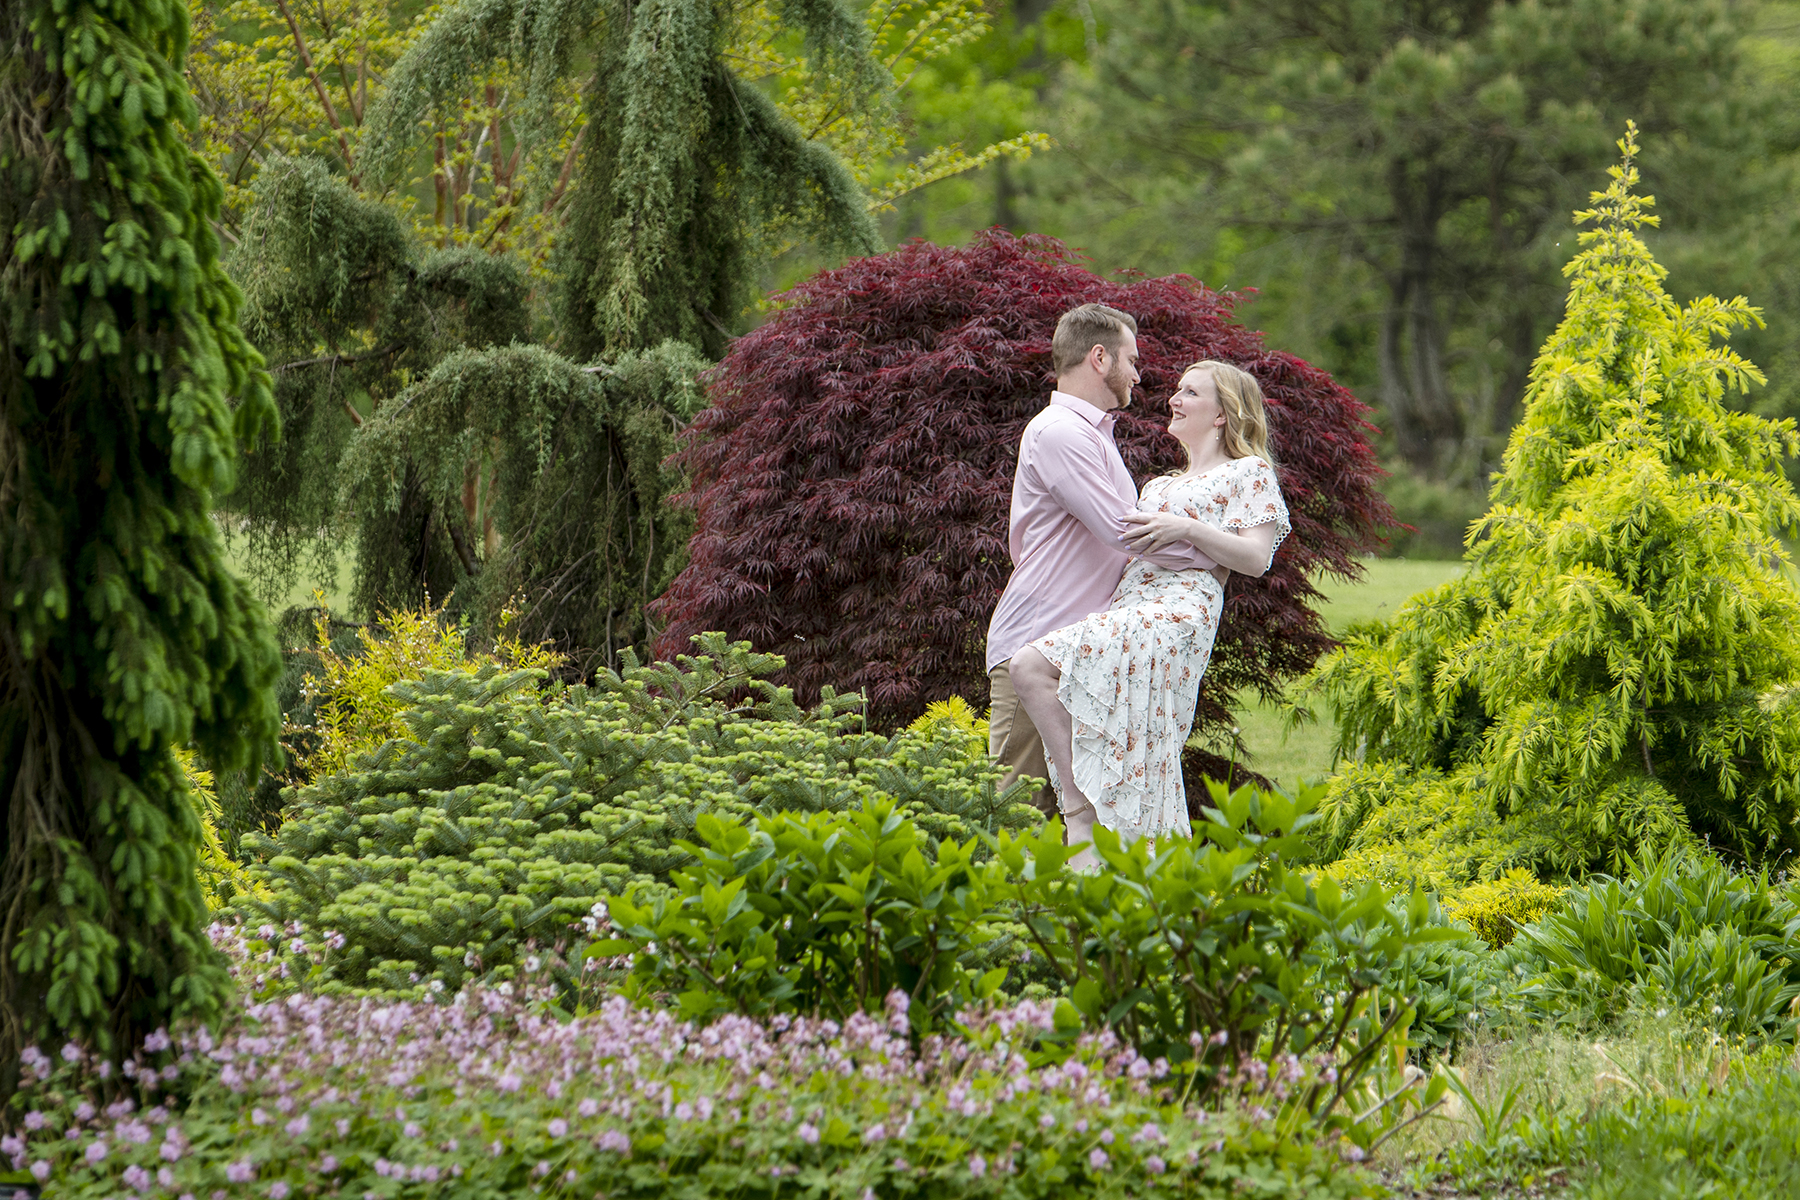
Flattening the image, or compressing the image, is a nice result achieved when you use a telephoto lens and are situated a distance from your subject. I used this effect to make a romantic engagement photo in the Bayard Cutting Arboretum of my newly engaged niece and her fiancé.

The trees in the distance appear much closer than they actually are. And all the “layers” of background objects appear large and stacked closed together. The closest and furthest objects fall out of focus due to the depth-of-field. I like the compression effect as it gives a very clean and almost painterly feeling to the background that might otherwise be too distracting and take away from the subjects in the frame.

This post by photographylife.com has a great explanation of the effect: “This combination of long lens and camera-to-subject distance gives the viewer the impression that distant objects are larger than they actually are. As a result, it gives the appearance that the background is pulled in closer to the subject. The opposite effect occurs when you use a wide angle lens. When we use a wide lens, we tend to stand much closer to our subjects compared to a telephoto lens. Because of this relative closeness, near objects will look proportionally larger than objects in the distance. As a result, the background elements become much smaller and seem farther away.”

I used a moderate telephoto lens, the Tamron 70-210mm F4, on a crop-sensor camera at 170mm, so my effective focal length was 255mm. I stood a distance away and actually used hand signals as they couldn’t hear me. The effect will be more dramatic by standing even further away and using a 300mm or longer telephoto setting. Next time you are headed out to shoot, bring along your tele lens to experiment with compressing the image.

Fall Foliage Background Perfect for Photo Portraits

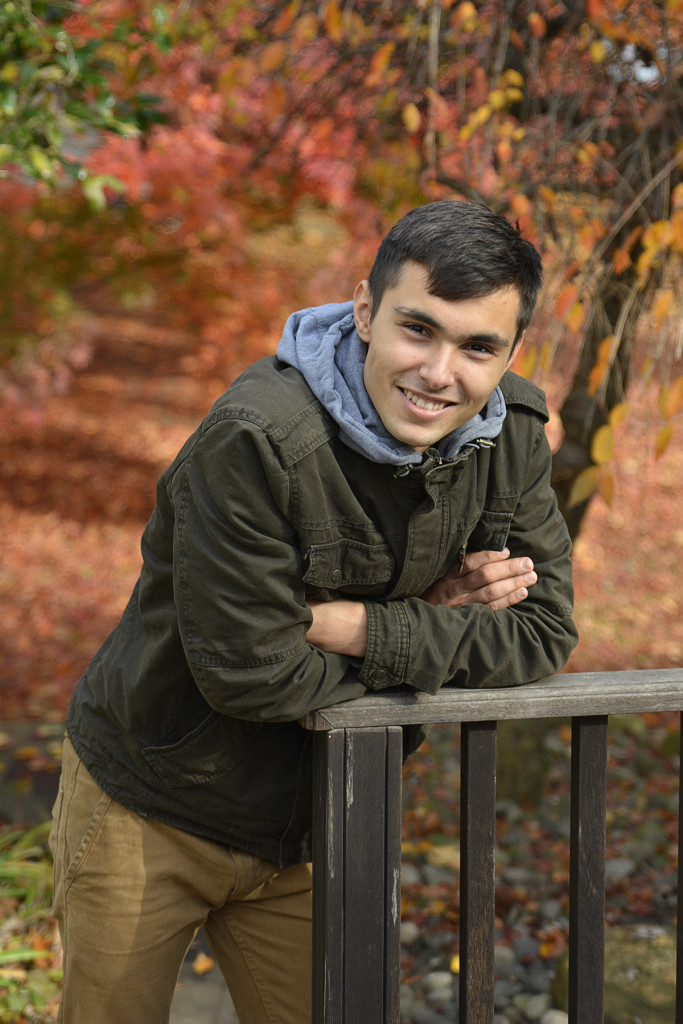
When sunlight hits colorful fall foliage, it makes a stunning backdrop for your impromptu family portraits. The trick to getting the painterly background look that makes the subject pop off the background is to use a wide open aperture. The portrait here was taken at 70mm with an aperture setting of F/2.8. Focusing on the eyes, the background drops out due to the shallow depth of field into a painterly sparkle of fall colors. If your lens does not open to a fast aperture like F/2.8, use your telephoto lens at its maximum zoom, set the camera to aperture priority and choose the widest aperture opening (most likely F/5.6 or F/6.3) and step in a little bit closer. That combination will drop out the background for a similar look that makes a beautiful portrait suitable for framing and display on your mantle. 

For Great Candid Photos, Keep Your Distance

Keep Your Distance

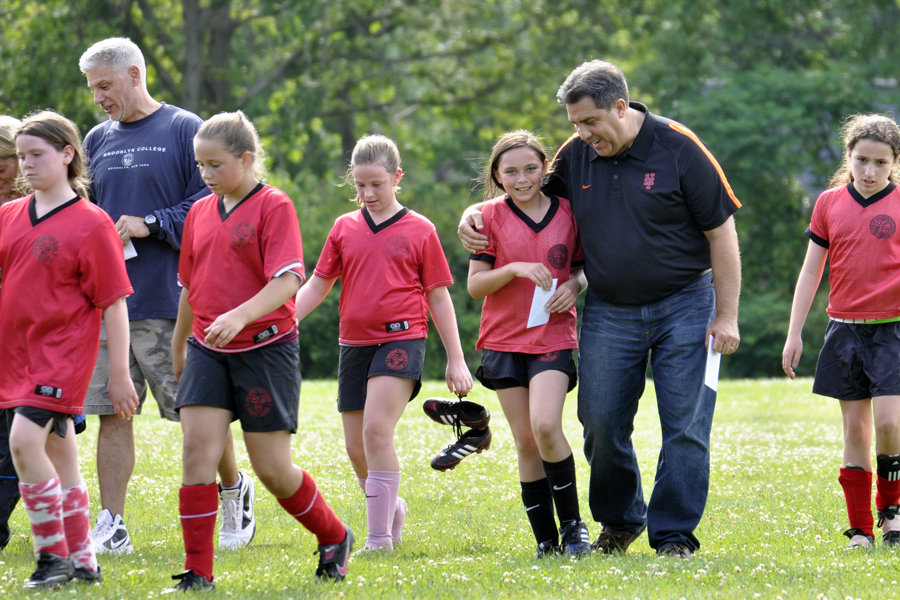
As all of the school year activities wind down, and some fun summer times begin, take a step back from it all and zoom in on the moments with your telephoto zoom lens. Not only will you get some more natural expressions, but your subjects will really stand out from the background with your tele lens setting. At the end of the last soccer game of the season, I remained at the side lines while the coaches gave encouragement and praise to their players and zoomed in. I caught a very natural expression on both coach and player. Additionally, while outdoors this summer, pay attention to where the sun is. Try to shoot later in the day when the sun is not so harsh. And look where the sun is hitting your subjects. Here, the sun is lower in the sky and behind the team, which adds a nice rim light to their hair and shoulders. In this lighting situation, set your camera to spot meter, as I did here, to be sure the camera gives the proper exposure for your subjects, and does not “put on sunglasses” because of the bright light behind and make your subjects darker than desired. Look for the metering button on your camera and turn it to spot. When you look through your viewfinder, you will see a the smallest of circles in the center of the frame (see below). Be sure this circle is on your subject, press and hold your shutter release button half way to lock in both focus and exposure, adjust your composition if necessary, and then take the shot by pressing the button the rest of the way.

Critique Your Photos In Order To Keep Improving Your Photography Skills

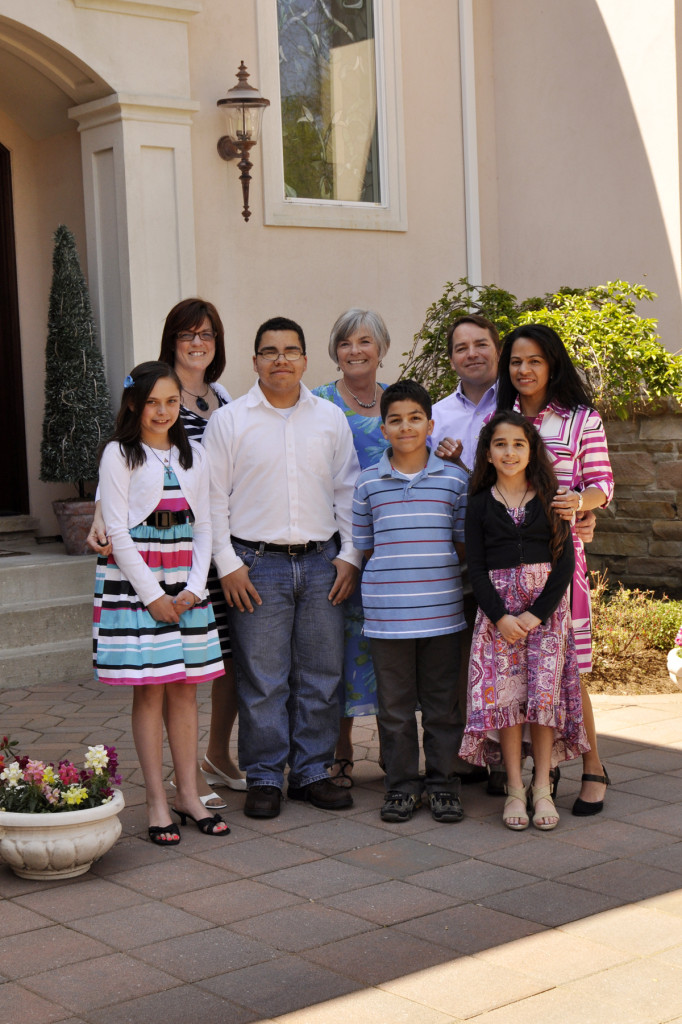
Before I rip this photo apart, I do have to say that I am so glad to have it and it will be framed and scrapbooked regardless of the faults I find in it. However, after loading this up

_DSC7692_RT

onto my computer, I sighed and wished I done some things differently. But this is one of the best ways to improve your picture-taking abilities–critique your images harshly to figure out how to make a better shot. If I could take this photo again, I’d do the following things to improve it:
  • I would get just a little bit higher instead of shooting at eye-level
  • I would have one more level of subjects instead of two predominately same-height rows, allowing me to make the group more narrow to accommodate my desire for a full-length vertical shot
  • I would move the boy in the white shirt to either kneel in front, or to a position behind grandma in blue
  • I would make more organized rows of turned shoulders, instead of all facing forward
  • I love the open shade, but I would changed our position slightly to eliminate the harsh lines of shadow in the foreground and background top right
  • While I purposefully picked F/8 as my aperture to be sure I had enough depth of field for both rows to be in sharp focus, I think stopping down to F/6.3 or 5.6 would have blurred my background more

I do love the lighting, though. Open shade is so flattering (see previous post for more) and in most instances, can be easily found when you take a look around your location. As you see, they are all standing just inside the shade, not in the harsh sun. If they were further back into the doorway, I might not have gotten the sparkle in each of their eyes from the open shade situation. The sun bounces around and lights my subjects evenly as if you held a big sift reflector in front of them, thereby eliminating harsh shadows under chins and brows and giving you highlights in the eyes.

So while I will look for a similar location next time I shoot a group like this, I will a) get higher, b) watch how the subjects are arranged more closely, and c) look more closely at what’s in the edges of the frame and zoom in, change position or change composition to eliminate anything distracting from the frame.

Natural Lighting for Mother’s Day Portraits

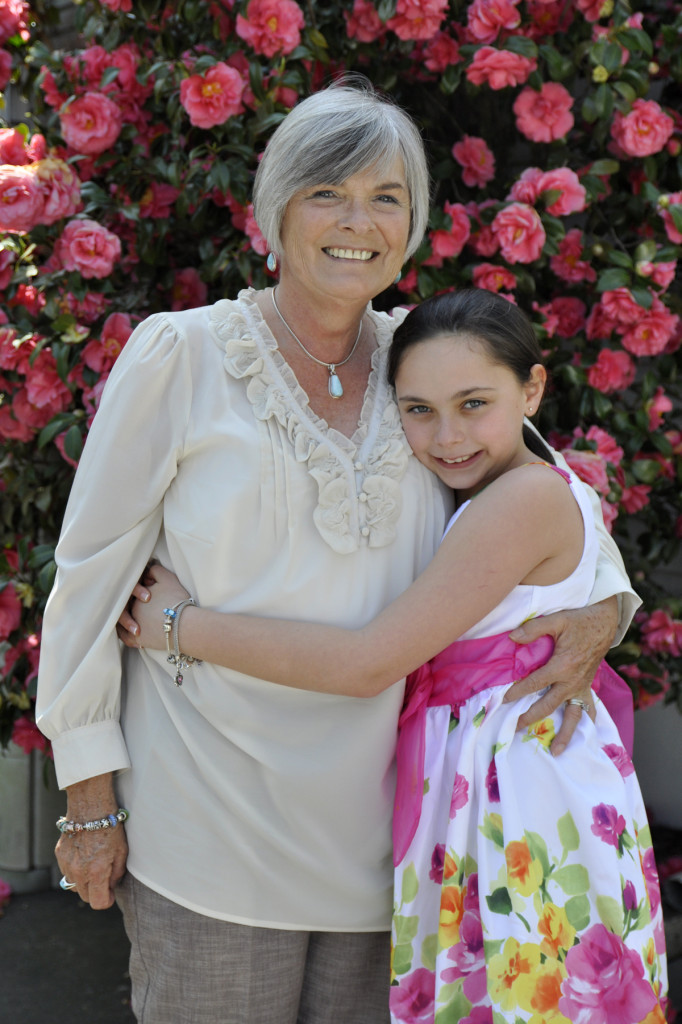
7719_Syd-Grandma

Before mom or grandma comes over for Mother’s Day (May 13th), think about a great spot in your yard to take a beautiful mother’s day portrait. Look for a spot that has open shade. Open shade will give you even lighting and really make the eyes sparkle. Great choices are in a doorway, under a covered porch, or under the perimeter of a shady tree. Position your subject just inside the lens of shade. Rule of thumb for positioning is if she can take just a step or two forward, and she is in sun the sun, then the step or two back is perfect! Too far back and you will lose some of the brightness and highlights in the eyes that the open shade provides. Try to get just a little higher than your subject so she looks up slightly towards your camera. Use a wide open aperture like F/2.8 or F/3.5 to blur the background. If you can use a tele zoom position, then your background will be even more blurred. So scout out your location and do a few test shots before your special guest arrives on Mother’s Day. Read more about open shade here and here).

Take in the Scene with a Slower Shutter Speed

_DSC1573_RT

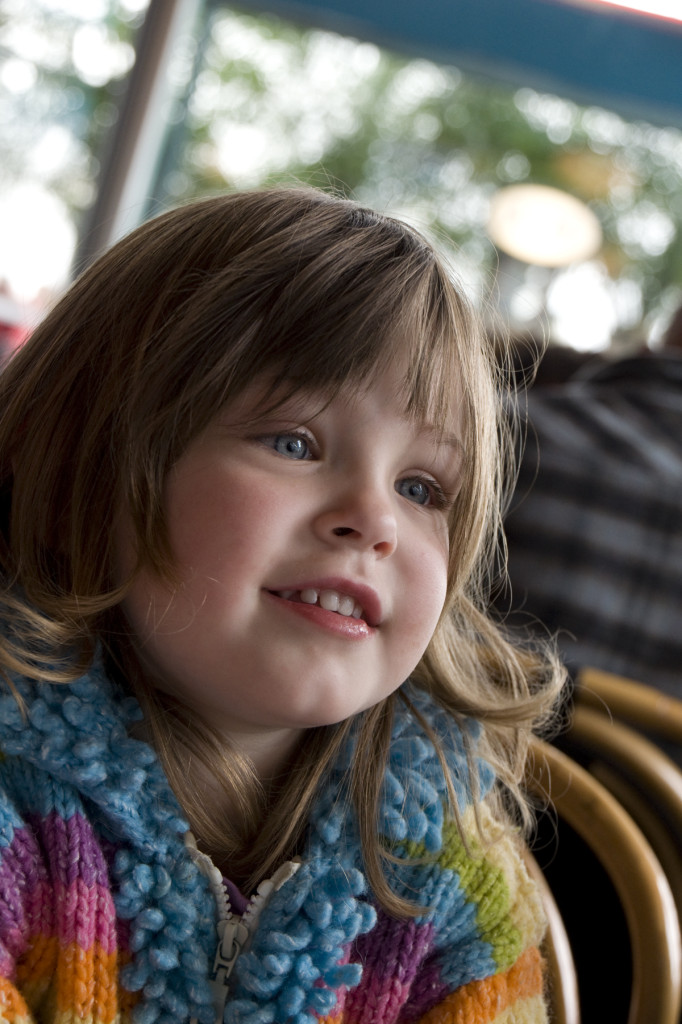
It’s very hard to catch him smiling naturally. So, as I did in this restaurant during lunch, I often snap a few photos in a row hoping for that “in-between” moment when he’s more relaxed. I think I got it here! This photo has a nice natural background since I used only the light from the window my subject was facing for lighting, rather than using my flash. And since my ISO was set to 400, my shutter speed was a slower 1/50th of a second (I turned on the anti-shake on the lens to eliminate any blur that might have occurred from hand-shake). That slower shutter speed allows the shutter to remain open long enough to capture the ambient light in the background, also lit by the large bright windows. The result is a nice shot that shows the whole scene. So when indoors, ask for a seat near a window and capture the ambiance of the whole scene.

Boost Your ISO and Take Photos Without Flash

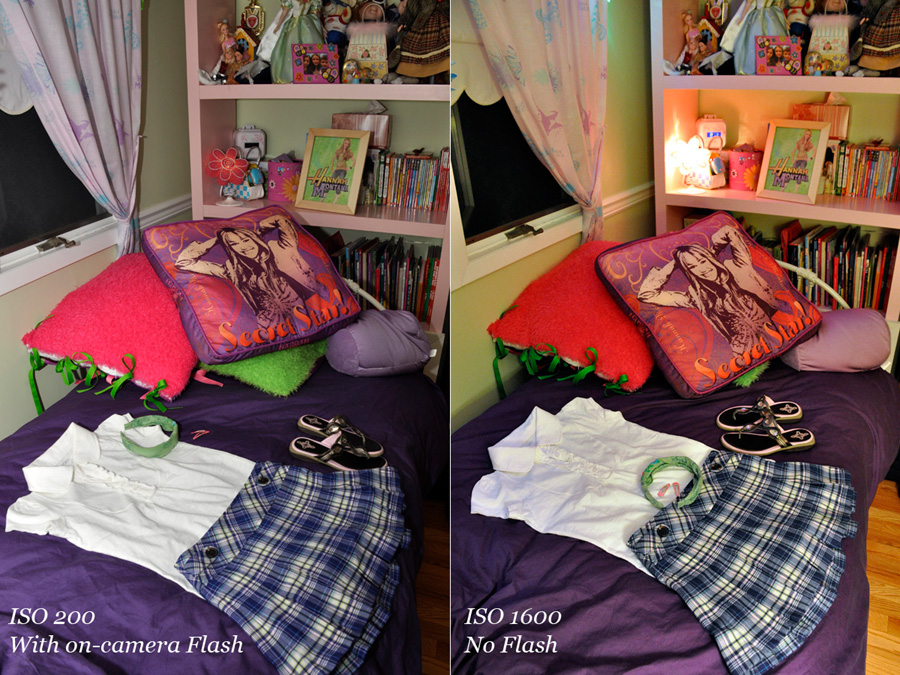
Boost ISO ComparisonSometimes the best indoor photos are taken without flash. Natural lighting is, well, so much more natural. The photo on the left is taken at ISO 200 with my built-in flash. The colors are accurately represented. And the noise (grain) is tight and sharp. But compare it to the photo on the left. Look at how you can see the night light and almost read the numbers on the clock radio? You can even see the wood floor in the room. That’s because I did not use a flash and boosted my ISO considerably in order to get enough light to really make this photo work. I boosted the ISO all the way up to 1600. And the image is lit well because I used a very slow shutter speed, which allowed the ambient light in the room (the light in the shot, the light in the room behind me and the lights along the curtains) to record onto the CCD. The shot is certainly grainy, and the color is not as accurate as in the image on the left, but given a choice, I definitely prefer the right side. It has more dimension and life. Boosting your ISO makes the chip more sensitive to light, so you can shoot in lower light and still get the shot. In this case, my light level was so low, that even at ISO 1600 and with my aperture opened all of the way to let in the maximum amount of light through the lens, my shutter speed was very slow-just one quarter of a second (1/4). So I had my VC image stabilization feature on my lens switched on for this shot to be sure I could hand-hold the camera without getting blur.(Left: 18mm; F/9; 1/60th sec; ISO 200; flash fired. Right: 18mm; F/6.3; 1/4th sec; ISO 1600; no flash).

Window Light Portraits

DSC_0628_RT4x6jpg

A few things to keep in mind when taking a portrait of a person or pet by window light:

ONE: Natural window light usually means wide open apertures and slower shutter speeds, so consider boosting your ISO if necessary, be sure your anti-shake mode is on, or use a tripod to prevent camera shake.

TWO: The closer you are to a window, the more dramatic the shadow on the opposite side of the face will be. Positioning your subject further from a window means softer, more even light.

THREE: You can actually stand in front of the window and position your subject facing the window and it won’t cast a shadow! This results in very flat lighting on the face. Four, shoot by a window even if it is overcast or there are soft sheer curtains. The light will be beautiful.

Guest Post at Elementally Speaking

BALLERINA

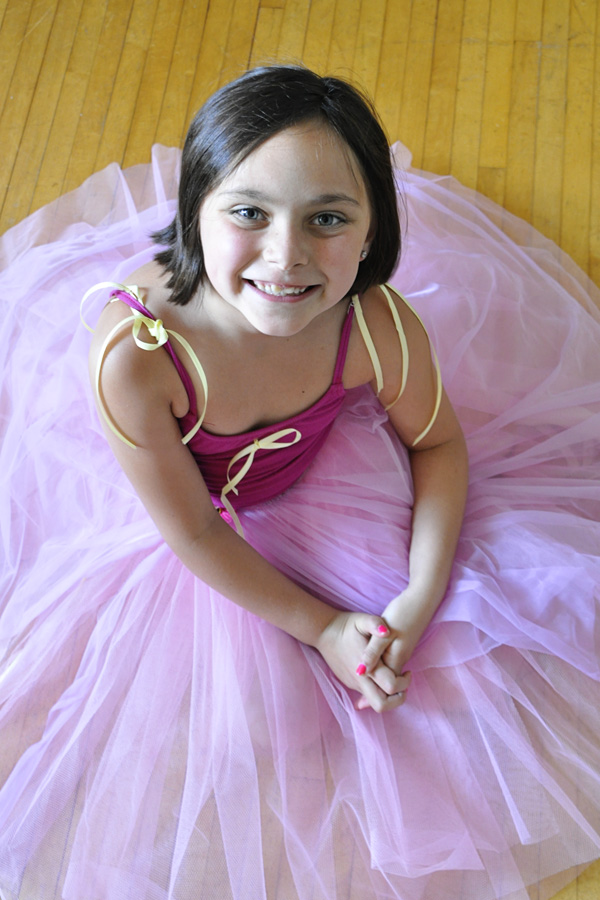
My friend CrisDee over at Elementally Speaking asked if I would guest post for her site where she shares with you ideas for creating, capturing and keeping family memories.(see the post below, or at http://elementallyspeaking.wordpress.com/2009/07/06/new-feature-photo-tips-from-stacie-errera/Thanks Cris!)

When it comes to our children’s stage performances, it is very difficult to get great shots unless you have total access during a rehearsal. The mistake most people make is to take photos from their seat in the auto mode.  If you do this, the flash will go off and you’ll get a dark stage and very well lit heads of the people in front of you.  So sit back and enjoy you child’s live performance with your eyes rather than through your camera’s viewfinder (I know, any of us shutterbugs find this an almost impossible suggestion!).Instead, concentrate on getting a nice shot of your child in costume by venturing back stage during rehearsals or prior to the performance.  I checked on my daughter the day before her recital and saw her costume for the first time.  I was thrilled when I saw the light streaming in from the windows behind the back stage curtains.  I asked her to sit down for a moment with the side of her face parallel to the windows to get nice side lighting on her face.  I then crouched down just a little so that I could see her ballerina skirt spread all around her and her big happy smile.  This point of view also let me include some of the wood floor that her pretty feet danced on the next day and one that really gives the viewer the true picture of what was happening when I took the photo.  Find a place in the environment that has some windows and position your actor or dancer so that the light brings out the detail in the costume and a highlight in your child’s eyes.  Don’t get too close to the window as the light will be too harsh.  Instead, move a few feet or more away from the window for an even light.  I always try to not use the flash and opt for natural light whenever possible.