Windows Are Your Best Friends for Better Portraits

As we start to move towards reuniting with families, consider a more formal portrait of your long-awaited get togethers.

Many of my portraits, candid or posed, are taken by big bright windows as they provide a beautiful soft light on my subjects. And, because I really have a love/hate relationship with my flash and try to avoid using it when much better light is available.

In this photo, the grandchildren gathered around grandma facing the window straight on. Even the dog got in on the action at the moment I clicked the shutter release, but due to my slower shutter speed of 1/25th sec, she is blurry, but I like the story behind it, so I do not mind. I was fairly close them, standing between them and the window, so I used a wide focal length of 32mm. Because of the focal length setting, and stopping down slightly to f/4, I was able to keep the boys behind grandma in relative sharp focus. Stopping down yet again to f/5.6 or even f/8 would make them 100% sharp.

I love the bright eyes that the window light provides as they looked up slightly to my camera lens. It really makes their eyes and smiles pop!


Getting Bright White Snow-Day Photos

A common problem when taking photos in the snow is that they come out a little grey and dreary. This is because the camera sees such brightness that it tries to compensate almost as if putting on sunglasses; and the white balance tries to make white a neutral grey. One way to fix this is with exposure compensation which adds light to the scene.

By adding exposure to the scene, you force the camera to overexpose just a bit. I usually start with +0.7 in snow and then either go up to +1.0 or down to +0.3.

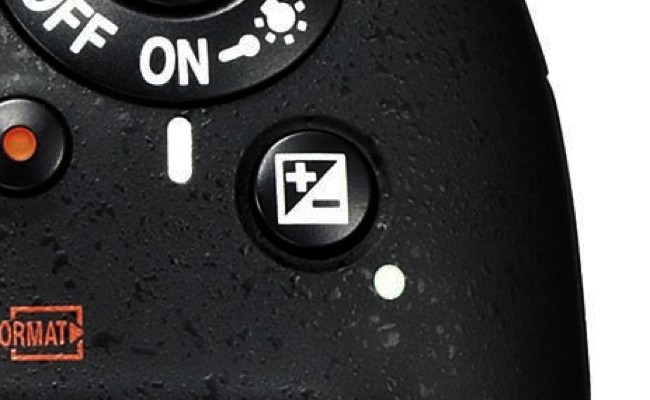
The exposure compensation dial on your DSLR or mirrorless camera can be used in any mode except “green box” program. It is usually found on top of the camera and shows +/-. Simply hold it down and move the thumb wheel left or right to add (+) or subtract (-) light. On your iPhone, touch the screen on the subject’s face and slide the sun icon up a bit to add light to make the shot a less grey. BTW, this tip also works at the beach.

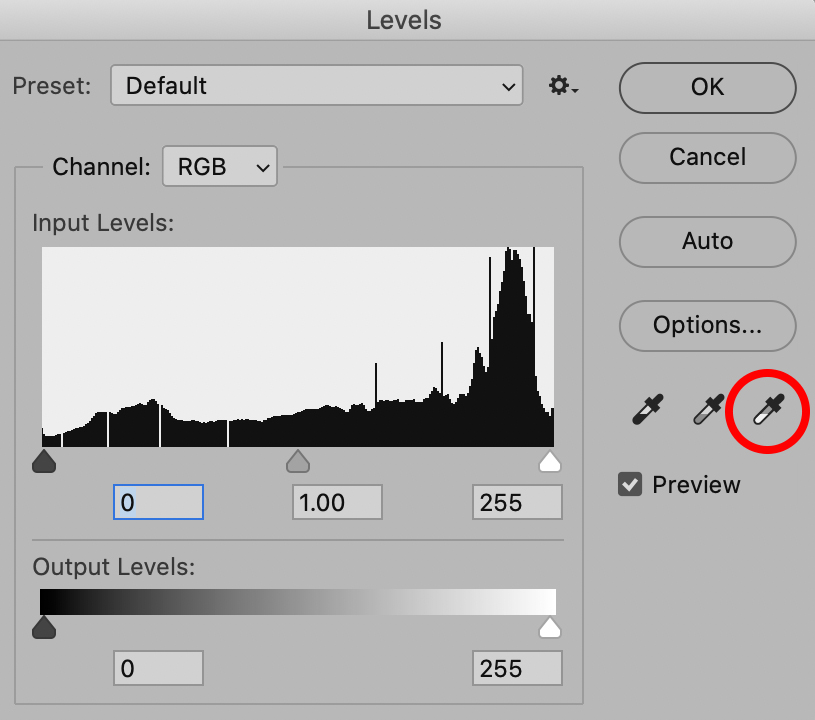
In photoshop, I may brighten the image by about 10-20%. Another trick to ensure white is white in photoshop is to use image>adjustment>levels. Then select the eye-dropper on the right (white) and click on something in your image that should be 100% white. This is a great way to correct images where the color isn’t just right and I find it really helps with skin tones.

Another way to get brighter winter portraits is to use flash. I will cover this next week. Enjoy the snow days of February and March!


Using a Telephoto Lens to “Flatten the Image”

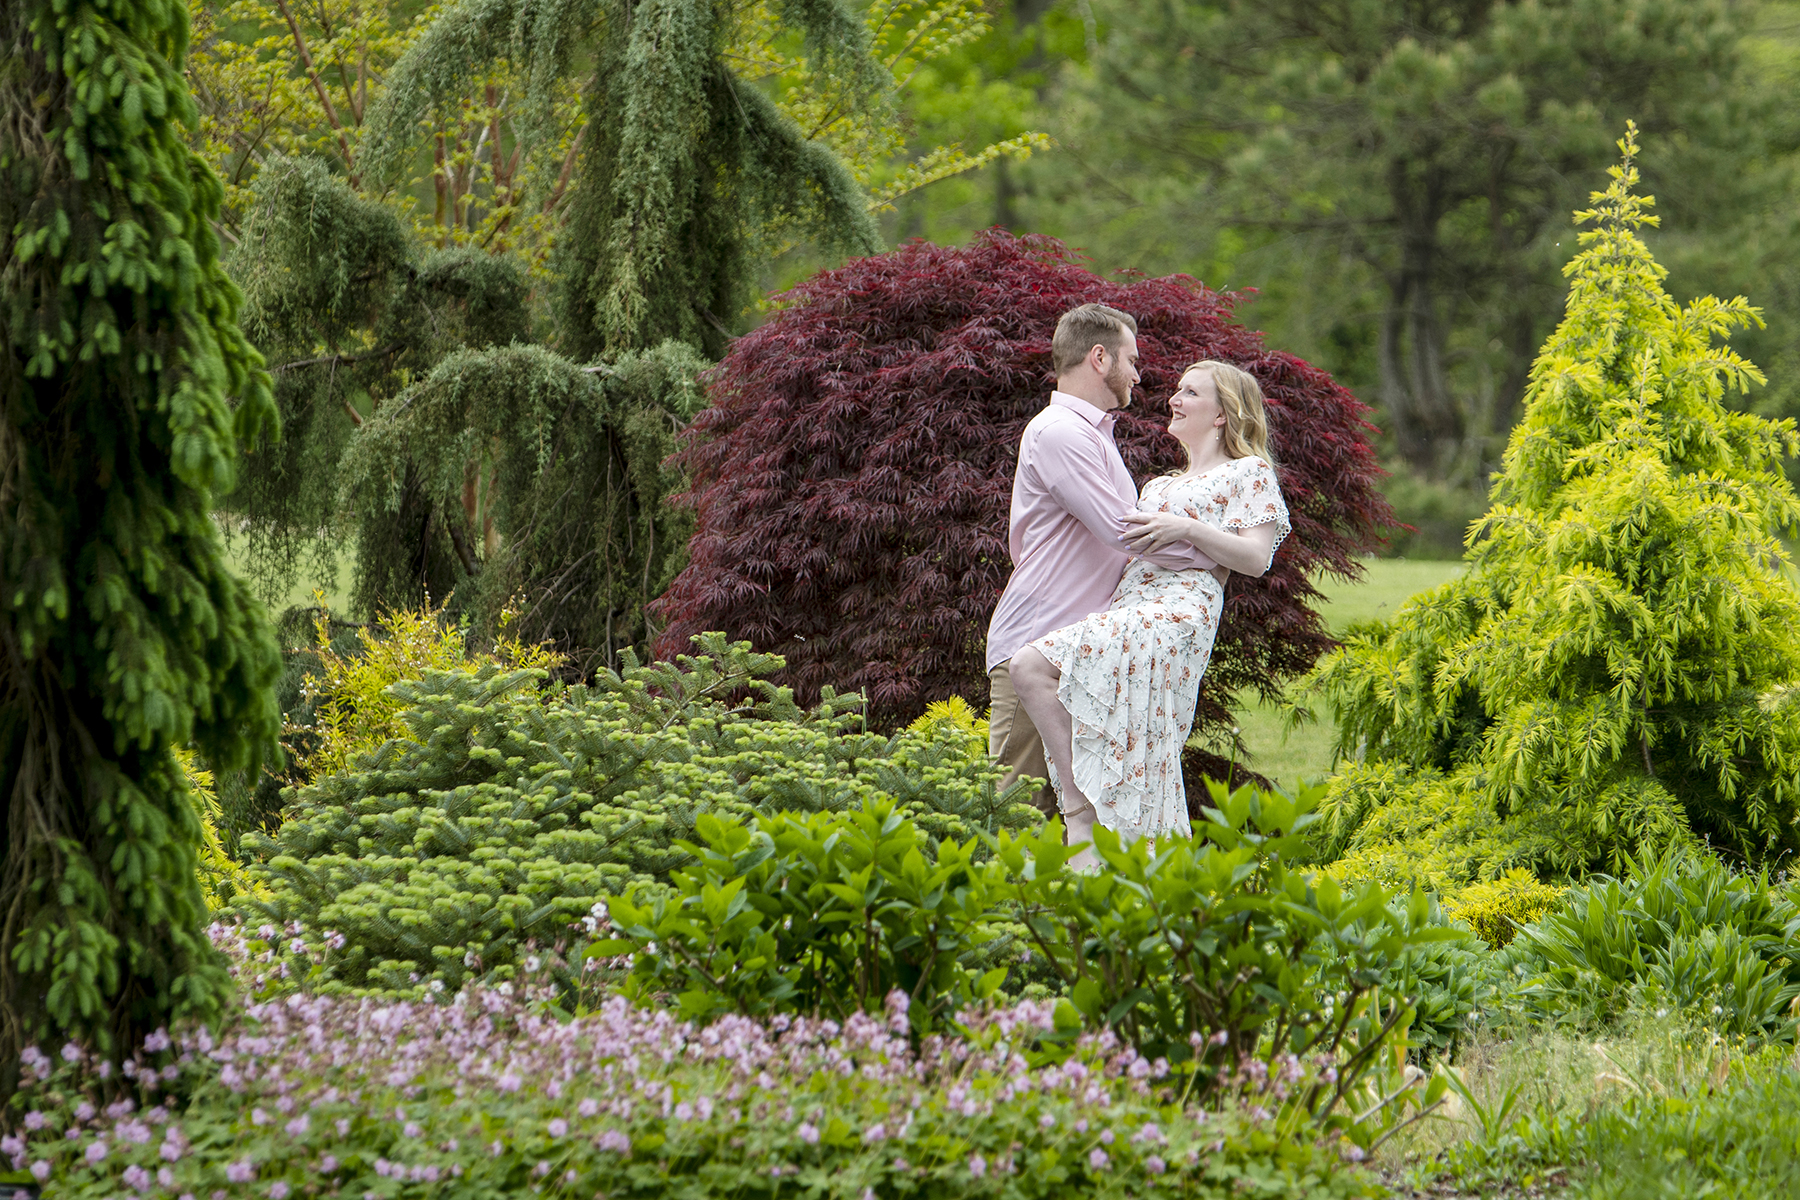
Flattening the image, or compressing the image, is a nice result achieved when you use a telephoto lens and are situated a distance from your subject. I used this effect to make a romantic engagement photo in the Bayard Cutting Arboretum of my newly engaged niece and her fiancé.

The trees in the distance appear much closer than they actually are. And all the “layers” of background objects appear large and stacked closed together. The closest and furthest objects fall out of focus due to the depth-of-field. I like the compression effect as it gives a very clean and almost painterly feeling to the background that might otherwise be too distracting and take away from the subjects in the frame.

This post by photographylife.com has a great explanation of the effect: “This combination of long lens and camera-to-subject distance gives the viewer the impression that distant objects are larger than they actually are. As a result, it gives the appearance that the background is pulled in closer to the subject. The opposite effect occurs when you use a wide angle lens. When we use a wide lens, we tend to stand much closer to our subjects compared to a telephoto lens. Because of this relative closeness, near objects will look proportionally larger than objects in the distance. As a result, the background elements become much smaller and seem farther away.”

I used a moderate telephoto lens, the Tamron 70-210mm F4, on a crop-sensor camera at 170mm, so my effective focal length was 255mm. I stood a distance away and actually used hand signals as they couldn’t hear me. The effect will be more dramatic by standing even further away and using a 300mm or longer telephoto setting. Next time you are headed out to shoot, bring along your tele lens to experiment with compressing the image.

Capture Silky Smooth Moving Water

Water is a compelling photographic subject. And how you capture it makes an impression on the viewer. Freezing the action for crystal clear water droplets from a crashing wave or pool splashes conveys power and energy. Slowing the motion down to create a milky white stream of water creates a more serene picture.

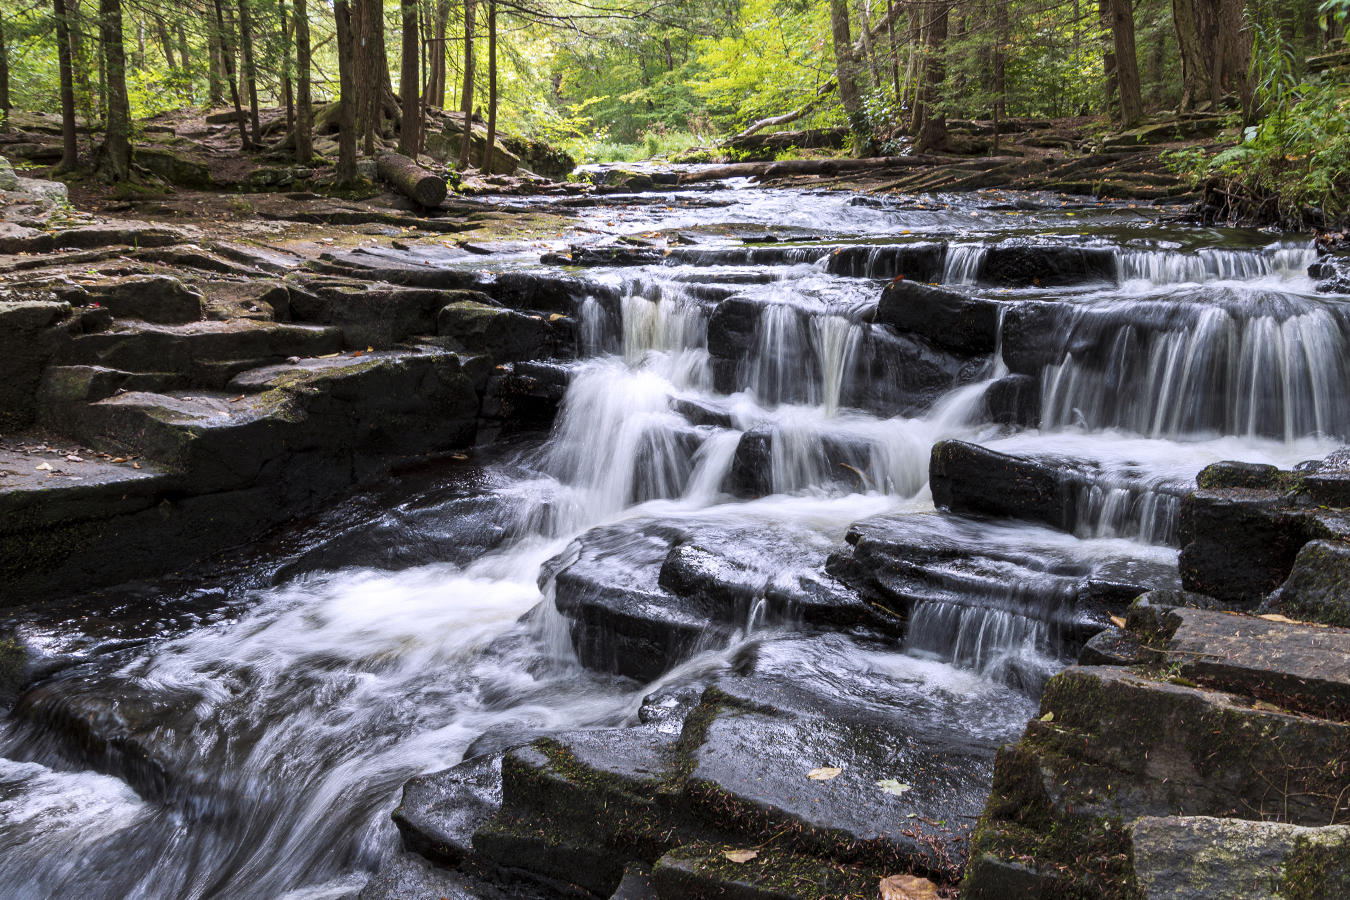
In this photo taken on the Little Falls Trail in Promised Land State Park, Poconos, PA, I hiked in mid-morning with my 18-400mm all-in-one lens as well as an electronics cable release designed for your camera and my travel tripod, two must-have accessories to create silky water fall action. Getting as close down and into the flowing water as possible creates a more dramatic perspective.

Settings are very important. First, set your camera to aperture priority and choose an aperture that will give you deep depth of field (between F11-F22 is ideal) so that your foreground to background will be in focus. I used F11 here. Next, select ISO 100. Now look thru the viewfinder and see if your shutter speed is below 1/15th second (I shot my image above at 1/6th second). You can change your aperture to make the shutter speed faster or slower. If you move the aperture from F11 to F16, the shutter speed be slower. If you open up your aperture to F8 to let light more light in, the shutter speed will be faster. Start shooting to see your effect and change your aperture until the image looks the way you want it to.

Since you will be shooting at slow shutter speeds below 1/60th second, you will not be able to handhold the camera. You must use a sturdy tripod and a cable release to ensure there is no camera shake.

The three settings involved in creating an image of a waterfall are referred to as the exposure triangle. The ISO, the aperture and the shutter speed all work in concert to create the effect. So your constant will be your ISO. The second that you will work with is your aperture. Opening or closing the aperture will change the shutter speed to be faster or slower. The shutter speed is ultimately the setting that will either freeze the water (faster shutter speed) or create the silky effect (slower shutter speed).

And the last tip for any landscape photo is to focus about a third of the way into the scene. This will give you the best results for foreground to background focus.

This tip is a good self-assignment for any season. So, find a park with waterfalls within driving distance and head out with your wide-angle lens, tripod and cable release.

Quick Silhouette

Exp Comp(-2.0)_SAE_3640There are several ways to capture silhouettes. I find one of the easiest is to use your exposure compensation function, the same feature discussed in the previous post. The image above was shot at -2.0, under-exposing the image by two stops. The sky is a rich color, and the couple on the beach swing is completely black. Below, you will see variations of compensation (0, -1.0 -2.0 and -3.0) of the same scene. Next time you’re shooting around sunset, take several images of your subject that has strong identifiable lines at different exposure compensation settings until you find the one that best suits your vision.

Exp Comp(0)_SAE_3637

Exposure Compensation 0

Exp Comp(-1.0)_SAE_3639

Exposure Compensation -1.0

Exp Comp(-2.0)_SAE_3640

Exposure Compensation -2.0

Exposure Compensation -3.0

Exposure Compensation -3.0


"My Photo Are Too Dark" — Solutions for Common Problems: Part 2

_DSC8231_RT

In my last post (so long ago, I apologize but summer seemed to have gotten in the way), I covered easy solutions for blurry photos. The next most common problem is dark photos (i.e., under-exposed). While the most logical answer is there just is not enough light, there are other reasons for dark photos.

Problem: You are using the flash but the subject is still dark. Reason: The subject is too far away. The built-in flash on your camera can safely cover a distance of about 10 feet or so. If your subject is well beyond that, chances are it cannot be lit by your flash. Solution: The answer in this case would be to move a little closer. (You can also try raising your ISO to give your flash some more distance coverage).

Problem: The background is really bright and the camera’s meter is fooled. This is called a “back-lit” situation. The meters in today’s cameras are excellent, and you have the choice of several metering patterns to help you achieve your desired result. However, there are still situations like back-lit where you camera’s meter is fooled and gives you the wrong exposure for your subject. When the background is overly bright, the camera “puts on a pair of sunglasses” by closing the aperture down a little to let in less light, resulting in a nicely exposed background and a darker subject.

Examples of back lit situations:

  • in front of a picture window
  • at the beach or pool
  • on snow
  • when shooting from below up against a bright sky, etc.
  • under an overhang (like a stadium with field in the background)
  • The sun is behind your subject

Solution: 1 My favorite option is to use the + exposure compensation (covered here and here). This +/- button usually positioned near your thumb is one of my often used adjustments since you can quickly darken or lighten a subject. By adding (+) .3 to 1 full stop of light by dialing towards the plus side (see your instruction manual to see just how your camera works), you can trick your camera into removing the sunglasses and get a perfect exposure on your subject. By bracketing (taking several shots at several different exposure compensation settings) you are sure to get the proper exposure.

Solution 2: A second solution is to pop up the flash and fill in the subject.

Solution 3: Another way to get a good exposure in a precise area is to switch the camera’s metering pattern to spot metering. Most of the time, you are most likely shooting in the camera’s matrix mode that reads several areas of the image and gives you an exposure based on a lot of data built into the camera. This pattern works well much of the time. But the camera also has a center metering pattern where a smaller area is read and the exposure is based on that area. And even smaller sliver of the image can be measured by suing the spot metering mode (the rectangle with a small dot in the middle is the symbol for this pattern). Make sure the dot lays over the area of your subject you want properly exposed and then take the shot. If you need to recompose your image after taking the reading (dot on subject), then hold in the AE lock button located near the +/- button until you have finished taking the photo. Breaking out your camera’s instruction manual will give you the exact steps to set spot metering and to use AE lock.

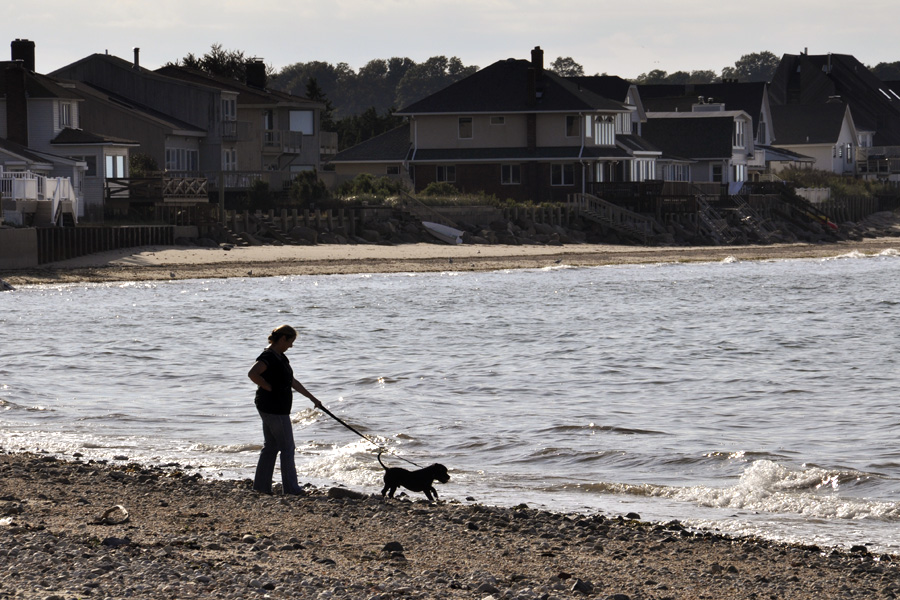
In my example above (a perfect shot to end the summer), the child’s face my have been under-exposed, or dark, due to the brightness of the sky, surf and sand. But by adding 2/3-stop of light using the +/- feature, I was able to get a great exposure on her cute face.

Shooting Against a Bright Background Fools Your Camera’s Meter: One Easy Answer Is A Quick Exposure Compensation Adjustment

exposure comp_snow3
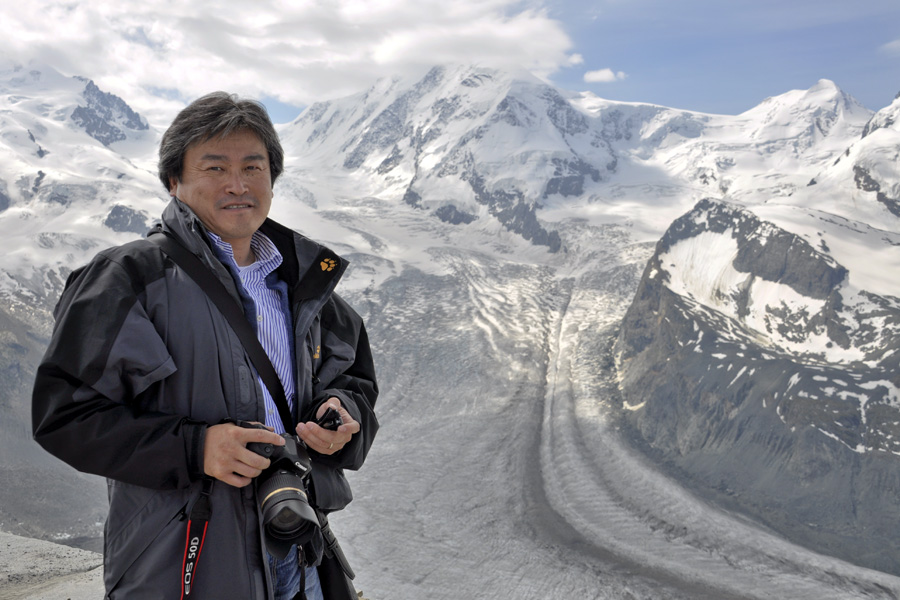
On my recent business trip to Switzerland this month, we had the opportunity to sightsee for two days. Our tour took us to an amazing view of the Swiss Alps. A short train trip on the Matterhorn Cog Railway from the mountain town of Zermatt brought us to the Gornergrat where we were met with a panoramic view at 3131 meters above sea level. This astounding view of 29 peaks, each over 4000 meters and including the Matterhorn at 4478 meters, offered up the chance for our small group of 25 to take thousands of photos. We each took turns taking photos of each other and quickly discovered we needed to adjust our camera settings to compensate for the extremely bright background. In this case, the meter saw that much of the frame was filled with white, so the camera “stopped down” the aperture to let in less light (sort of like squinting in bright light). However, this made the subject’s face quite dark. To compensate, I moved the exposure compensation setting to +1.0. I then pointed the camera at my colleague, held the shutter release button down halfway to lock in the focus, and shifted the camera so that I could capture Yuki in front of the Klein Matterhorn. This tip is useful when shooting against any bright background such as snow, sand, water and bright windows, all which lead to backlit situations. So keep this in mind as you travel this summer or spend a day at the beach or boating.

Silhouette Photos Are Easier Than You Think

silhouette_bball

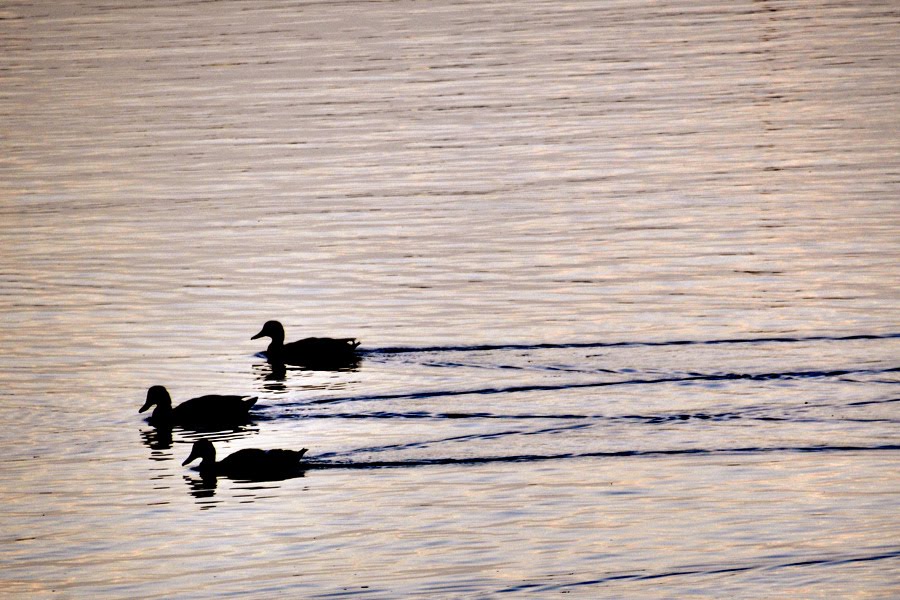
Silhouettes are some of the most dramatic images. Who doesn’t love the silo of father and child walking away from the camera holding hands; or dad lifting a toddler high above his head against a blue sky; or an iconic skyline with a beautiful sunset backdrop. I could go on and on with examples we can instantly picture in our minds…palm trees, mountain ranges, large mammals atop a hillside, swimmers getting ready to jump into the lake. You get it. And to get the shot, it is actually very easy. My first example is not the greatest composition due to the distracting fence that surrounds the basketball court, but it clearly shows the subject and all details as black silhouettes. To take a silhouette photo, it helps to remember how the camera makes a proper exposure. When the meter reads very bright light, it stops down the aperture to a very small aperture, thus letting in less light. So if you point the camera at the sky, and lock in the exposure for the bright blue sky or brilliant sunset, the camera will pick a very small aperture like F22, letting in less light and therefore under-exposing your subject, which in turn becomes black. You can vary the effect by using your exposure compensation button (+/-) and taking shots a stop or two under and a stop or two over and pick the effect you like best. In my examples below, I metered off of the bright water and achieved the same effect. So next time it is a sunny day, crouch low so that your subject is against the bright background, meter for the sky and shoot away.

ducks _DSC4326_RT_150

Holiday Portraits Using the Night Portrait Scene Mode

nite_portrait_flash
I rarely use the scene modes on my camera, but the one I find myself using from time to time is the Night Portrait mode. This scene mode is the one with the icon featuring a person and star  or moon (see typical camera mode dial below). I use this mode when I want a person as my main subject, but the special lighting in the background, like Christmas lights, Times Square lighting, or a sunset, is equally important. In this photo, my subject posed in front of the town’s decorated gazebo and lit tree.
night portrait mode on dial
The Night Portrait mode sends out a burst of the flash to capture the subject and than makes the shutter stay open a little longer to capture the lighting in the background. The trick in this mode is to be sure both you and your subject hold still to avoid unwanted blur from camera shake or subject movement. In fact, my subject did move and her hands are slightly blurry due to the very slow 1/10 sec shutter speed required to achieve the effect. But the expression was just what I hoped for, so for me, it’s perfect. I boosted the ISO considerably—to 1000— and I opened my aperture to F/5, the widest setting for this situation, in order to make the lights softer in the background. Using the Night Portrait mode helped me take the guess work out of deciding how to set my flash and shutter speed and instead concentrate on snapping away until I got what I was looking for. So pose your kids in front of the tree or outdoor decorations, or position your family along the railing at sunset on your next cruise, set the camera to Night Portrait mode and see what you can get!

Boost Your ISO and Take Photos Without Flash

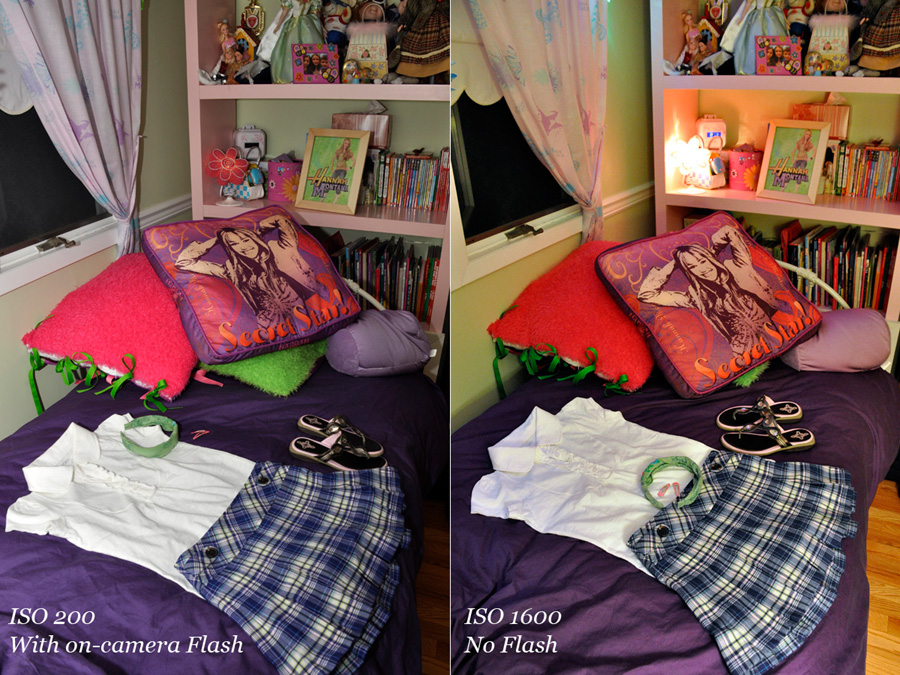
Boost ISO ComparisonSometimes the best indoor photos are taken without flash. Natural lighting is, well, so much more natural. The photo on the left is taken at ISO 200 with my built-in flash. The colors are accurately represented. And the noise (grain) is tight and sharp. But compare it to the photo on the left. Look at how you can see the night light and almost read the numbers on the clock radio? You can even see the wood floor in the room. That’s because I did not use a flash and boosted my ISO considerably in order to get enough light to really make this photo work. I boosted the ISO all the way up to 1600. And the image is lit well because I used a very slow shutter speed, which allowed the ambient light in the room (the light in the shot, the light in the room behind me and the lights along the curtains) to record onto the CCD. The shot is certainly grainy, and the color is not as accurate as in the image on the left, but given a choice, I definitely prefer the right side. It has more dimension and life. Boosting your ISO makes the chip more sensitive to light, so you can shoot in lower light and still get the shot. In this case, my light level was so low, that even at ISO 1600 and with my aperture opened all of the way to let in the maximum amount of light through the lens, my shutter speed was very slow-just one quarter of a second (1/4). So I had my VC image stabilization feature on my lens switched on for this shot to be sure I could hand-hold the camera without getting blur.(Left: 18mm; F/9; 1/60th sec; ISO 200; flash fired. Right: 18mm; F/6.3; 1/4th sec; ISO 1600; no flash).