Using a Telephoto Lens to “Flatten the Image”

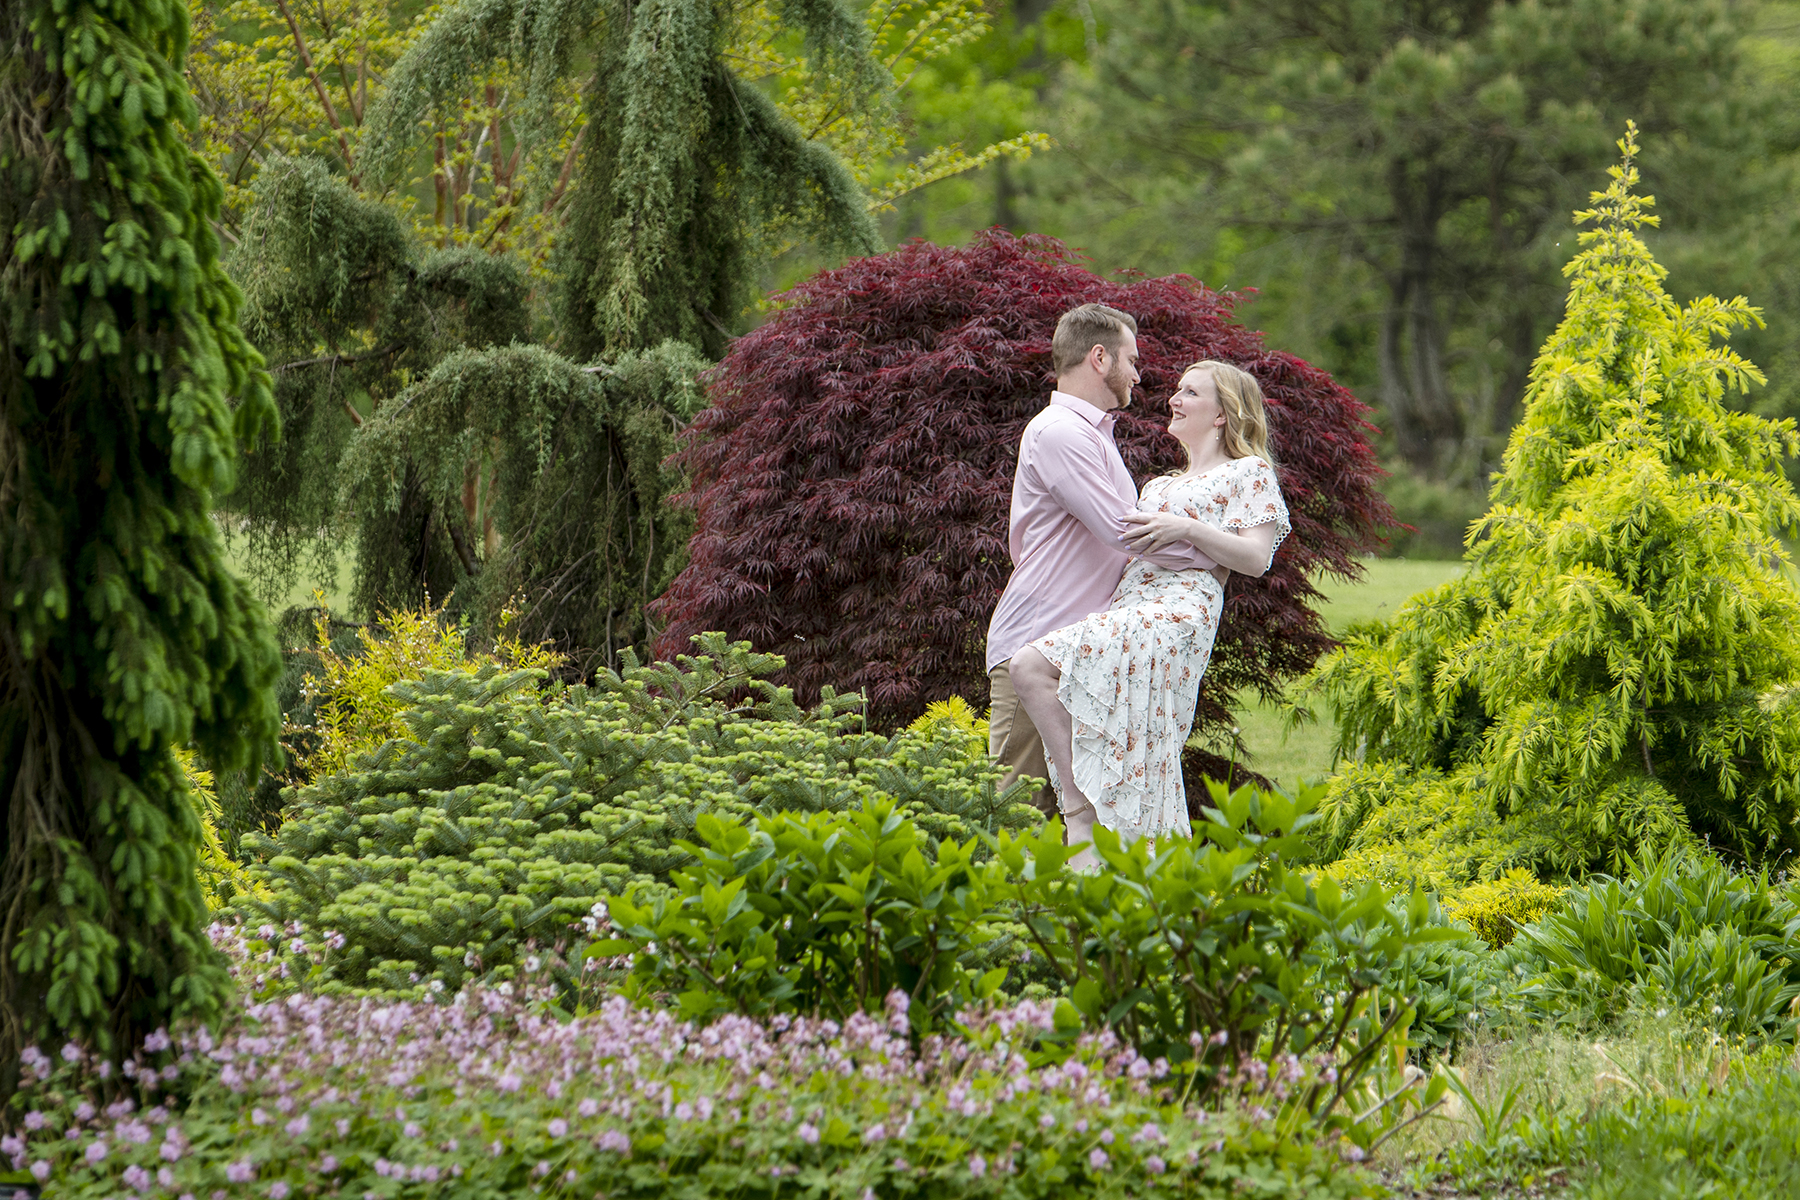
Flattening the image, or compressing the image, is a nice result achieved when you use a telephoto lens and are situated a distance from your subject. I used this effect to make a romantic engagement photo in the Bayard Cutting Arboretum of my newly engaged niece and her fiancé.

The trees in the distance appear much closer than they actually are. And all the “layers” of background objects appear large and stacked closed together. The closest and furthest objects fall out of focus due to the depth-of-field. I like the compression effect as it gives a very clean and almost painterly feeling to the background that might otherwise be too distracting and take away from the subjects in the frame.

This post by photographylife.com has a great explanation of the effect: “This combination of long lens and camera-to-subject distance gives the viewer the impression that distant objects are larger than they actually are. As a result, it gives the appearance that the background is pulled in closer to the subject. The opposite effect occurs when you use a wide angle lens. When we use a wide lens, we tend to stand much closer to our subjects compared to a telephoto lens. Because of this relative closeness, near objects will look proportionally larger than objects in the distance. As a result, the background elements become much smaller and seem farther away.”

I used a moderate telephoto lens, the Tamron 70-210mm F4, on a crop-sensor camera at 170mm, so my effective focal length was 255mm. I stood a distance away and actually used hand signals as they couldn’t hear me. The effect will be more dramatic by standing even further away and using a 300mm or longer telephoto setting. Next time you are headed out to shoot, bring along your tele lens to experiment with compressing the image.

Shoot From a Different Angle for a Meaningful Perspective

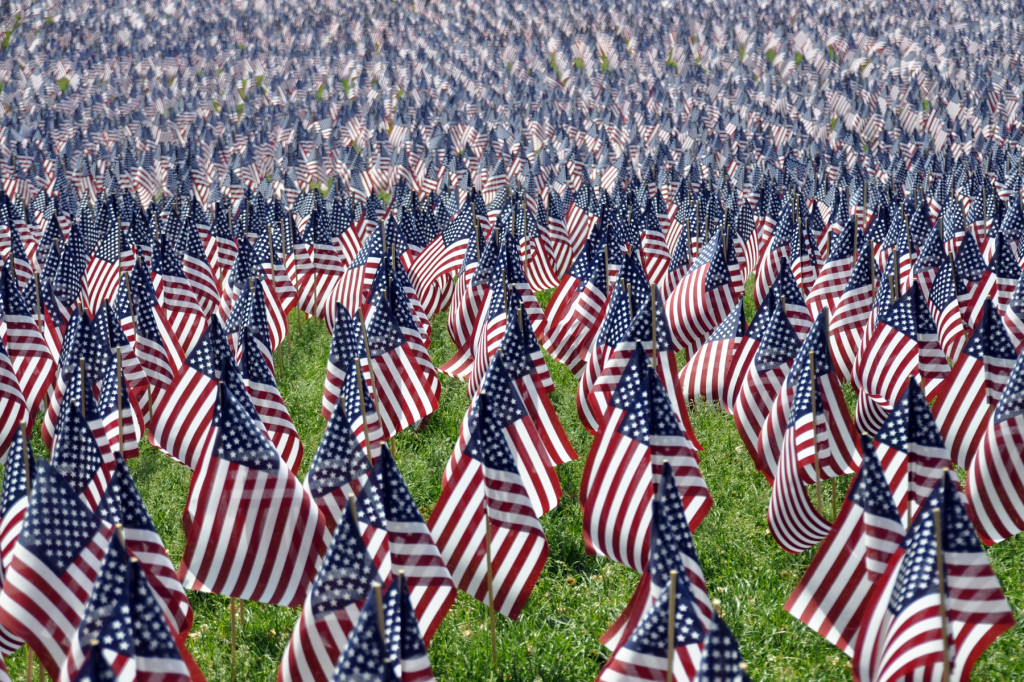
_DSC2061_RTWhile visiting Boston over the Memorial Day weekend, we experienced a moving memorial to the fallen soldiers of Boston: 20,000 flags in the middle of The Boston Commons. Each flag represented a Massachusetts citizen who died in wars and military conflicts during the last 100 years. By shooting low (with the camera nearly on the ground as I knelt in front of the first line of flags) I was able to eliminate the distracting background of visitors and keep the focus on this sea of flags that really puts into perspective the staggering number of lives lost. The 50mm focal length setting combined with a wider open aperture of f/5.3 helped to compress the flags to give the image a painterly feeling as the seemingly never-ending rows of flags dissolves into the background.

Take a Photo from A Worm’s Eye

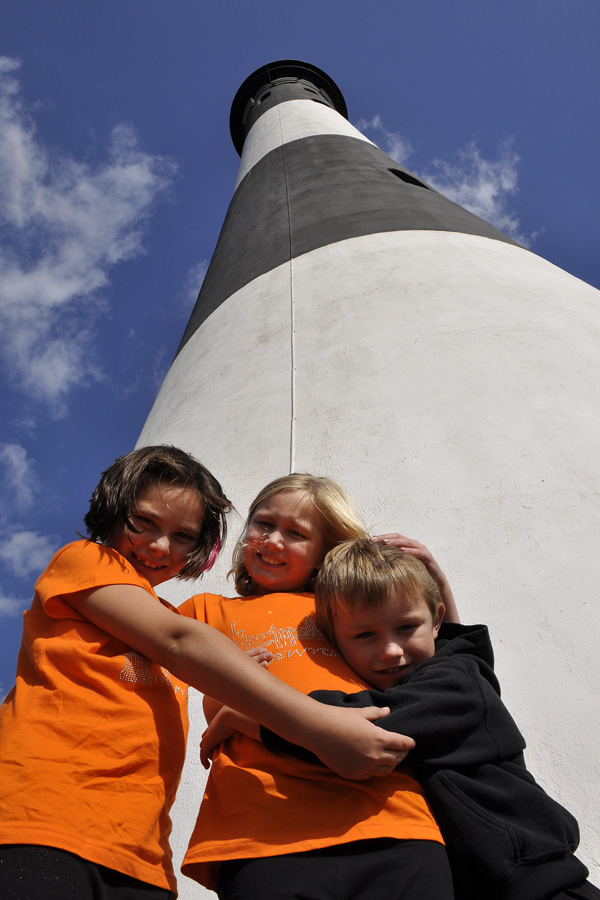
_DSC4840_RT

Getting low on the ground and shooting up towards your subject can create a dramatic effect. This is called a “worm’s eye view” since you are essentially viewing the subject just as a worm would. As opposed to a bird’s eye view, well, you get the picture. Now, I literally laid down on the ground and shot up to make sure I could get the full length of the lighthouse in my shot. However, crouching down can achieve the effect. So can raising your subject. For example, your subject is up on a ladder, or porch, and you are on the ground. Use your imagination to get below your subject. You will see how you can crop out distracting backgrounds, include more sky, or incorporate something special in the photo. You can also give the illusion of height, power, strength and more when you shoot upwards.

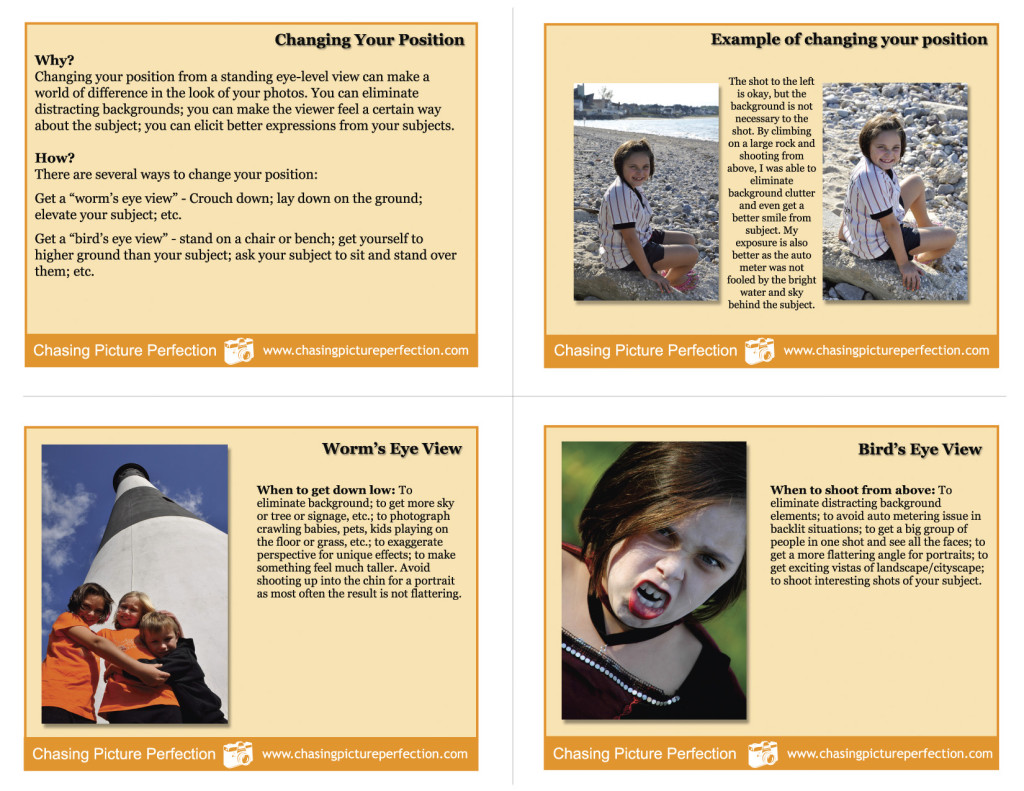
Free Photo Tips Card Download #3: Positioning

TIPS CARDS_Positioning_Layered.psd

Getting above or below your subject makes your images interesting. Download this card set here and add to set 1 and set 2. Printing it on photo paper is best so it is heavier weight (luster or matte) and add it to a D-ring to clip onto your camera bag. Enjoy!

Change Your Position for Better Photos

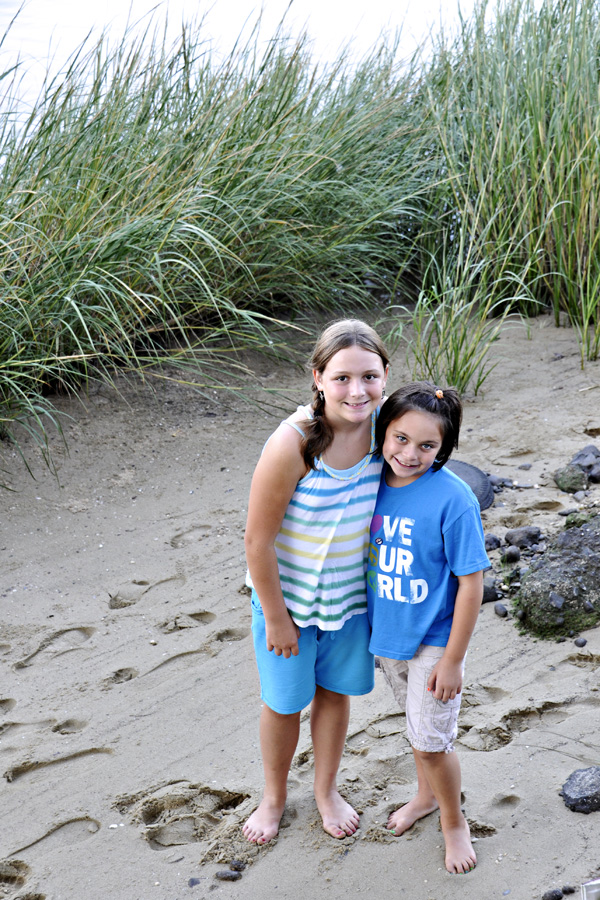
shoot from above
Just like changing the scenery can give us a whole new outlook and change our mood, so does changing your position when taking a photo. It is very common for all of us to just shoot pictures from a standing position, but this leads to somewhat boring images. We have all gotten a much better shot just by crouching down or standing on a chair or bench. Not only do you get a whole new perspective, but this helps to eliminate distracting backgrounds for a clean, more professional look. For this shot, I was standing on the bulkhead while my subjects were down on the shore, allowing me to give a real sense of where they are since I was able to show both the sand and the beach grass in the shot. Plus, the busy background harbor was now out of the shot. Look for the next photo tips card download about positioning yourself for better photos to come shortly (see previous photo tips cards: #1 here; and #2 here).

Add Your Point-of-View to Your Photos

Point-Of-View

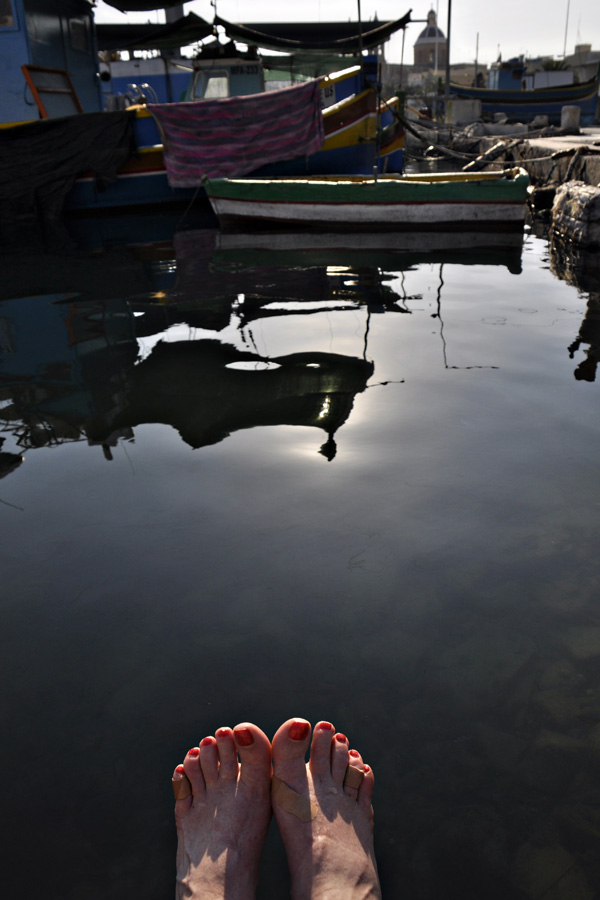
Every picture tells a story, right? I believe so. And a good photo makes the viewer see what you want them to see, experience something the same way you experienced it, or feel what you felt. When shooting, try to find those unique angles that tell your unique story. Here, while on my business trip to Malta in June, surrounded by 40 others carrying DSLRs with fabulous Tamron zoom lenses, I had only one photo of myself to prove I went to this place. So on my last day, a long grueling day of on and off the bus sightseeing, one where my shoe selection proved to be all wrong, I sat down on the edge of the harbor area, exhausted, and dipped my feet (covered with band-aids and white from baby powder I hoped would stop the burning) into the oily harbor water. But heck, it was Mediterranean oily harbor water. I took the opportunity to get a real “I was here photo” that tells my story of that day. At the end of a burning hot sunny day. But one I am glad I had the opportunity to experience. (18mm; F/8; 1/1000th sec.; ISO 200)