
When sunlight hits colorful fall foliage, it makes a stunning backdrop for your impromptu family portraits. The trick to getting the painterly background look that makes the subject pop off the background is to use a wide open aperture. The portrait here was taken at 70mm with an aperture setting of F/2.8. Focusing on the eyes, the background drops out due to the shallow depth of field into a painterly sparkle of fall colors. If your lens does not open to a fast aperture like F/2.8, use your telephoto lens at its maximum zoom, set the camera to aperture priority and choose the widest aperture opening (most likely F/5.6 or F/6.3) and step in a little bit closer. That combination will drop out the background for a similar look that makes a beautiful portrait suitable for framing and display on your mantle. 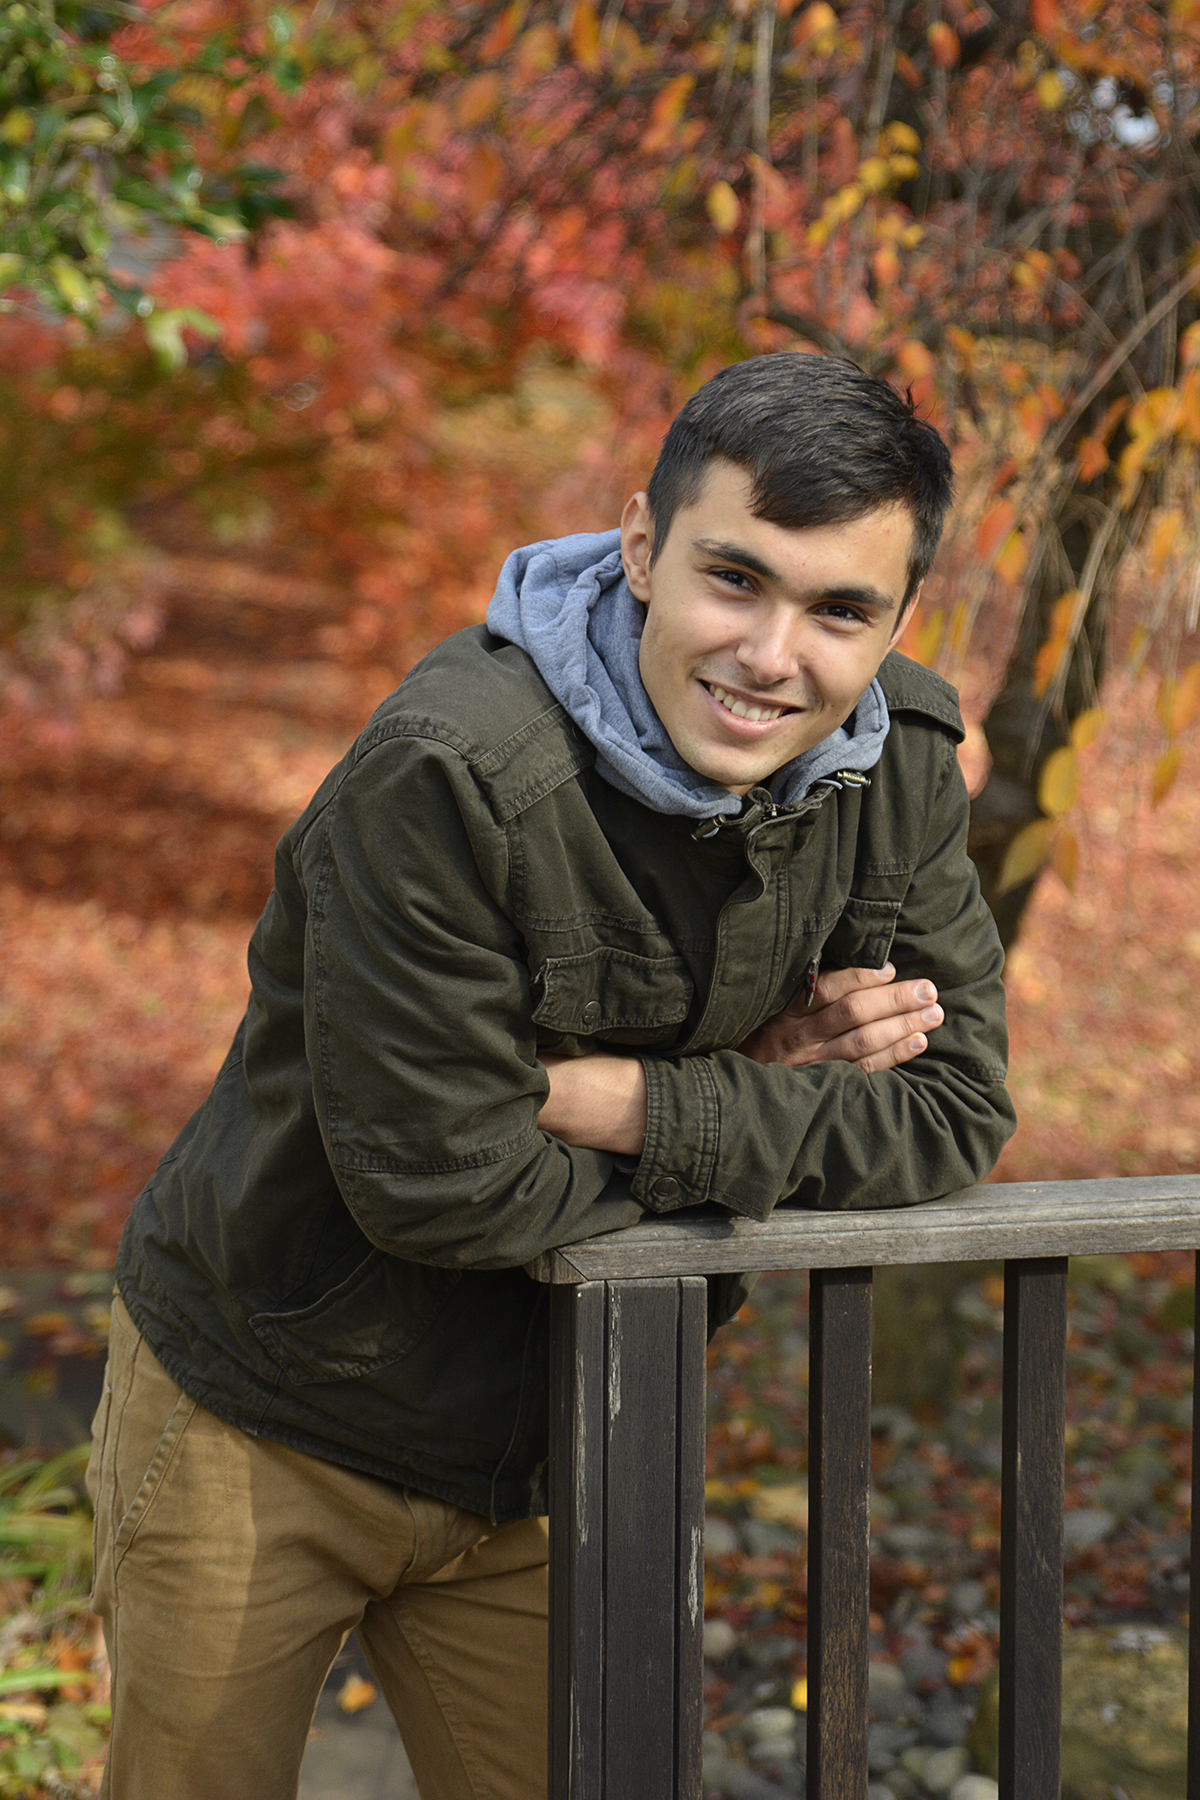
Tag Archives: wide open aperture
Changing the Look of Your Photo with Aperture Priority Mode
You can dramatically change the look of your photo by changing the aperture of the lens on your camera, which controls the depth of field. Depth of field is how much of your photo in front of and behind your subject is in focus. If foreground to background is all in focus, your depth of field is deep. If the foreground and background are out of focus, then you have shallow depth of field. Learning to control this function on your camera will help you to yield more professional-looking photos that let your subject pop off the image because it will be separated from the background. In the two example photos below, the one on the left shows shallow depth of field. The aperture was set to F/4.5 (a wide open aperture). The photo on the right shows deep depth of field and the aperture was set to F/16 (a small aperture).
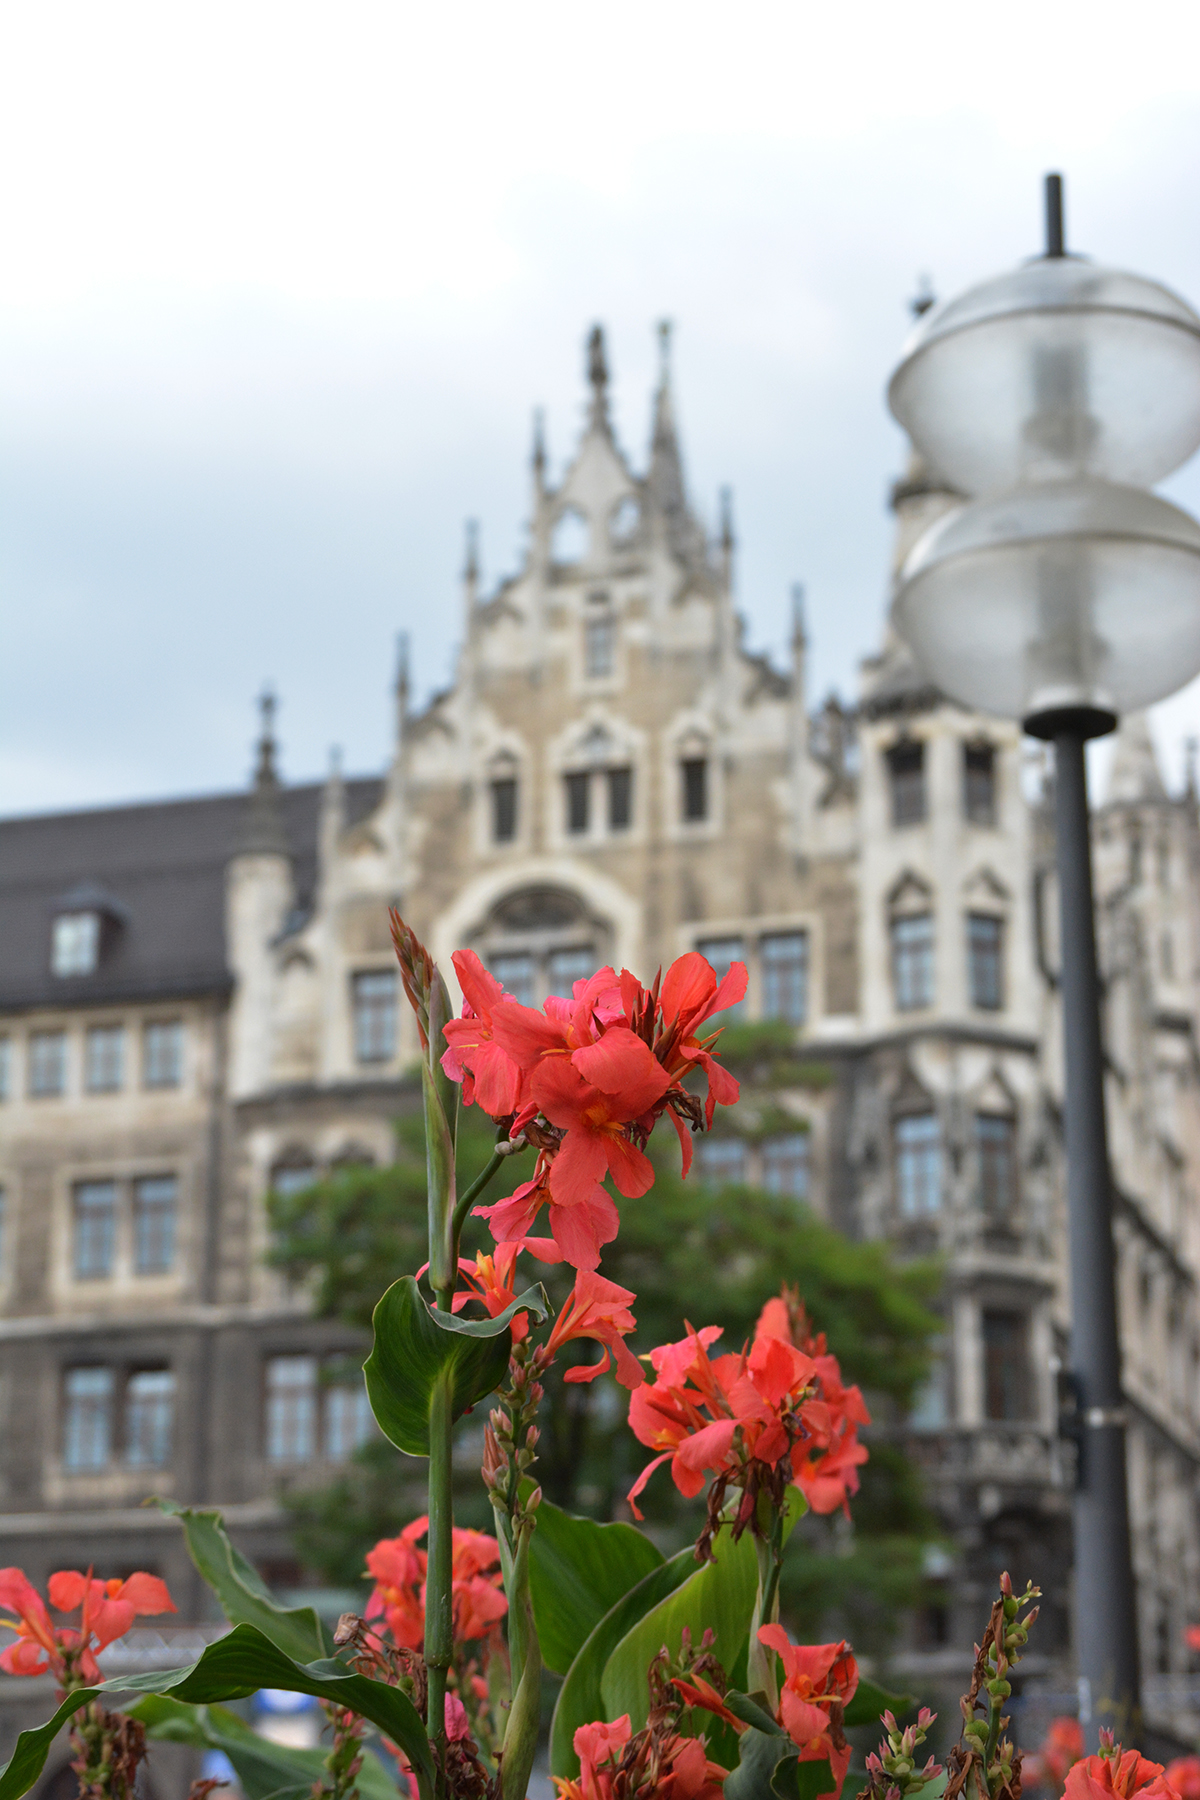
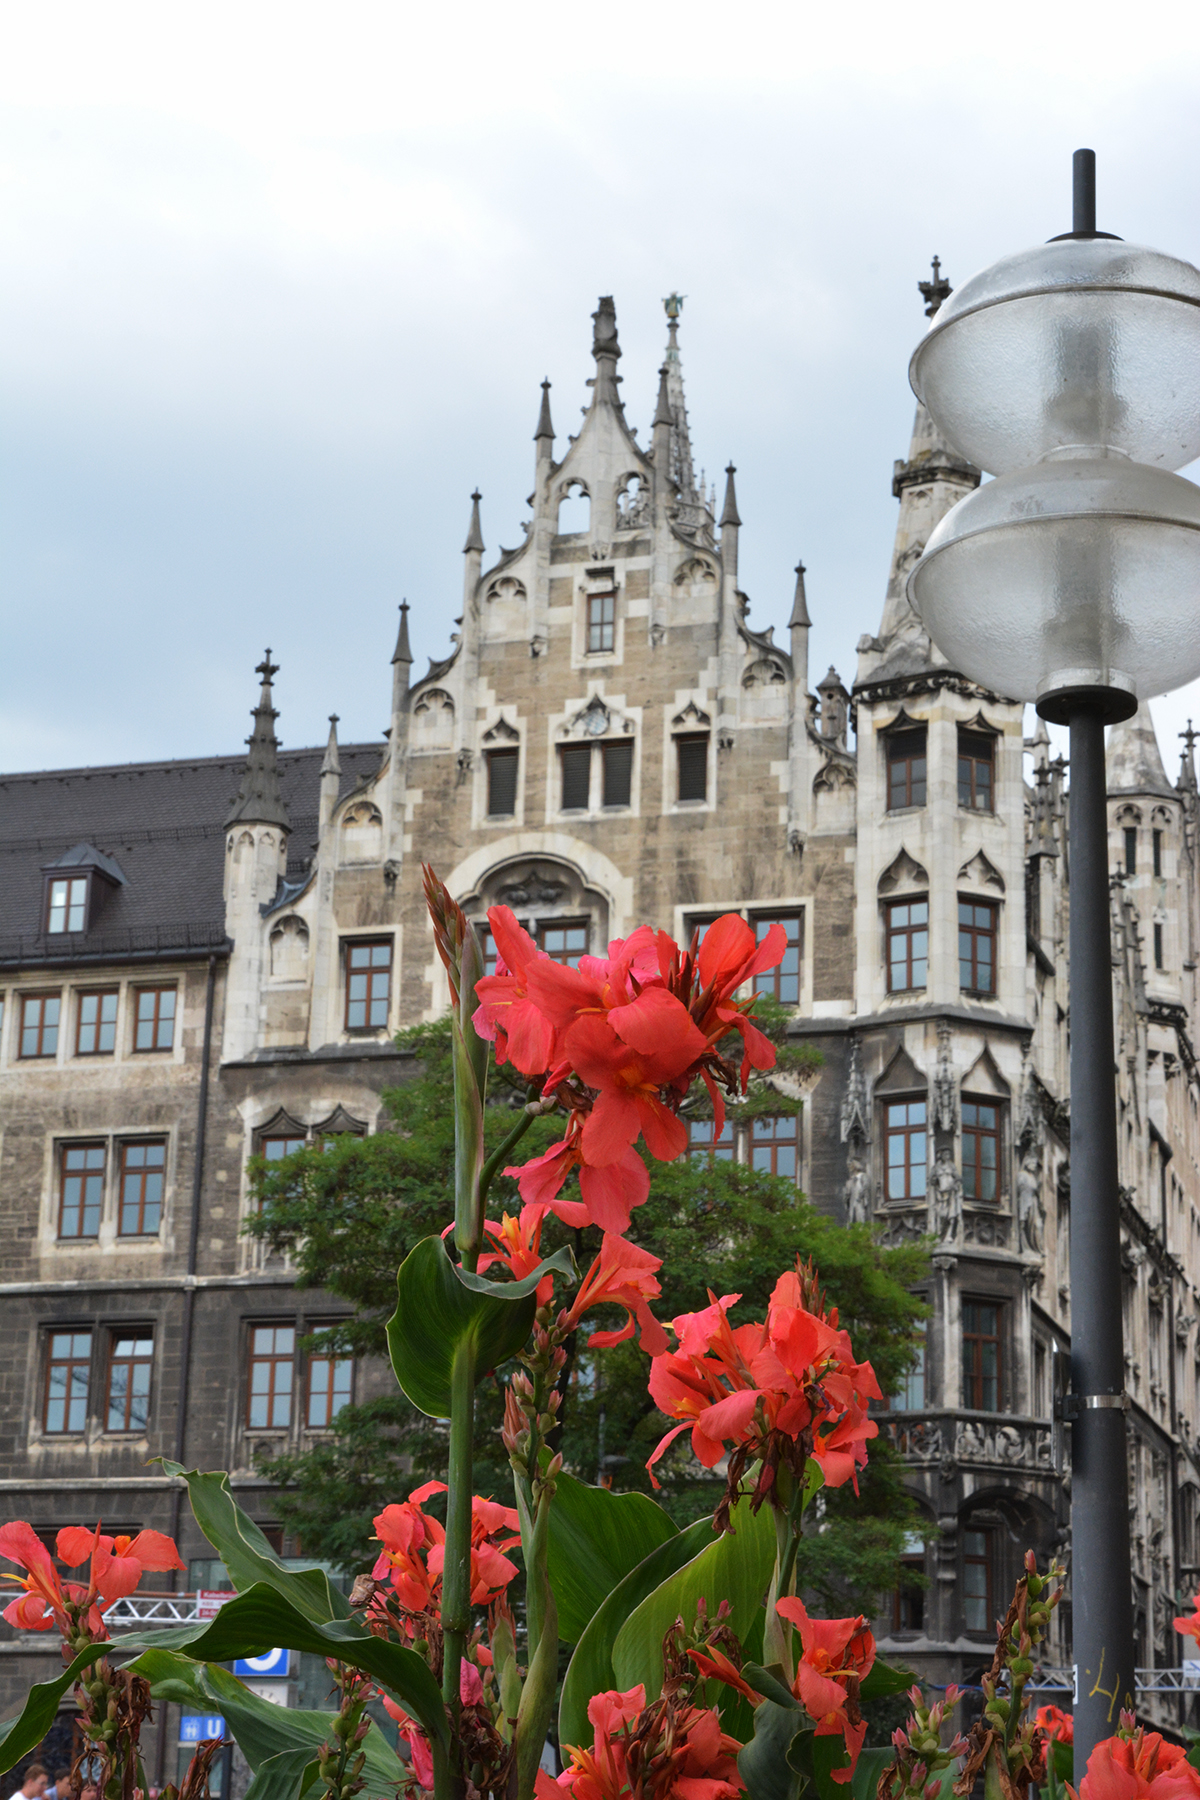 The aperture is easy to set on your camera by setting your camera mode dial to A (on Nikon cameras) and Av (on Canon cameras). Then use the thumb wheel to move the aperture number to a smaller or a larger number. The smaller the number, the more blurry the background will be like the above left photo. The larger the number, the more in focus both subject and background will be, like the above right photo.
This technique is particularly useful when shooting portraits. You want your subject to stand out from the background, especially if there are distracting items behind the subject. You can choose how blurry or sharp the background will be by experimenting with different aperture settings. To practice, shoot the same subject twice at the two extremes like I did above. Do this several times with different subjects each time you have your camera out until you feel comfortable that you can easily pick the aperture to get the look you want. See more examples below and don’t forget to download the photo tips card for your gadget bag to help you in the field.
-
- Aperture set to F/4
-
- Aperture set to F/8
-
- Aperture set to F/20
Natural Lighting for Mother’s Day Portraits
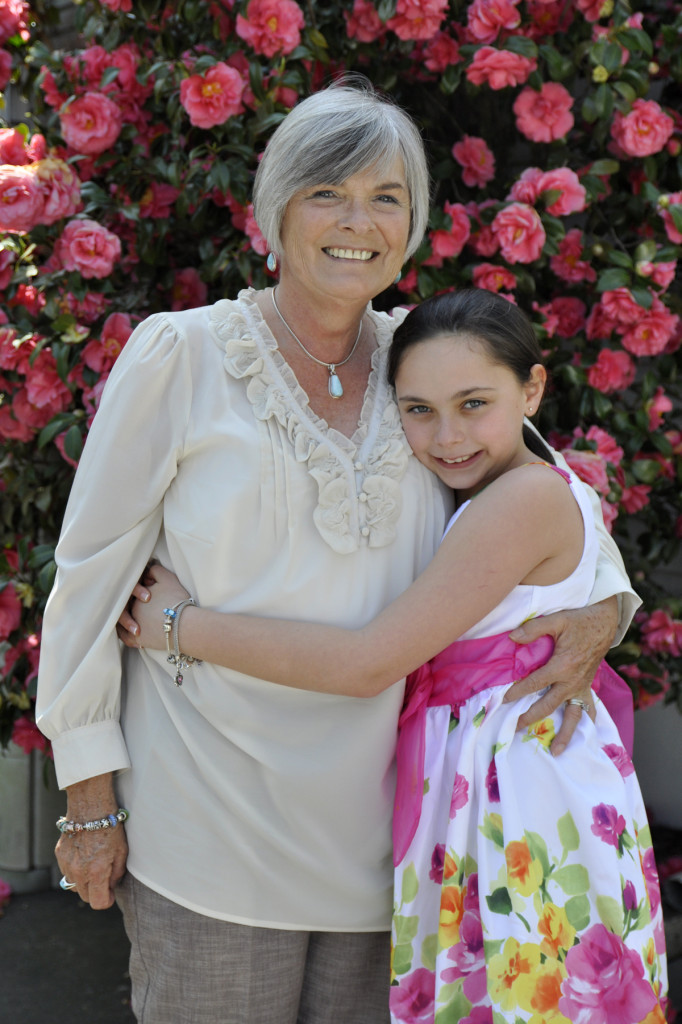
Before mom or grandma comes over for Mother’s Day (May 13th), think about a great spot in your yard to take a beautiful mother’s day portrait. Look for a spot that has open shade. Open shade will give you even lighting and really make the eyes sparkle. Great choices are in a doorway, under a covered porch, or under the perimeter of a shady tree. Position your subject just inside the lens of shade. Rule of thumb for positioning is if she can take just a step or two forward, and she is in sun the sun, then the step or two back is perfect! Too far back and you will lose some of the brightness and highlights in the eyes that the open shade provides. Try to get just a little higher than your subject so she looks up slightly towards your camera. Use a wide open aperture like F/2.8 or F/3.5 to blur the background. If you can use a tele zoom position, then your background will be even more blurred. So scout out your location and do a few test shots before your special guest arrives on Mother’s Day. Read more about open shade here and here).
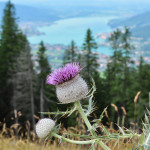
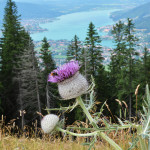
Shoot From a Different Angle for a Meaningful Perspective
 While visiting Boston over the Memorial Day weekend, we experienced a moving memorial to the fallen soldiers of Boston: 20,000 flags in the middle of The Boston Commons. Each flag represented a Massachusetts citizen who died in wars and military conflicts during the last 100 years. By shooting low (with the camera nearly on the ground as I knelt in front of the first line of flags) I was able to eliminate the distracting background of visitors and keep the focus on this sea of flags that really puts into perspective the staggering number of lives lost. The 50mm focal length setting combined with a wider open aperture of f/5.3 helped to compress the flags to give the image a painterly feeling as the seemingly never-ending rows of flags dissolves into the background.
Photographing a Spooky Jack O’Lantern
 Tonight is the perfect night to light up your carved pumpkin and snap a few spooky shots. I found that taking a shot a little bit after the sun sets, while there is still some light left in the sky, can make your pumpkin look more scary. The tree branches will be back-lit, which adds to the mood of the shot. Start by setting your camera to aperture priority and selecting the widest aperture your lens allows (F/2.3, F/3.5) and a low ISO (200 or 100). Next, put your camera on a tripod or other stable surface. Using a cable release or electronic remote control like I did will ensure that you do not get an blur when you press the shutter release button during your long exposure. If you have a lens with an anti-shake mechanism (like Tamron’s VC, Nikon’s VR or Canon’s IS systems), be sure to turn it off when using a tripod as it is counter-productive to use the stabilizer system in that situation. Then, shoot your pumpkin at a lower angle using a wide angle setting on your lens to get some of the trees in the background. You can add extra exposure if your background is too dark by using the exposure compensation dial and going to the plus side. This slows down your shutter speed even more. Your exposure will be somewhere around 15 seconds to get the soft glow of the jack o’lantern and the bluish sky in the background.


Happy Halloween!
"My Photos Are Blurry" — Solutions for Common Photo Problems: Part 1
 So while talking with friends who are all new DSLR owners this past weekend, we discussed the solutions for the most common problems people have with their photos. So of course, it sparked an idea for a blog post. Here is part 1: “My Photos Are Blurry.”
The reason for a blurry photo is that the shutter speed is too slow to stop either fast moving action or camera shake in low light situations. The faster action moves, the faster the shutter speed required to stop the action; the longer your lens setting (telephoto), the faster the shutter speed required to stop camera shake since the shake is magnified (think about looking through powerful binoculars and how hard it is to hold them without the seeing shake); and finally, in lower the lighting conditions, the shutter speed slows down to let in more light, making it harder to hand hold.
So what to do? First, you need to understand what the ideal shutter speed is for hand-holding to avoid camera shake. The quick answer to to shoot at a shutter sped that is no slower than the reciprocal of the focal length setting of your lens. So if you are zoomed out to 300mm to catch sports, nature, wildlife or candid portraits, the ideal shutter sped will be 1/300th of a second or faster to stop hand shake blur. However, with today’s stabilized lenses, you can shoot a 2-3 or even 4 stops slower with no resulting hand-shake. Second, understand that it is almost impossible for anyone to hand hold the camera at any focal length setting if the shutter speed goes below 1/30th of a second. Thirdly, if action is moving fast, like soccer or basketball, you will need a shutter speed of approx. 1/500th of a second. If the action moves even faster than that, such as car racing or horse racing, you will need to shoot even faster (1/1000th, 1/2500th, etc.(.
Solution 1: Open your aperture to let in more light and the camera will pick a faster shutter speed.
If you set your camera to aperture priority, move the aperture towards a wider opening (e.g., F/6.3, F/5.6, F/3.5) and watch your shutter speed get faster. Hopefully, you will be able to get a shutter speed / aperture combination that allows you to have a fast shutter speed for the action or zoom setting. Be mindful that with an open aperture, you have less depth of field, so precisely focusing on the critical part of your image is very important.
Solution 2: If opening the aperture does not give you a shutter speed high enough to action blur or stop hand shake from slow shutter speeds as a result of low light or long telephoto settings, then the next solution is to boost your ISO higher. A higher ISO, will automatically provide you with higher shutter speeds. While your photo might have a little more noise or not as vibrant of color, you will be able to shoot the image. (Some DSLRs have really great high ISO capabilities, so don’t be afraid to try higher ISO settings).
Solution 3 (and my least favorite): If neither solution above works, then you can try to increase the lighting in the scene. One way is by adding flash. Flash will certainly freeze action and eliminate hand shake blur (as long as you are not in night time portrait mode). While flash can lead to an artificial feeling in your shot, hence my reason for it not being my favorite, it can do the job effectively and send you home with images of the moment. Remember, however, that flash can only cover a certain distance, and is sometimes not allowed at certain venues, so solutions 1 or 2 or a combination of both may be your only choices to correct the problem.
The image above would have been completely different had I used flash. So I boosted my ISO to 1600 so that the little bit of light coming into the room could be captured naturally. My lens was zoomed to 60mm, making the magic shutter speed 1/60th of a second. However, with my stabilized lens, I was fortunate to be able to catch the image at 1/8th of a second, the fastest shutter speed I could achieve with the given lighting, ISO setting and open aperture (F/4). The VC stabilization allowed me to shoot 3 stops slower than what would be normally required.
And of course, a solution that works the best for low light situations is a tripod. As long as there is no movement in your shot, a tripod will stabilize your camera and let you shoot at rather slow shutter speeds. Tripods are the most essential tool for landscape and nature photographers since a smaller aperture like F/11, F/16 or F/22 are required to achieve deep depth of field, but shutter speeds are naturally slower.
Next time you are shooting in low light, shooting at a longer telephoto zoom setting, or shooting action, consider the solutions above and you should find your images will be sharp as a result.
Bring a Symbol of the Holiday Into Focus
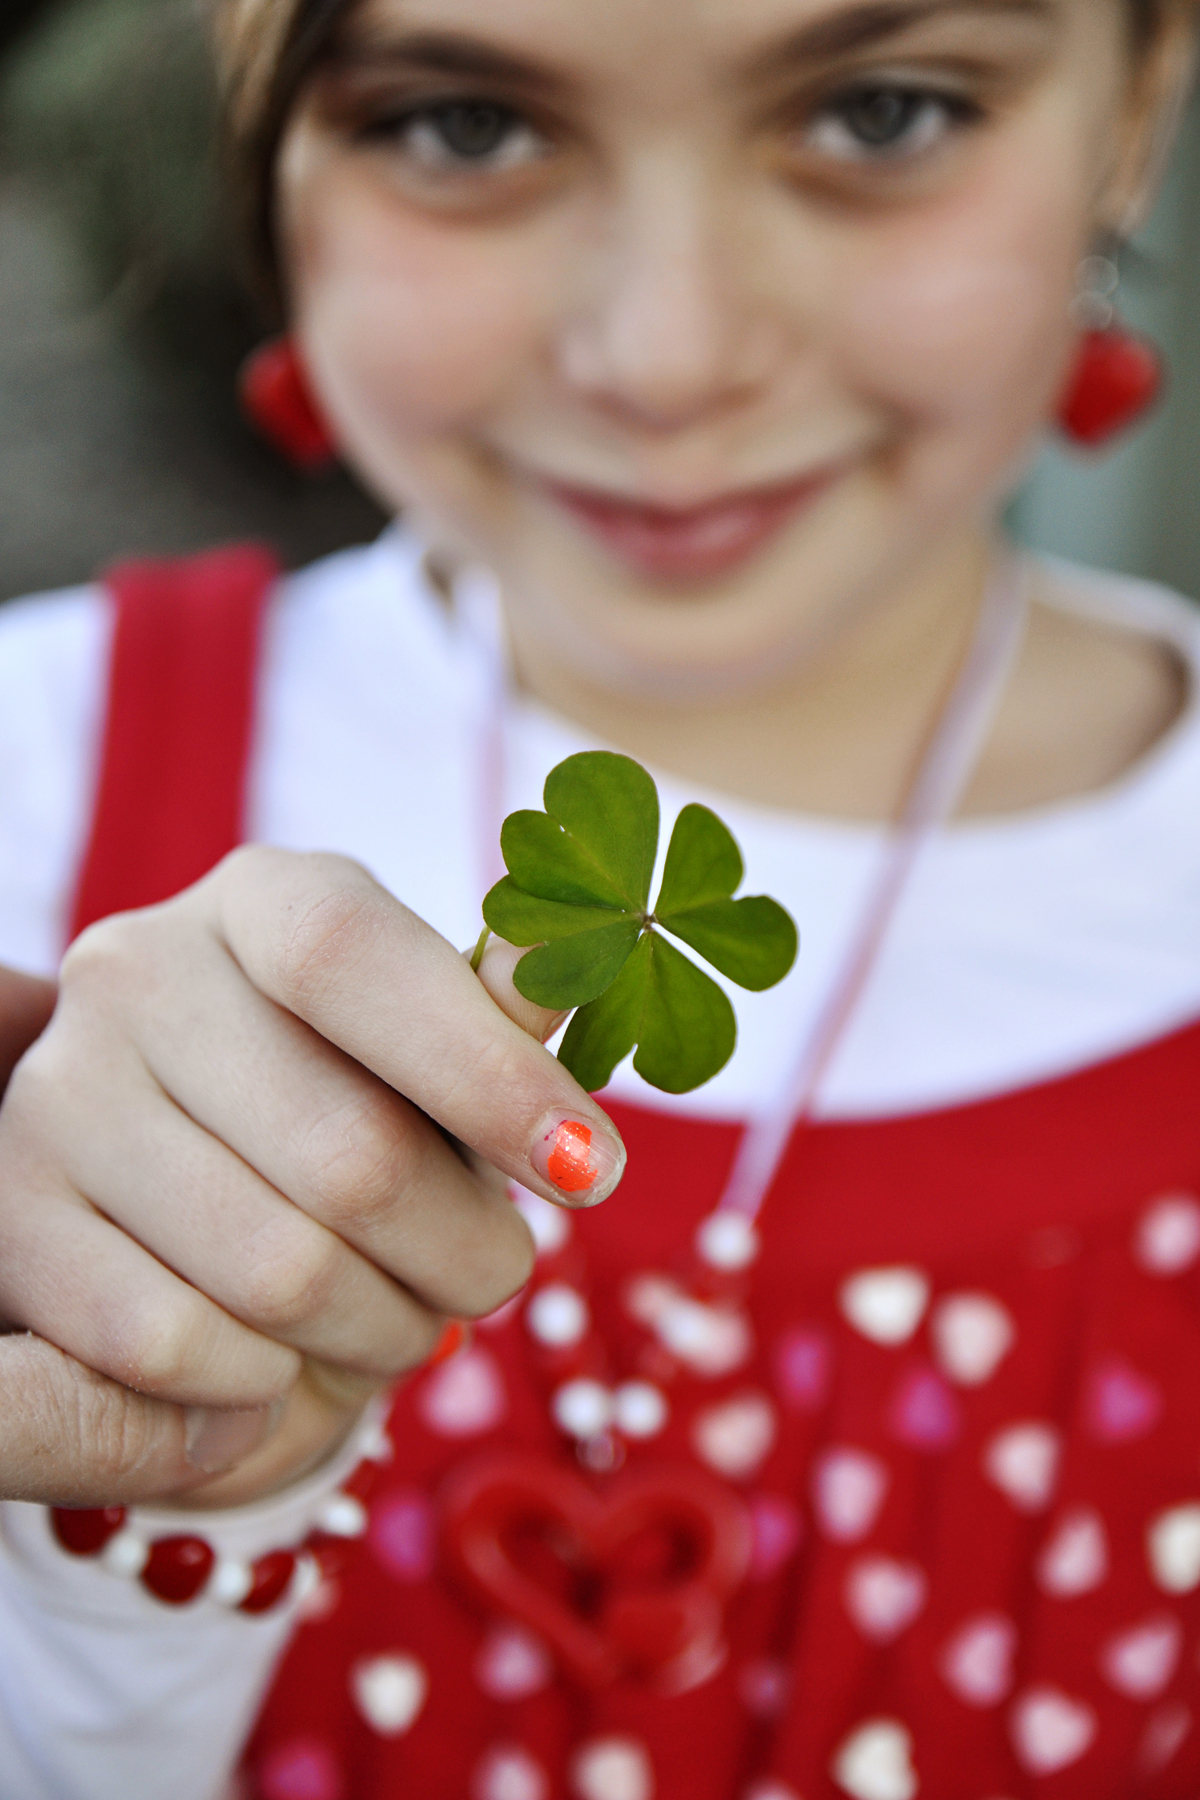
I have made this same picture over and over and I still love it. Birthday cupcakes with lit candle, a number of fingers held up to signify a birthday year, a lottery ticket, a dyed Easter egg, and more. This time it’s the four leaf clover my subject plucked from a pot in the yard (look closely since at first glance it looks like three, but it is four). I was actually taking pictures of her cute Valentine’s outfit when she found the clover and held it out to me to inspect. The resulting image is really cute and the clover pops out not only because my aperture was set wide open at F/2.8 and I focused on the clover (thus blurring the background), but also because of the contrast of the green against the red and white of her clothing. So whether it’s your child’s favorite stuffed animal, a perfect test score, or a special holiday object, this effect is a great way to bring focus to the event or milestone while still keeping the subject’s face present in your photos.
Video Tutorials Worth Watching
I usually don’t post work-related stuff, but I have to say that the new 1-minute videos featuring professional photographer Andre Costantini are worth checking out, so I thought I’d share the link to the latest video about aperture since it is great information. See Episode Three and other videos here.
Take a Portrait With Shallow Depth of Field
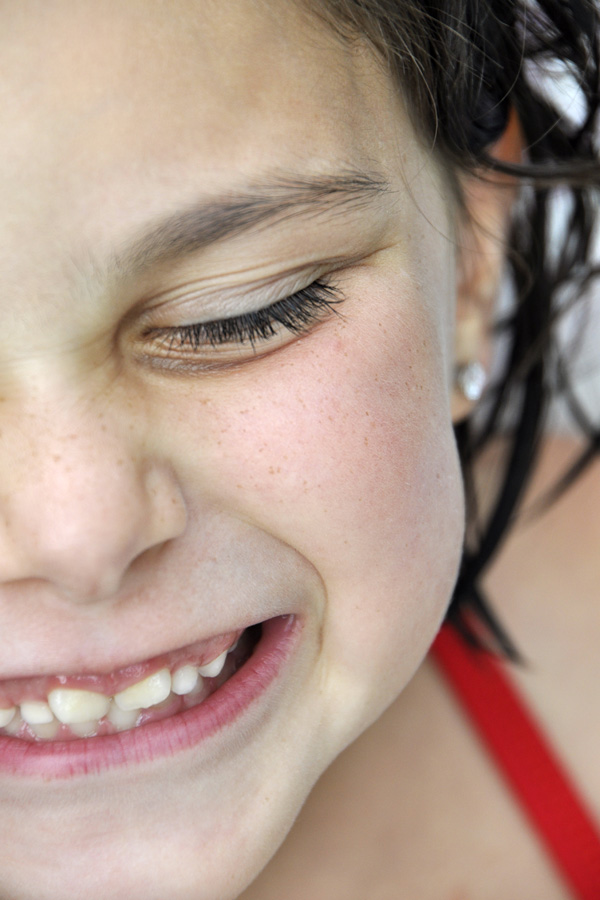
This is a repeat, but one that needs repeating since I think we all want to achieve great portrait shots— even when it’s just a quick candid shot we’re grabbing before the cake is served or before the kids are leaving for school. And using shallow depth of field is a key to great portraits (along with expression, lighting, angle). Shallow depth of field, when the parts of the image in front of and behind the subject are out of focus, makes your subject pop off the image. The example here (a repost from the summer), for instance, shows the eye and smile in sharp focus, yet the tip of the nose, ear and hair are out of focus. Another advantage of shallow depth of field is that you can eliminate distracting backgrounds like indoor clutter, foliage, cars on the street, etc., It makes the background less defined with soft colors.
To get shallow depth of field, the key is to set your camera to the “A” mode: Aperture-Priority. You can leave your ISO setting at 200 or 400 (or higher if the lighting conditions are low) and leave your camera in autofocus. You will then use your thumb-wheel to dial in the smallest number you can, like F/2.8, F/3.5, F/5.6. Focus on the eyes of your subject, or the eye that is closest to the camera. Depending on how close you are to your subject and what lens you are using (telephoto lenses and closer proximity make the effect even more apparent), you will notice that the background is just soft to almost unrecognizable. If you want the photo to have some context of where you are (like cooking in the kitchen), then maybe F/5.6 is a better choice. But if you want the crowd in the background to go really soft, “open the lens wider” to F/3.5 or F/2.8 if you can.Please review the aperture download card here.
Holiday Portraits Using the Night Portrait Scene Mode

I rarely use the scene modes on my camera, but the one I find myself using from time to time is the Night Portrait mode. This scene mode is the one with the icon featuring a person and star or moon (see typical camera mode dial below). I use this mode when I want a person as my main subject, but the special lighting in the background, like Christmas lights, Times Square lighting, or a sunset, is equally important. In this photo, my subject posed in front of the town’s decorated gazebo and lit tree.

The Night Portrait mode sends out a burst of the flash to capture the subject and than makes the shutter stay open a little longer to capture the lighting in the background. The trick in this mode is to be sure both you and your subject hold still to avoid unwanted blur from camera shake or subject movement. In fact, my subject did move and her hands are slightly blurry due to the very slow 1/10 sec shutter speed required to achieve the effect. But the expression was just what I hoped for, so for me, it’s perfect. I boosted the ISO considerably—to 1000— and I opened my aperture to F/5, the widest setting for this situation, in order to make the lights softer in the background. Using the Night Portrait mode helped me take the guess work out of deciding how to set my flash and shutter speed and instead concentrate on snapping away until I got what I was looking for. So pose your kids in front of the tree or outdoor decorations, or position your family along the railing at sunset on your next cruise, set the camera to Night Portrait mode and see what you can get!