Windows Are Your Best Friends for Better Portraits

As we start to move towards reuniting with families, consider a more formal portrait of your long-awaited get togethers.

Many of my portraits, candid or posed, are taken by big bright windows as they provide a beautiful soft light on my subjects. And, because I really have a love/hate relationship with my flash and try to avoid using it when much better light is available.

In this photo, the grandchildren gathered around grandma facing the window straight on. Even the dog got in on the action at the moment I clicked the shutter release, but due to my slower shutter speed of 1/25th sec, she is blurry, but I like the story behind it, so I do not mind. I was fairly close them, standing between them and the window, so I used a wide focal length of 32mm. Because of the focal length setting, and stopping down slightly to f/4, I was able to keep the boys behind grandma in relative sharp focus. Stopping down yet again to f/5.6 or even f/8 would make them 100% sharp.

I love the bright eyes that the window light provides as they looked up slightly to my camera lens. It really makes their eyes and smiles pop!


One Location. Two Entirely Different Photos.

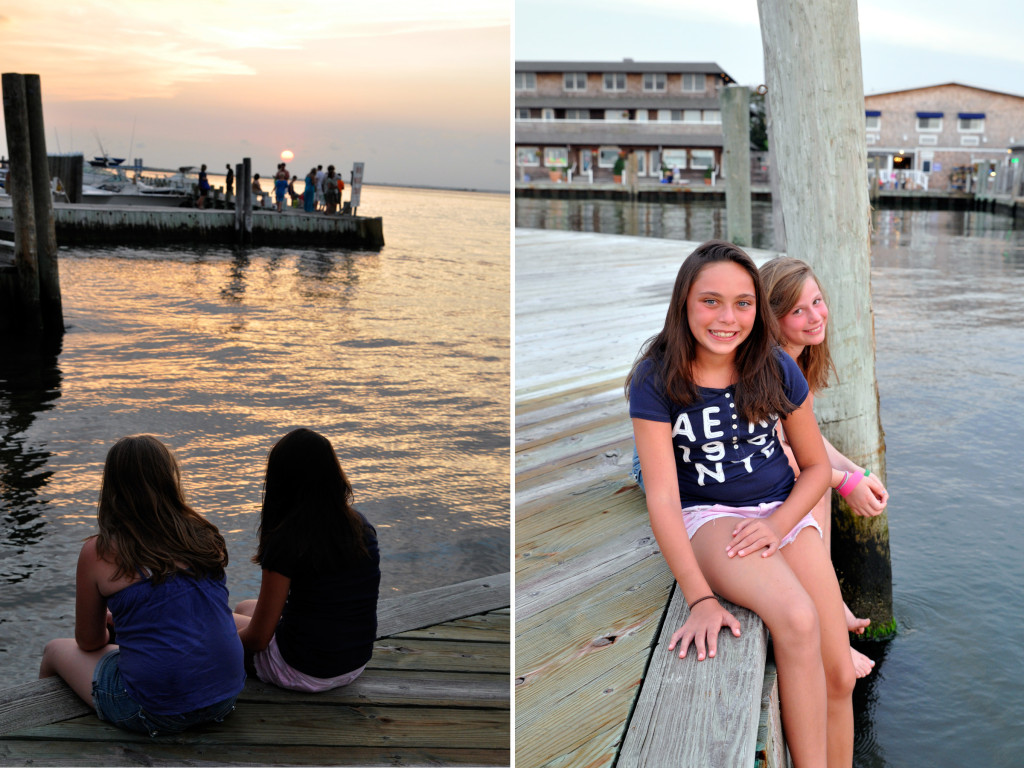
Change your position_compSometimes we take the shot we had in mind and call it a day. But when the light is so beautiful at sunset, it pays to take a few steps around just to check out how the sun is lighting your subject. The photo on the left was the one I was after: two girls watching the sunset, captured in near silhouette as the center-weighted meter gave an exposure for the bright setting sun and made most of the other parts of the shot go dark. Just what I wanted. But then I sat down next to the girls to watch the sunset with them, and wow, was the light across their faces gorgeous. So of course I snapped away while the sun set! Because the light was low, I boosted my ISO to 640 and got a shutter speed of 1/100th sec at F/5.0 aperture. If I had unlimited cooperation from my two subjects, I would have boosted the ISO to 1000 and shot more photos at F/8 so that the girl further back would be in sharper focus. When shooting more than one person, either try to get them on the same plane of focus, or deepen your depth of field by using a smaller aperture like F/8. Not always possible, as was the case here, but the sweet expressions and the light make the shot a perfect one for me.

For Great Candid Photos, Keep Your Distance

Keep Your Distance

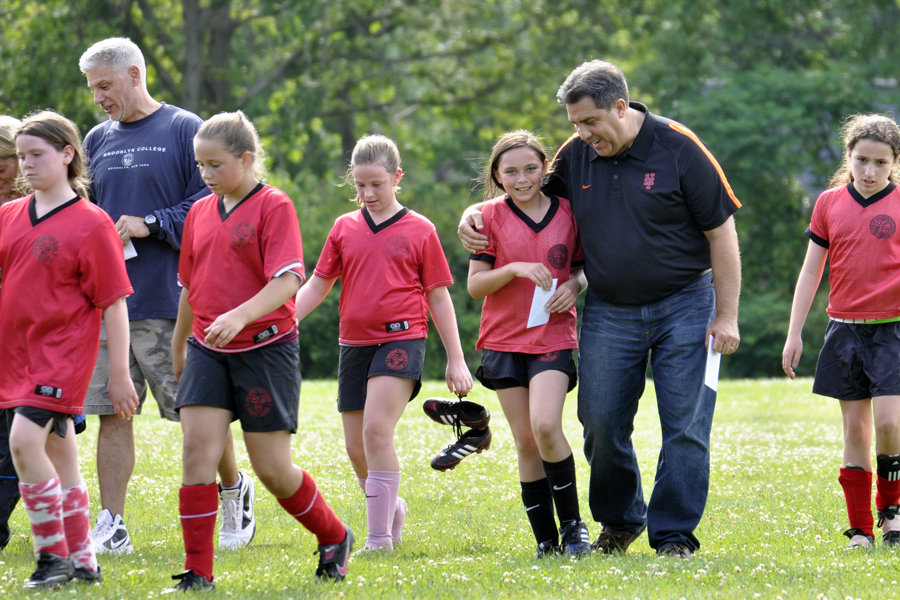
As all of the school year activities wind down, and some fun summer times begin, take a step back from it all and zoom in on the moments with your telephoto zoom lens. Not only will you get some more natural expressions, but your subjects will really stand out from the background with your tele lens setting. At the end of the last soccer game of the season, I remained at the side lines while the coaches gave encouragement and praise to their players and zoomed in. I caught a very natural expression on both coach and player. Additionally, while outdoors this summer, pay attention to where the sun is. Try to shoot later in the day when the sun is not so harsh. And look where the sun is hitting your subjects. Here, the sun is lower in the sky and behind the team, which adds a nice rim light to their hair and shoulders. In this lighting situation, set your camera to spot meter, as I did here, to be sure the camera gives the proper exposure for your subjects, and does not “put on sunglasses” because of the bright light behind and make your subjects darker than desired. Look for the metering button on your camera and turn it to spot. When you look through your viewfinder, you will see a the smallest of circles in the center of the frame (see below). Be sure this circle is on your subject, press and hold your shutter release button half way to lock in both focus and exposure, adjust your composition if necessary, and then take the shot by pressing the button the rest of the way.

It’s Almost Spring, But Here’s Another Tip for Snowy Winter Photos

RT_DSC6925

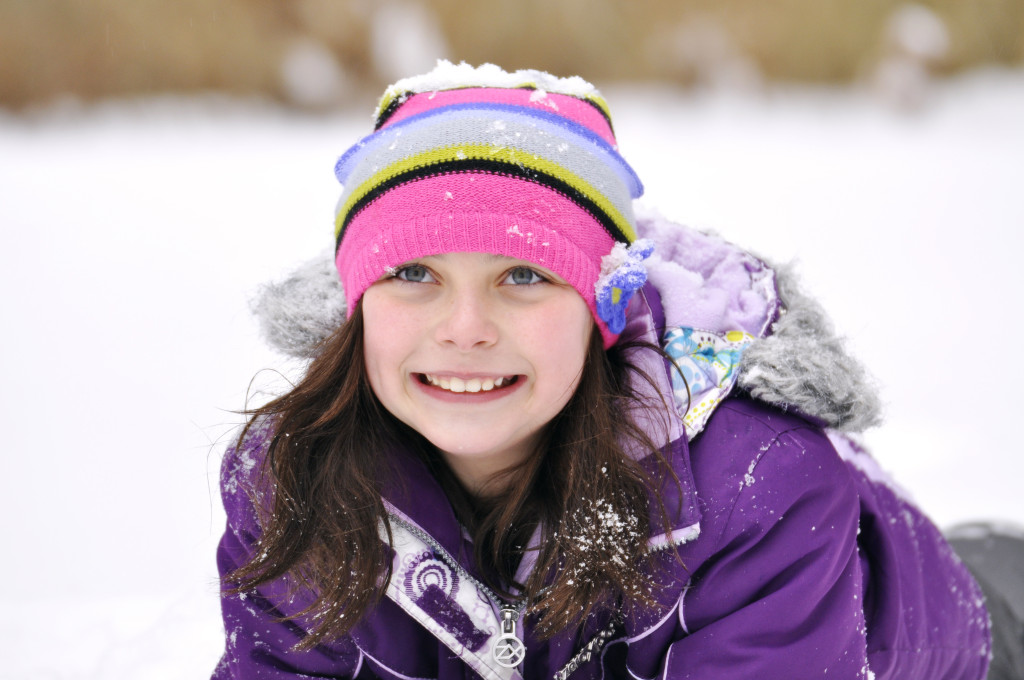
We had just one snow storm this winter, so just one day to get out and play in the snow with my camera. Snow tends to fool your camera’s meter since the snow is so bright, making the camera under-exposure your snowy pics. My analogy is that your camera wants to put on a pair of sunglasses to cut the brightness. To get a better exposure, start by setting your camera’s exposure compensation dial to +.67 (2/3 of a stop). Most of the time this does the trick, but you can even go to +1.0. (Read about exposure compensation here and here). Your snow will be bright white instead of gray-looking. For this picture, I set the exposure to +.67. I was further away from my subject and got down low to eliminate the distracting fence and bare branches in the background. I also set my aperture to a wide opening of F/5.0 and zoomed in to 185mm telephoto to blur the background. I love the snow crystals on her hat. I feel chilly just looking at this photo! Please take note that if you are lucky enough to get away to a beach destination this winter, this same tip works for bright sand and water, too.

RT_DSC6921
Here, I zoomed out to 110mm to get more snow in the photo.

Slow Down Your Shutter Speed for Fun Snowy Photos

_DSC5633_RT

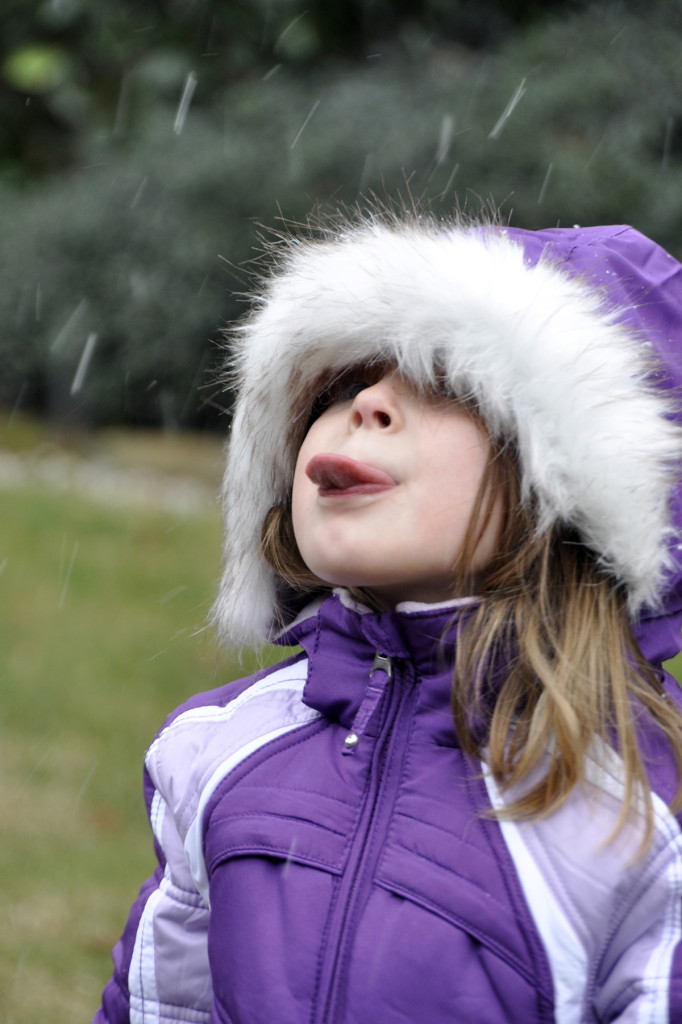
Now that winter is here, you’ll find yourself outside with the kids on the next snowy day. A good time to practice slowing down your shutter speed to create fun effects! By putting your camera on aperture priority mode (A on the mode dial)and moving your aperture (or f-stop) to a larger number like F/8, you will get a slower shutter speed. Since it is usually overcast when it is snowing, this aperture setting should be about right, but feel free to make the aperture even larger, or open up a little bit (move to a smaller number like F/6.3 or F/5.6). In this photo, the exposure was 1/40th sec. at F/6.3— just enough to make the very light snow turn into short streaks, but still fast enough to keep my subject in focus if she moved slightly. I used the stabilization feature on my lens, so camera shake was not a worry, but you will want to be sure that the shutter speed does not drop to slower than 1/30th sec. or else you do risk camera shake without a stabilization feature. If your subjects are jumping around considerably, this technique may not work. I asked my subject to catch snowflakes with her tongue, which made her stand still and concentrate on the activity. Slower shutter speeds (typically those under 1/125th sec.) can help convey motion, and this same technique should be used to make water streaks under a sprinkler or from a hose or for waterfalls. Read more about freezing and blurring motion here and here.

Shoot From below for Dynamic Images that Capture the Whole Scene

TheGirls
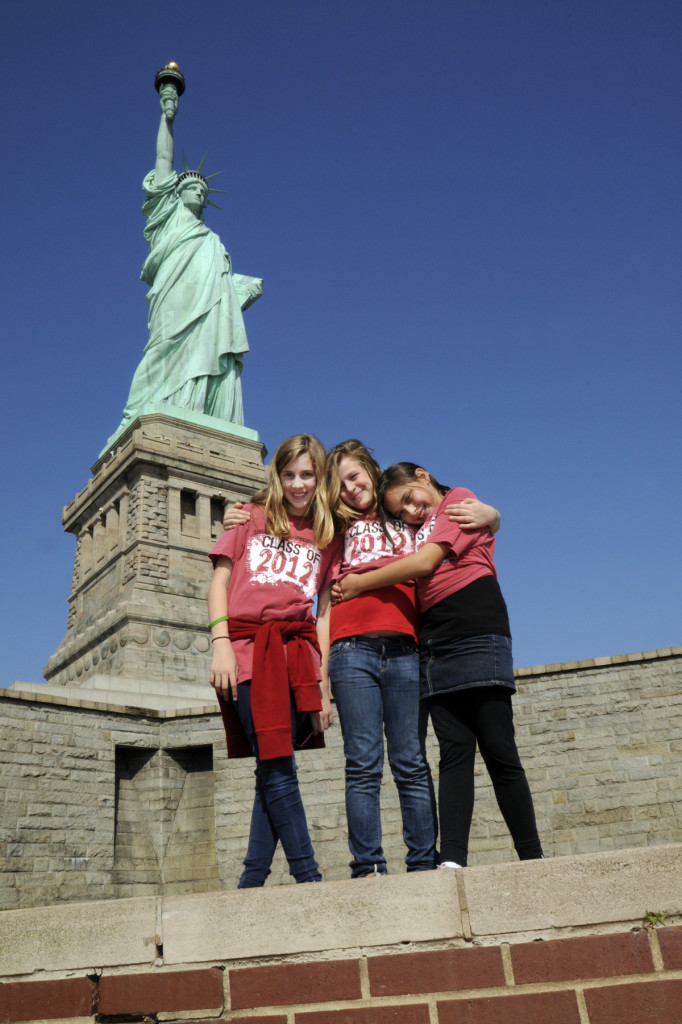
I was literally laying on the ground with my head in the lap of another mom when I shot this photo of the girls under the Statue of Liberty on a recent field trip. While it will be a year or so before you can visit the inside of the Statue due to its closing for repairs, you can still visit Liberty Island and get this shot. And this low angle can and should be used for holiday picture-taking, winter vacations, and more. Here are just a few ideas:

-A tall public Christmas tree
-The Eiffel Tower
-A lighthouse
-The Disney castle
-A snowman
-Your house
-Skyscrapers
-An amusement park ride
-Mountains

Get down low, shoot up and use a wide angle setting on your zoom lens. Be sure to meter on the subject, not the sky or the background or else your subject’s face will be under-exposed. To do this, 1) set your camera to spot meter mode (see your instruction manual, but it’s easy); 2) put the small circle in your frame on your subject so that the camera can read the exposure of your subject and not the background; 3) press your shutter release button down halfway to lock-in that exposure; 4) re-compose your shot as you like; and 5) press the shutter button the rest of the way to take your shot.

Use Structures In Your Surroundings As a Reflector for Better Outdoor Portraits

_DSC5514_RT

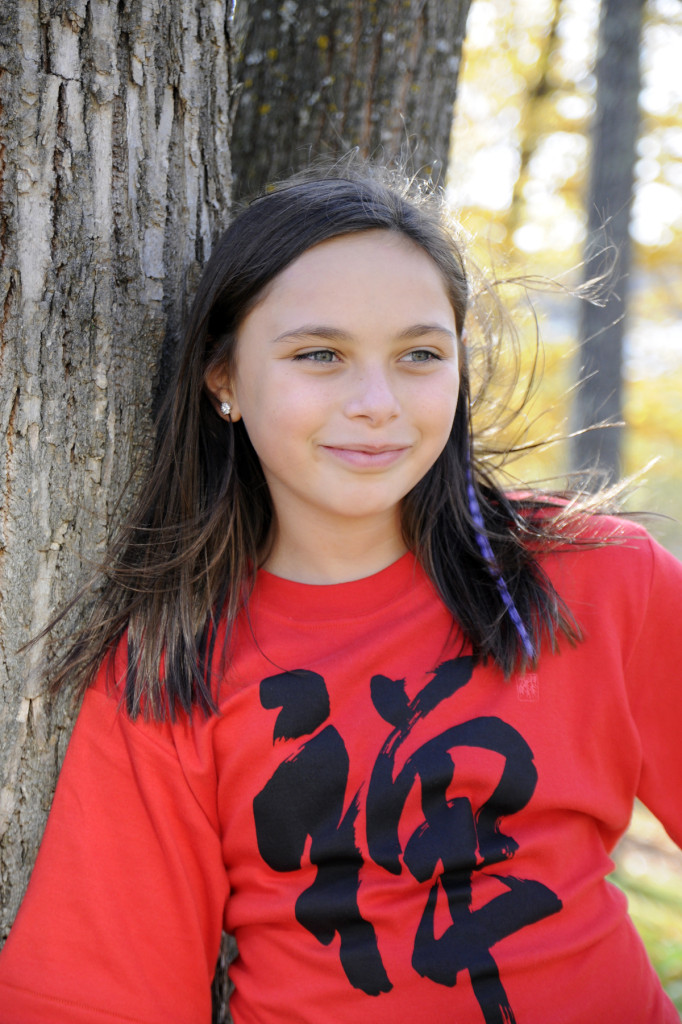
On a beautiful fall day, I posed my subject next to a tree facing the back of the house, which acted as a reflector. The sun bounced off the house and lit the girl’s face and gave her a really nice highlight in each eye. Reflectors can be any white or near white surface, such as a painted brick wall, a sign on a door, or more. Position your subject in the path of the light as it bounces naturally off the “reflector.” If you are in a place where there is no structure that can act as a reflector, then break out a white piece of foam core or oat tag to bounce light back into your subject’s face and eyes. If you love this technique for posed portraits, then you might consider buying a reflector from your local camera store. So look around to see not only where the light is coming from, but what it is bouncing off.

_DSC5499_RT
The lit leaves in the background add some drama.

Add a Little Light to Combat Harsh Sun for Better Beach Photos

FillFlashMainPhoto

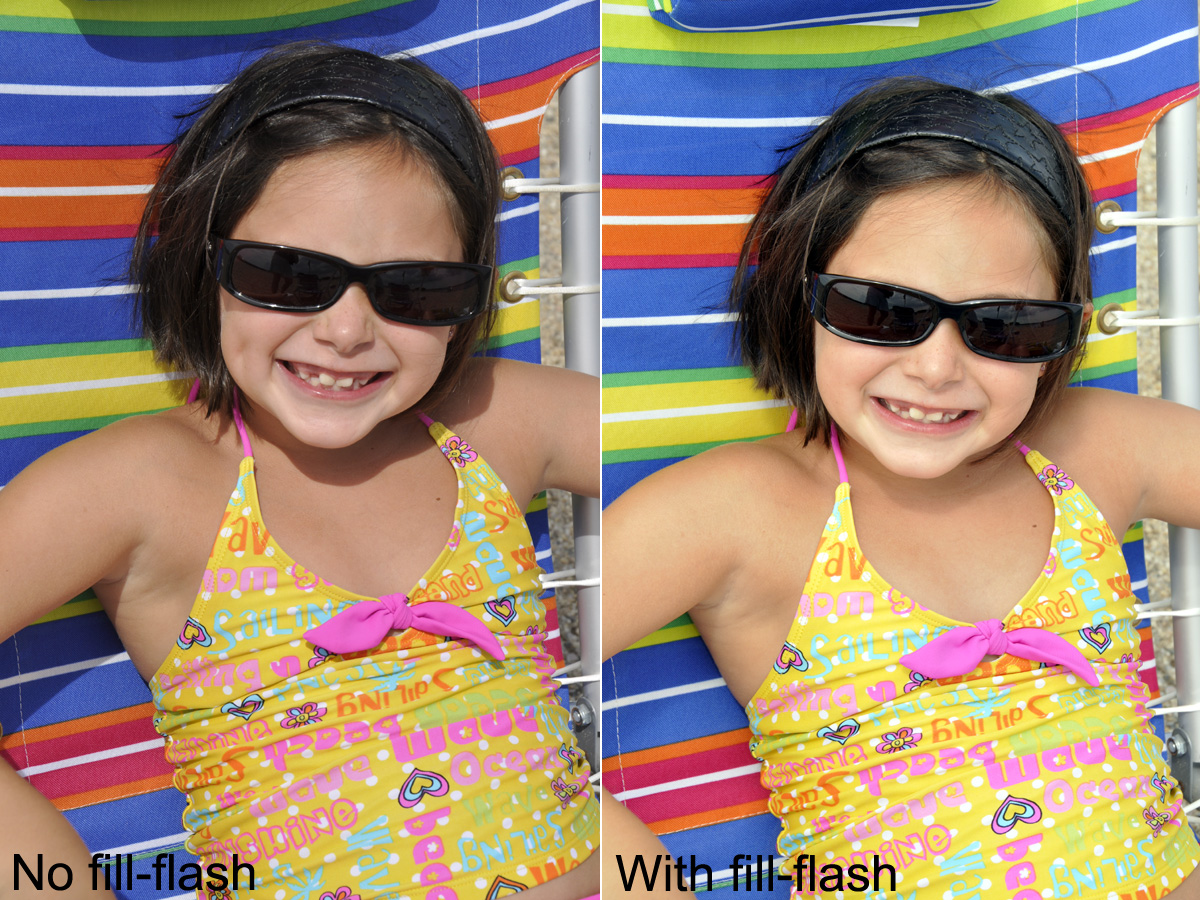
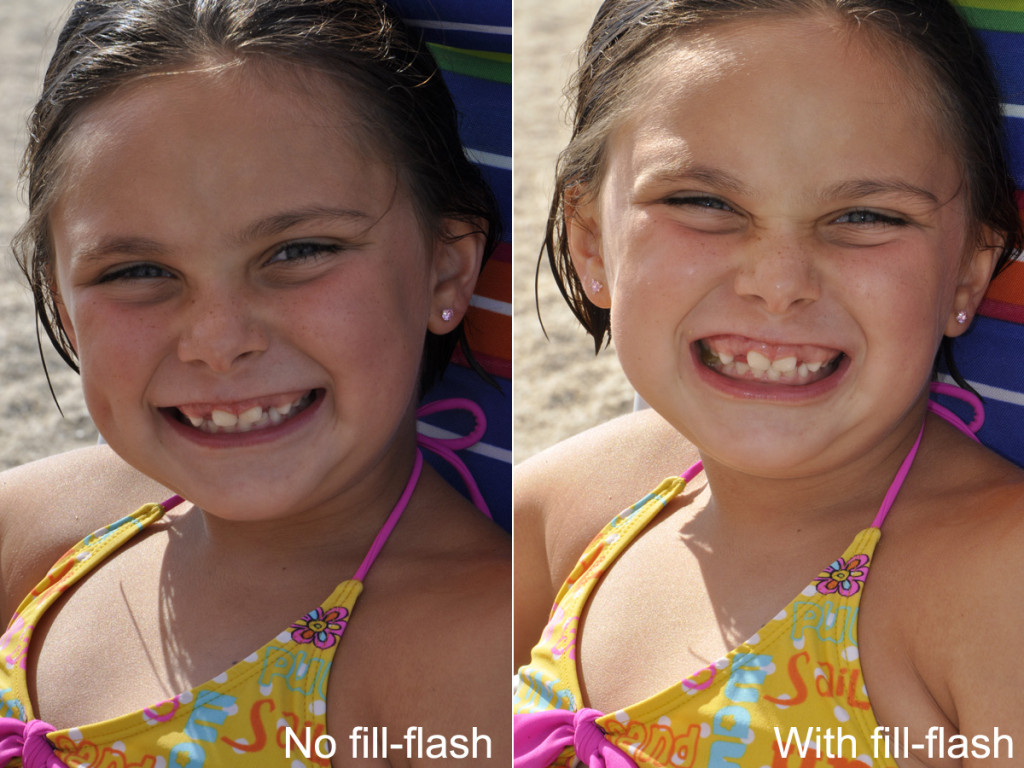
Taking pictures at the beach is always fun (as long as you take a few precautions to protect your camera — see 7/6/11 post). But often we get harsh shadows that make the photos less desirable. Get rid of the harshness and raccoon eyes just by popping up your flash! Put your camera on the program mode (P) and pop-up your flash. As you can see in the example comparisons below, you can soften all of the harsh shadows. Examine the two photos. Look under the chair’s head rest, under the left arm, under the chin and below the rim of the sunglasses. Additionally, look at the sliver of rocky sand in the background on the right side. On the left, it’s sort of greyish, but on the right, it is a more pleasing color. Then look at the example further below (please ignore that toothless grinny expression!). In this case, the brightness behind the subject made the camera’s meter stop down a little (like putting on sunglasses because it was too bright) resulting in her face being too dark. But by popping up the flash, you see how you can brighten up a dark face. Tip: If you find the flash to be too bright or too artificial looking for your taste, then  you can tone down the flash very simply. Look at the same button you use to pop up your flash. It should have a +/- symbol. Hold this button in and dial the wheel at your index finger to the right so that the numbers on your display go to the negative side. You are essentially subtracting power from the flash so that it puts out less light. Try several different settings (-0.7, -1.0, etc) until you achieve a desirable shot. You may need to consult your owner’s manual (yes, sorry) and look for “flash exposure compensation” in the index.

comparison_2_fill flash comparison_1_fill flash

Shoot Wide and Close to Eliminate Distracting Backgrounds in Your Photos

_DSC0984_RT

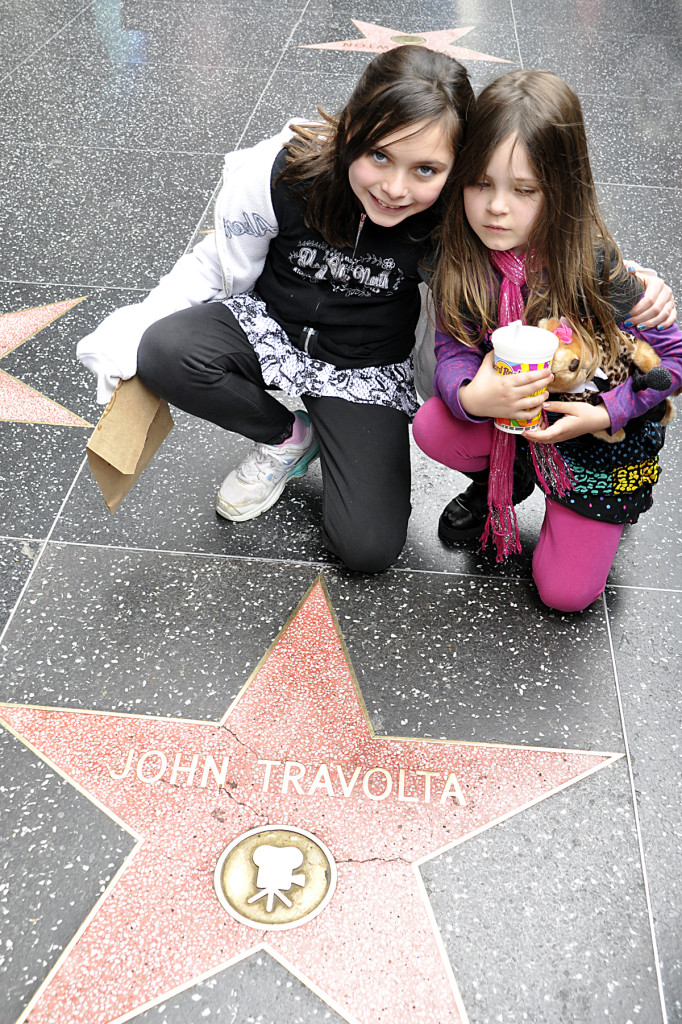
During winter break, we spent a few days in sunny and warm California. Our trip to Hollywood was brief and pictures were difficult with so many people on the crowded boulevard that was in full set-up mode for the Academy Awards. And with two kids all too anxious to see the sights, I had just a moment to capture a “we are here” photo in front of a star on the Hollywood Walk of Fame. By setting my lens to a 23mm wideangle setting, getting close to them and tilting down on the scene, I was able to quickly eliminate the people in the background while still capturing their expressions and John Travolta’s star. I used a slightly small F/6.3 aperture, that when combined with the wide focal length, kept both the star and the kids in focus. Be sure to focus on the subjects eyes and then tilt down for your best exposure and to keep the most important focus point sharp. (Note: I did Photoshop out one lingering foot of a Storm Trooper from the upper right side of the frame. Don’t be afraid to crop or retouch to make your photo even better before posting, framing, scrapbooking or adding to an album).

Better Holiday Snapshots Article Features Photos and Tips From Yours Truly!

_DSC5944_RTI was honored to be asked by Stephanie from LifetimeMoms.com to write up some tips on how to take better photos over the holiday season. Well, that season officially starts next week and there are a few tips in that article that will come in handy at your Thanksgiving gathering. Or as you think about snapping away over the extended weekend trying to get the perfect photo for your holiday card. Please take a look at the article by clicking here. And thanks Stephanie!