It’s Almost Spring, But Here’s Another Tip for Snowy Winter Photos

RT_DSC6925

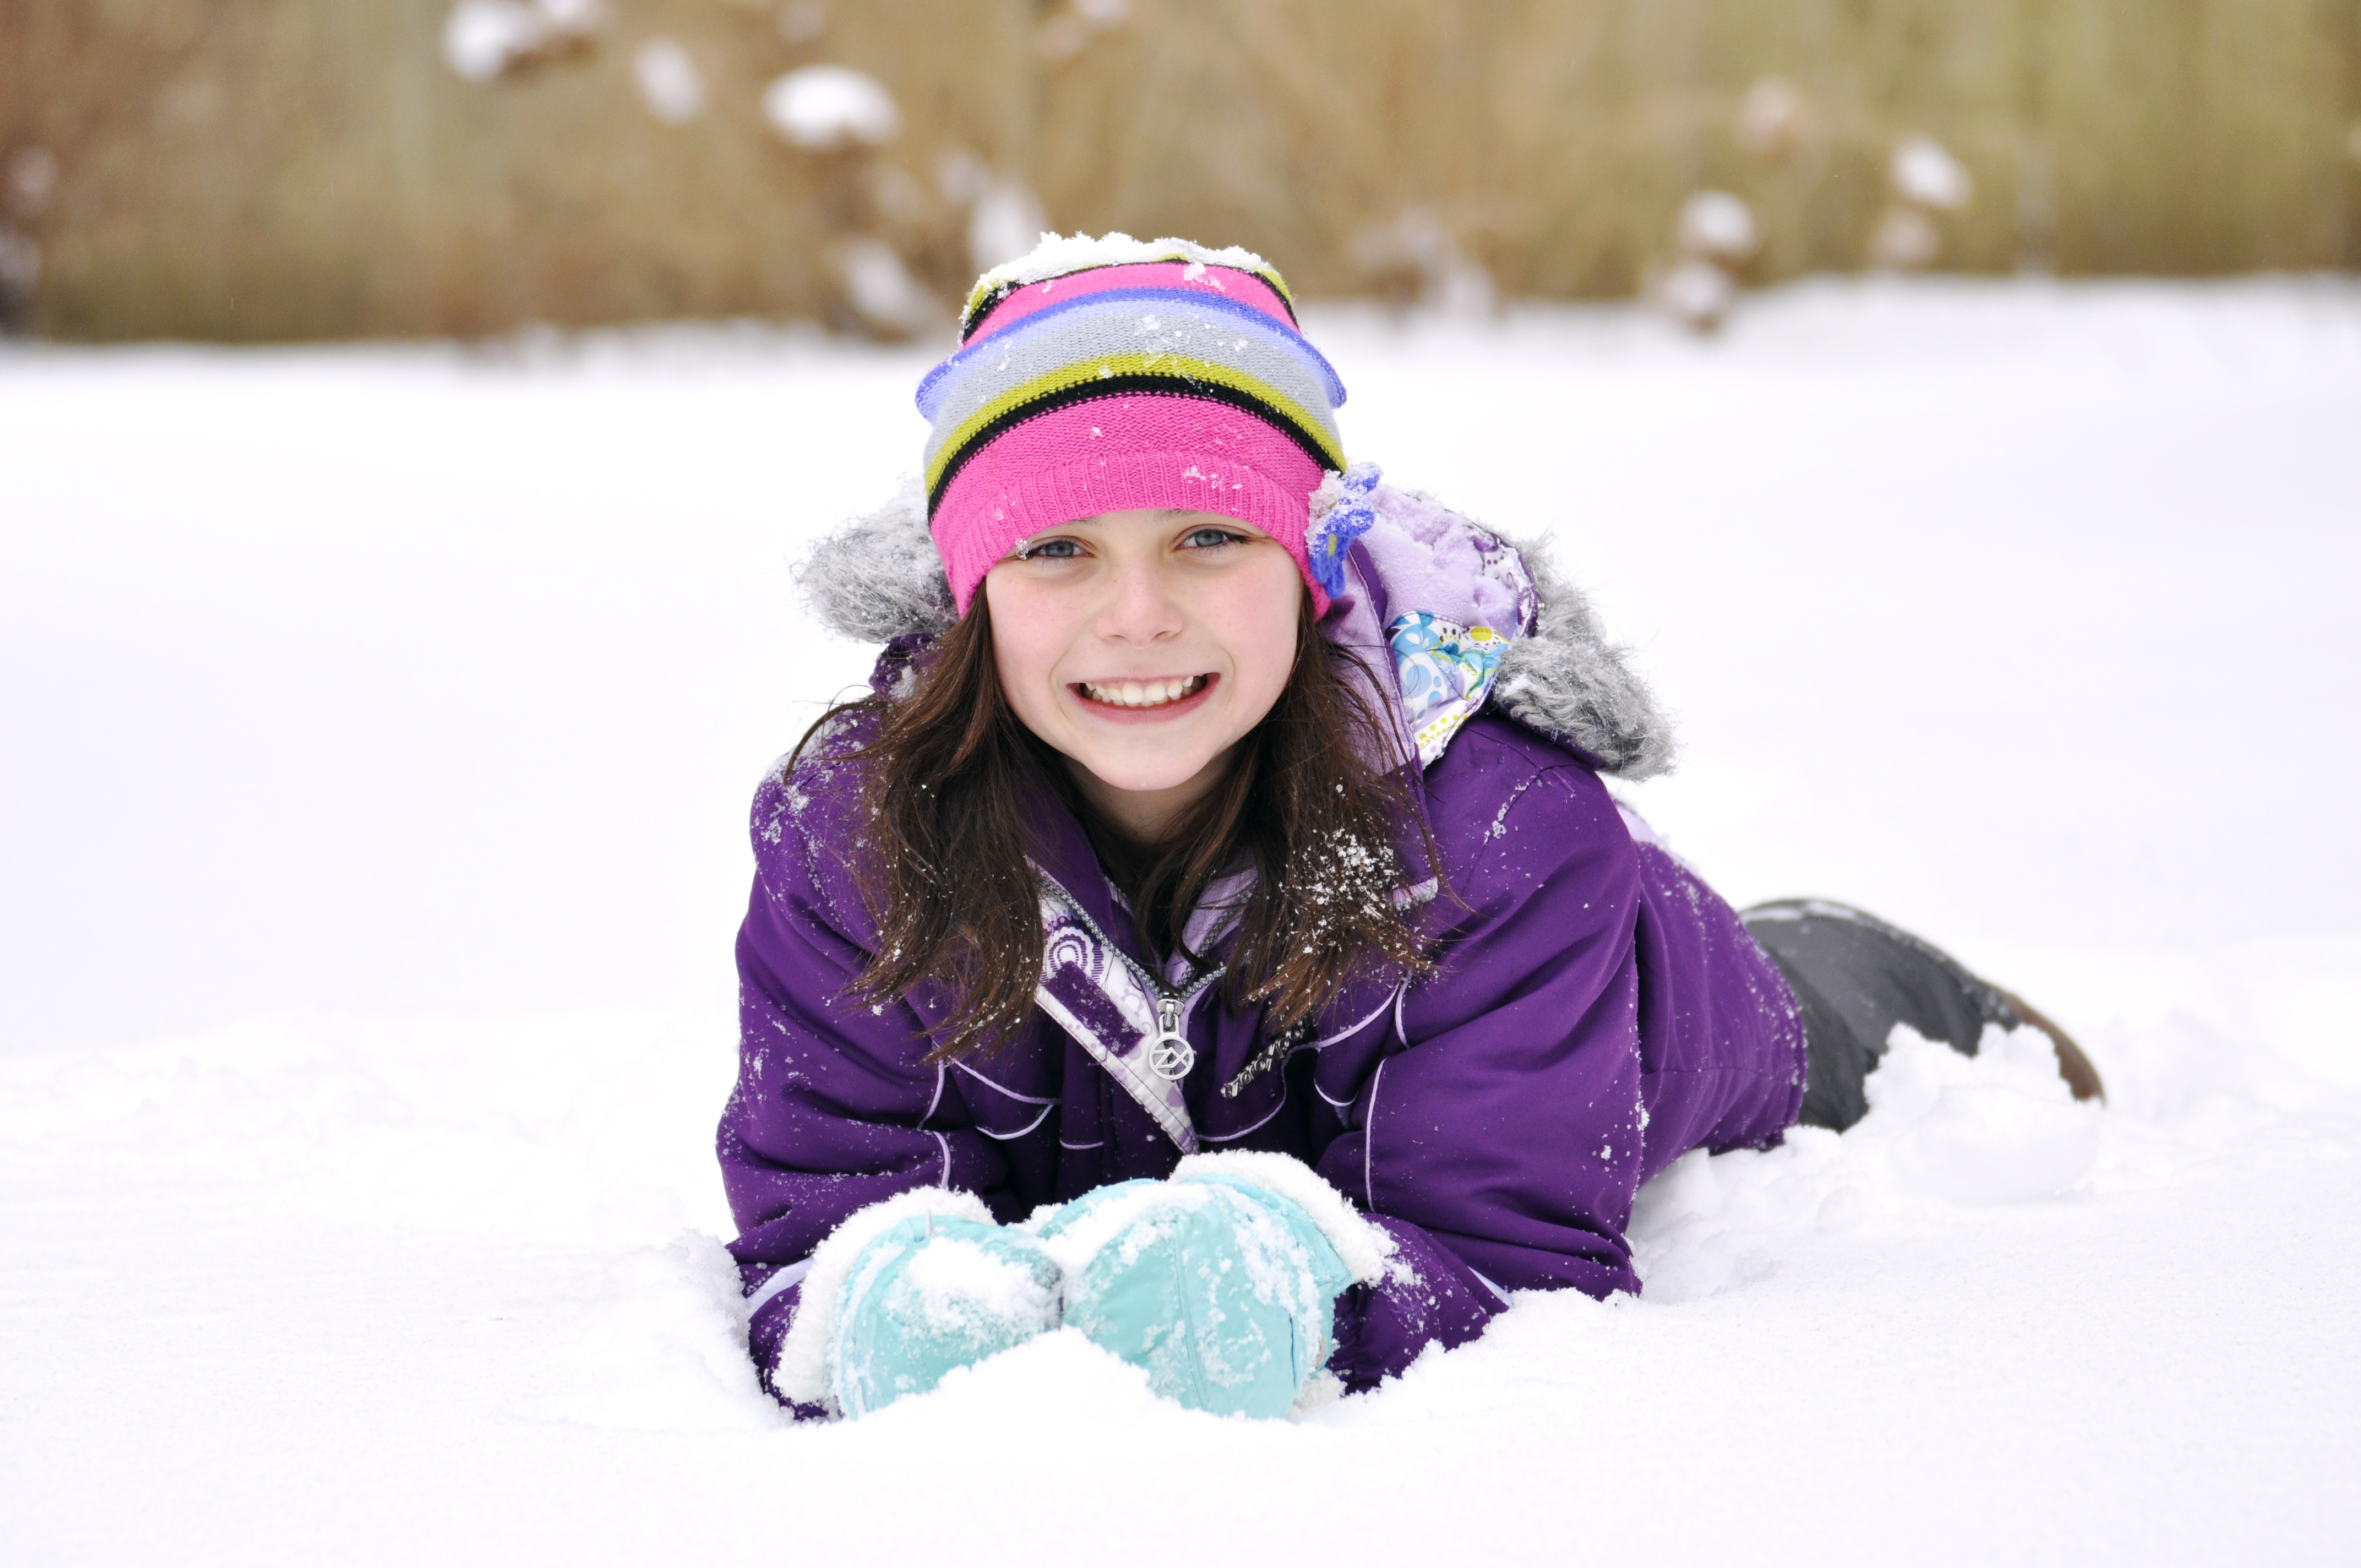
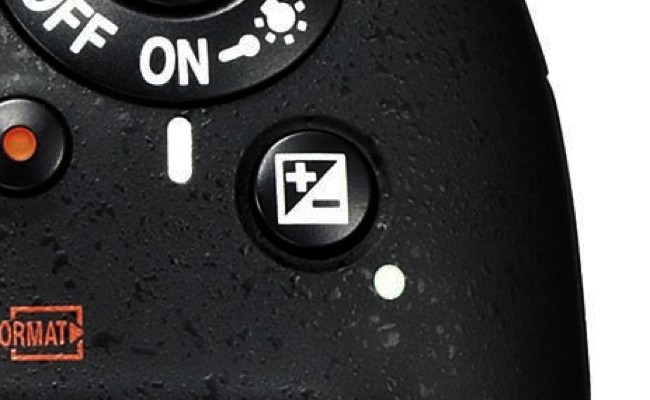
We had just one snow storm this winter, so just one day to get out and play in the snow with my camera. Snow tends to fool your camera’s meter since the snow is so bright, making the camera under-exposure your snowy pics. My analogy is that your camera wants to put on a pair of sunglasses to cut the brightness. To get a better exposure, start by setting your camera’s exposure compensation dial to +.67 (2/3 of a stop). Most of the time this does the trick, but you can even go to +1.0. (Read about exposure compensation here and here). Your snow will be bright white instead of gray-looking. For this picture, I set the exposure to +.67. I was further away from my subject and got down low to eliminate the distracting fence and bare branches in the background. I also set my aperture to a wide opening of F/5.0 and zoomed in to 185mm telephoto to blur the background. I love the snow crystals on her hat. I feel chilly just looking at this photo! Please take note that if you are lucky enough to get away to a beach destination this winter, this same tip works for bright sand and water, too.

RT_DSC6921
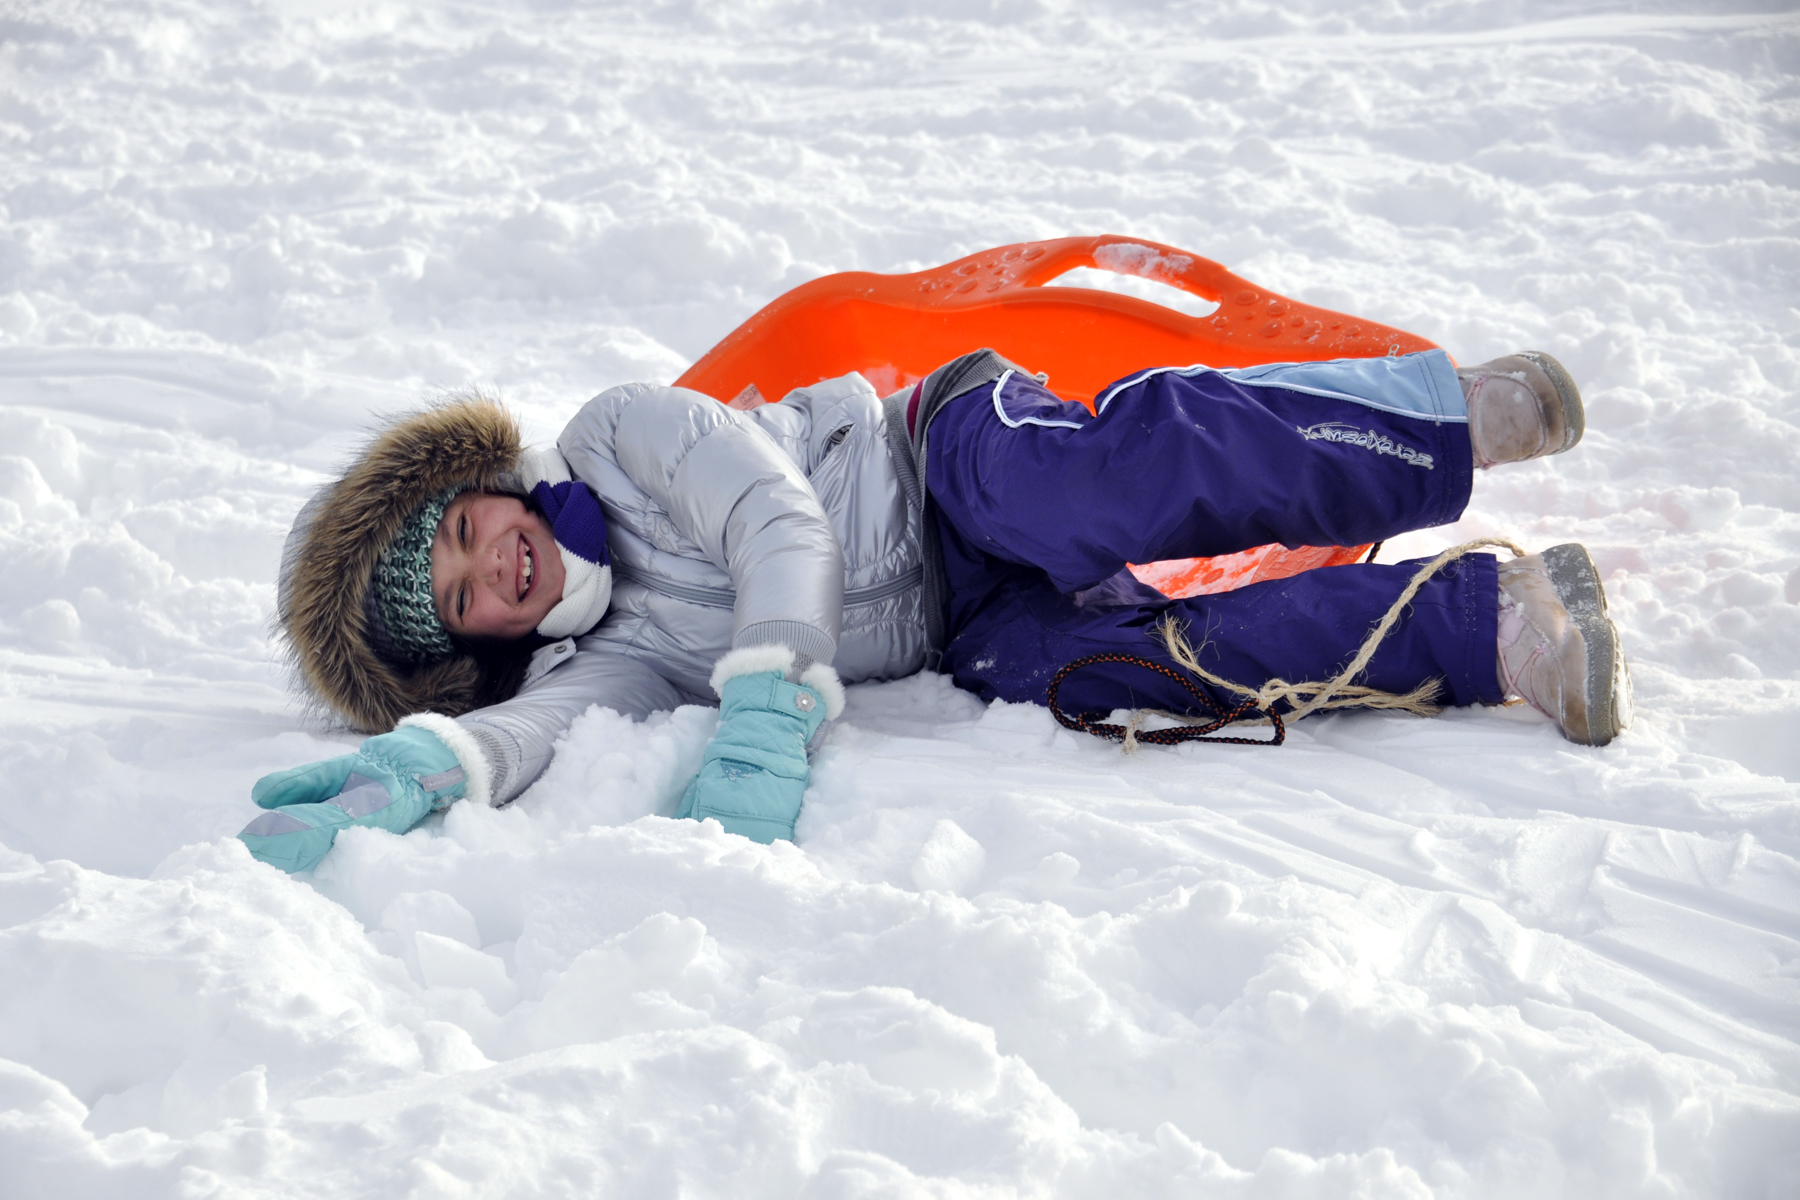
Here, I zoomed out to 110mm to get more snow in the photo.

Slow Down Your Shutter Speed for Fun Snowy Photos

_DSC5633_RT

Now that winter is here, you’ll find yourself outside with the kids on the next snowy day. A good time to practice slowing down your shutter speed to create fun effects! By putting your camera on aperture priority mode (A on the mode dial)and moving your aperture (or f-stop) to a larger number like F/8, you will get a slower shutter speed. Since it is usually overcast when it is snowing, this aperture setting should be about right, but feel free to make the aperture even larger, or open up a little bit (move to a smaller number like F/6.3 or F/5.6). In this photo, the exposure was 1/40th sec. at F/6.3— just enough to make the very light snow turn into short streaks, but still fast enough to keep my subject in focus if she moved slightly. I used the stabilization feature on my lens, so camera shake was not a worry, but you will want to be sure that the shutter speed does not drop to slower than 1/30th sec. or else you do risk camera shake without a stabilization feature. If your subjects are jumping around considerably, this technique may not work. I asked my subject to catch snowflakes with her tongue, which made her stand still and concentrate on the activity. Slower shutter speeds (typically those under 1/125th sec.) can help convey motion, and this same technique should be used to make water streaks under a sprinkler or from a hose or for waterfalls. Read more about freezing and blurring motion here and here.

Shooting Against a Bright Background Fools Your Camera’s Meter: One Easy Answer Is A Quick Exposure Compensation Adjustment

exposure comp_snow3
On my recent business trip to Switzerland this month, we had the opportunity to sightsee for two days. Our tour took us to an amazing view of the Swiss Alps. A short train trip on the Matterhorn Cog Railway from the mountain town of Zermatt brought us to the Gornergrat where we were met with a panoramic view at 3131 meters above sea level. This astounding view of 29 peaks, each over 4000 meters and including the Matterhorn at 4478 meters, offered up the chance for our small group of 25 to take thousands of photos. We each took turns taking photos of each other and quickly discovered we needed to adjust our camera settings to compensate for the extremely bright background. In this case, the meter saw that much of the frame was filled with white, so the camera “stopped down” the aperture to let in less light (sort of like squinting in bright light). However, this made the subject’s face quite dark. To compensate, I moved the exposure compensation setting to +1.0. I then pointed the camera at my colleague, held the shutter release button down halfway to lock in the focus, and shifted the camera so that I could capture Yuki in front of the Klein Matterhorn. This tip is useful when shooting against any bright background such as snow, sand, water and bright windows, all which lead to backlit situations. So keep this in mind as you travel this summer or spend a day at the beach or boating.

Making Snow Pictures Look Less Grey

After the snow falls and school is cancelled for the day, the first thing the kids want is to bundle up and build a snowman. And we can’t help but grab our cameras and shoot the whole process. Sometimes, you’ll find the snow in your uploaded photos looks slightly grey and/or the overall picture is on the darker side. One way to fix this before you shoot is to adjust your exposure using the exposure compensation dial (see photo below and be sure to look this up in your manual). See, your camera’s meter reads the whole scene as very bright since there is so much white all around your subject. In turn, the camera closes the aperture a bit to make what it believes to be the proper exposure (like squinting when it’s too bright out, your camera wants to put on sunglasses).

exposure-compensation-4-2-650x0So you need to trick your camera and “add” more light by holding down your exposure compensation dial (+/-) and moving the thumb wheel to add exposure by going to the plus side. I usually add +0.7 when shooting in snow. The result is a bright picture and whiter snow. So next time there’s snow by you and you go snowshoeing or help the kids with their snowman, add some extra exposure (+0.3~+1.0) before you start shooting.


Overcast Days Make Great Photos

DSC_4173_RT_4x6

The lighting on an overcast day, even at midday, is ideal for natural and easy candid portraits. My daughter played in the snow, got her cheeks all rosy, and then stopped for a minute for me to grab a couple of shots. I stood back and zoomed in to 120mm to blur out the background and I had no worries about the “raccoon eyes” you might get midday on sunny days since the snow acted as a natural reflector and bounced light back into her beautiful face.