Windows Are Your Best Friends for Better Portraits

As we start to move towards reuniting with families, consider a more formal portrait of your long-awaited get togethers.

Many of my portraits, candid or posed, are taken by big bright windows as they provide a beautiful soft light on my subjects. And, because I really have a love/hate relationship with my flash and try to avoid using it when much better light is available.

In this photo, the grandchildren gathered around grandma facing the window straight on. Even the dog got in on the action at the moment I clicked the shutter release, but due to my slower shutter speed of 1/25th sec, she is blurry, but I like the story behind it, so I do not mind. I was fairly close them, standing between them and the window, so I used a wide focal length of 32mm. Because of the focal length setting, and stopping down slightly to f/4, I was able to keep the boys behind grandma in relative sharp focus. Stopping down yet again to f/5.6 or even f/8 would make them 100% sharp.

I love the bright eyes that the window light provides as they looked up slightly to my camera lens. It really makes their eyes and smiles pop!


Fall Foliage Background Perfect for Photo Portraits

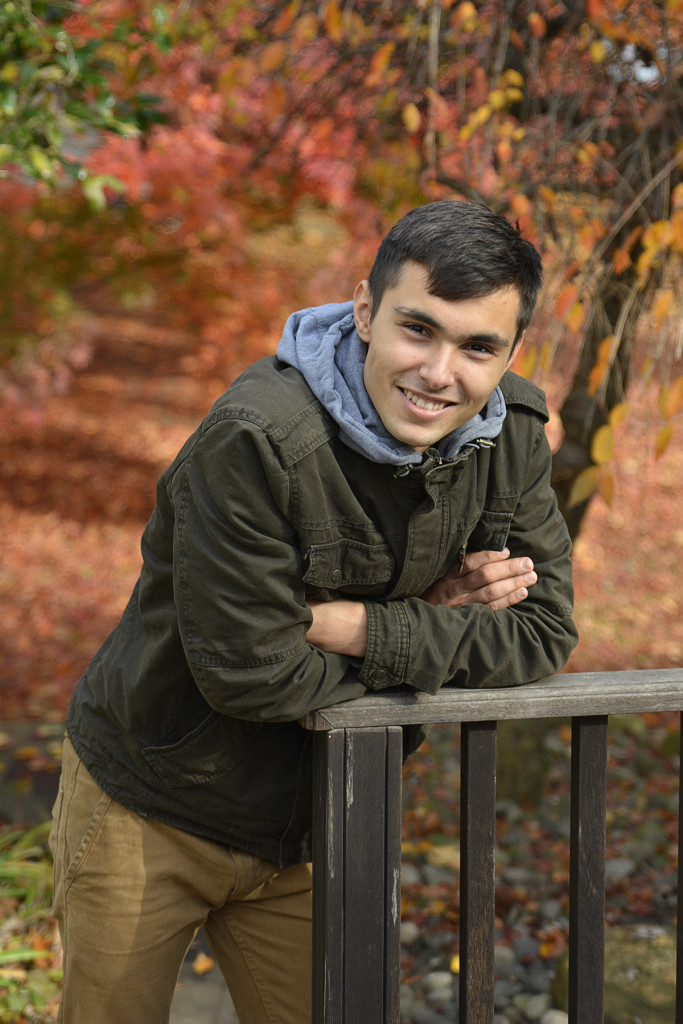
When sunlight hits colorful fall foliage, it makes a stunning backdrop for your impromptu family portraits. The trick to getting the painterly background look that makes the subject pop off the background is to use a wide open aperture. The portrait here was taken at 70mm with an aperture setting of F/2.8. Focusing on the eyes, the background drops out due to the shallow depth of field into a painterly sparkle of fall colors. If your lens does not open to a fast aperture like F/2.8, use your telephoto lens at its maximum zoom, set the camera to aperture priority and choose the widest aperture opening (most likely F/5.6 or F/6.3) and step in a little bit closer. That combination will drop out the background for a similar look that makes a beautiful portrait suitable for framing and display on your mantle. 

Photographing Pets

Spanky

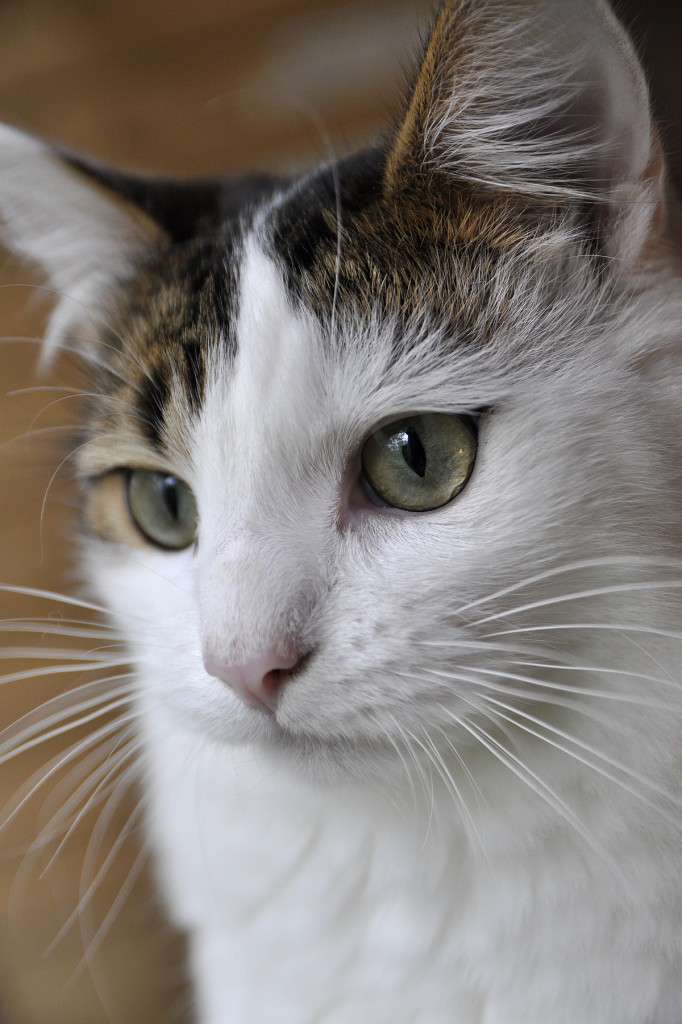
The key to taking good photos of your pets is to approach them in much the same way you do people in regards to lighting and composition. Much like children, however, it may be hard to get them to actually pose for you. I took a few shots of Spanky and Darla while they were having a quieter day. The lighting in each of the shots is slightly different, but each photo is done without flash and using only window light. Try to not use flash when taking photos of pets to avoid washing out their fur. In the main photo, Spanky was positioned very close to the window and looking out of it. You can actually see the window reflected in his eyes. I was close to him, and at 70mm, the F/2.8 aperture really helped to drop out the background and keep the main focus on his eye closest to the camera.

In picture B, Spanky moved to another table in my work area to lounge. Here, that same window is behind him, creating a nice bright background, and he is lit by the light from that same window that is bouncing off the white wall he is now facing. When taking portraits of people or pets, reflected or bounced light provides a beautiful even lighting that can be very flattering. See a post about reflected light off of a house in the backyard here. You can see the door reflected in his eyes, where a skylight in the hallway has provided extra light and makes a great catch light in his eyes. As with people and birds, it is important to get a catch light in your cat or dog’s eyes to really bring their portrait to life.

In photo C, Spanky was bored of posing, and moved to a location further away from the window and while the light here was not as bright as close to the window, it was spread out over the room for some nice even lighting (see how even the background is lit up). So here, I boosted my ISO a little higher to be able to capture more light. The very shallow depth of field throws his paws out of focus, but helps to show off his comfy sleeping position.

Lastly, in photo D, Darla is photographed in a diffused side-lit manner. The window partially covered by drapes is still allowing a lot of light to come into the room, and the slight side lighting gives the shot a little more definition and drama as opposed to the flattering and softer front or reflected lighting in Spanky’s portraits. Darla was much more curious about the camera and moved in closer to me for a look. The wide open aperture gave me sharp focus on her eyes and everything else drops out of focus.

Natural Lighting for Mother’s Day Portraits

7719_Syd-Grandma

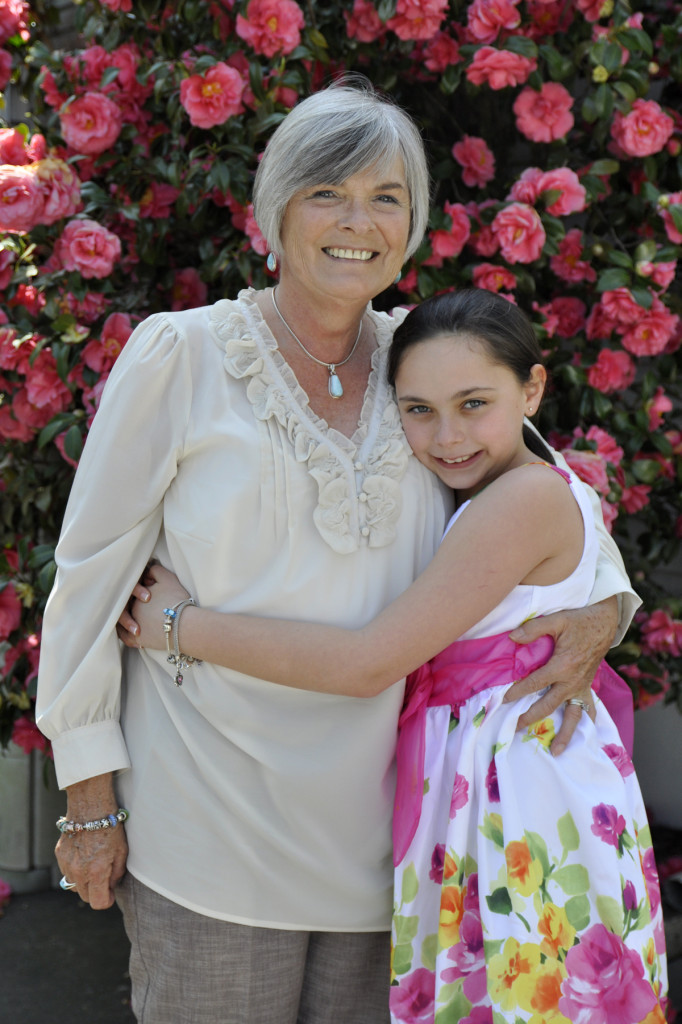
Before mom or grandma comes over for Mother’s Day (May 13th), think about a great spot in your yard to take a beautiful mother’s day portrait. Look for a spot that has open shade. Open shade will give you even lighting and really make the eyes sparkle. Great choices are in a doorway, under a covered porch, or under the perimeter of a shady tree. Position your subject just inside the lens of shade. Rule of thumb for positioning is if she can take just a step or two forward, and she is in sun the sun, then the step or two back is perfect! Too far back and you will lose some of the brightness and highlights in the eyes that the open shade provides. Try to get just a little higher than your subject so she looks up slightly towards your camera. Use a wide open aperture like F/2.8 or F/3.5 to blur the background. If you can use a tele zoom position, then your background will be even more blurred. So scout out your location and do a few test shots before your special guest arrives on Mother’s Day. Read more about open shade here and here).

It’s Almost Spring, But Here’s Another Tip for Snowy Winter Photos

RT_DSC6925

We had just one snow storm this winter, so just one day to get out and play in the snow with my camera. Snow tends to fool your camera’s meter since the snow is so bright, making the camera under-exposure your snowy pics. My analogy is that your camera wants to put on a pair of sunglasses to cut the brightness. To get a better exposure, start by setting your camera’s exposure compensation dial to +.67 (2/3 of a stop). Most of the time this does the trick, but you can even go to +1.0. (Read about exposure compensation here and here). Your snow will be bright white instead of gray-looking. For this picture, I set the exposure to +.67. I was further away from my subject and got down low to eliminate the distracting fence and bare branches in the background. I also set my aperture to a wide opening of F/5.0 and zoomed in to 185mm telephoto to blur the background. I love the snow crystals on her hat. I feel chilly just looking at this photo! Please take note that if you are lucky enough to get away to a beach destination this winter, this same tip works for bright sand and water, too.

RT_DSC6921
Here, I zoomed out to 110mm to get more snow in the photo.

Slow Down Your Shutter Speed for Fun Snowy Photos

_DSC5633_RT

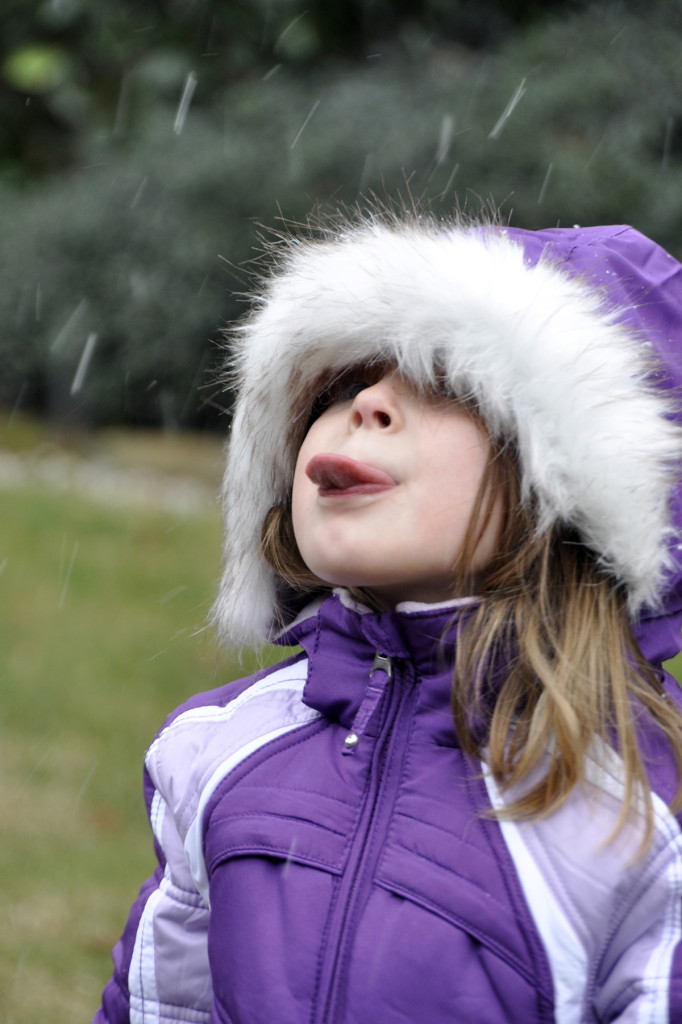
Now that winter is here, you’ll find yourself outside with the kids on the next snowy day. A good time to practice slowing down your shutter speed to create fun effects! By putting your camera on aperture priority mode (A on the mode dial)and moving your aperture (or f-stop) to a larger number like F/8, you will get a slower shutter speed. Since it is usually overcast when it is snowing, this aperture setting should be about right, but feel free to make the aperture even larger, or open up a little bit (move to a smaller number like F/6.3 or F/5.6). In this photo, the exposure was 1/40th sec. at F/6.3— just enough to make the very light snow turn into short streaks, but still fast enough to keep my subject in focus if she moved slightly. I used the stabilization feature on my lens, so camera shake was not a worry, but you will want to be sure that the shutter speed does not drop to slower than 1/30th sec. or else you do risk camera shake without a stabilization feature. If your subjects are jumping around considerably, this technique may not work. I asked my subject to catch snowflakes with her tongue, which made her stand still and concentrate on the activity. Slower shutter speeds (typically those under 1/125th sec.) can help convey motion, and this same technique should be used to make water streaks under a sprinkler or from a hose or for waterfalls. Read more about freezing and blurring motion here and here.

Add a Little Light to Combat Harsh Sun for Better Beach Photos

FillFlashMainPhoto

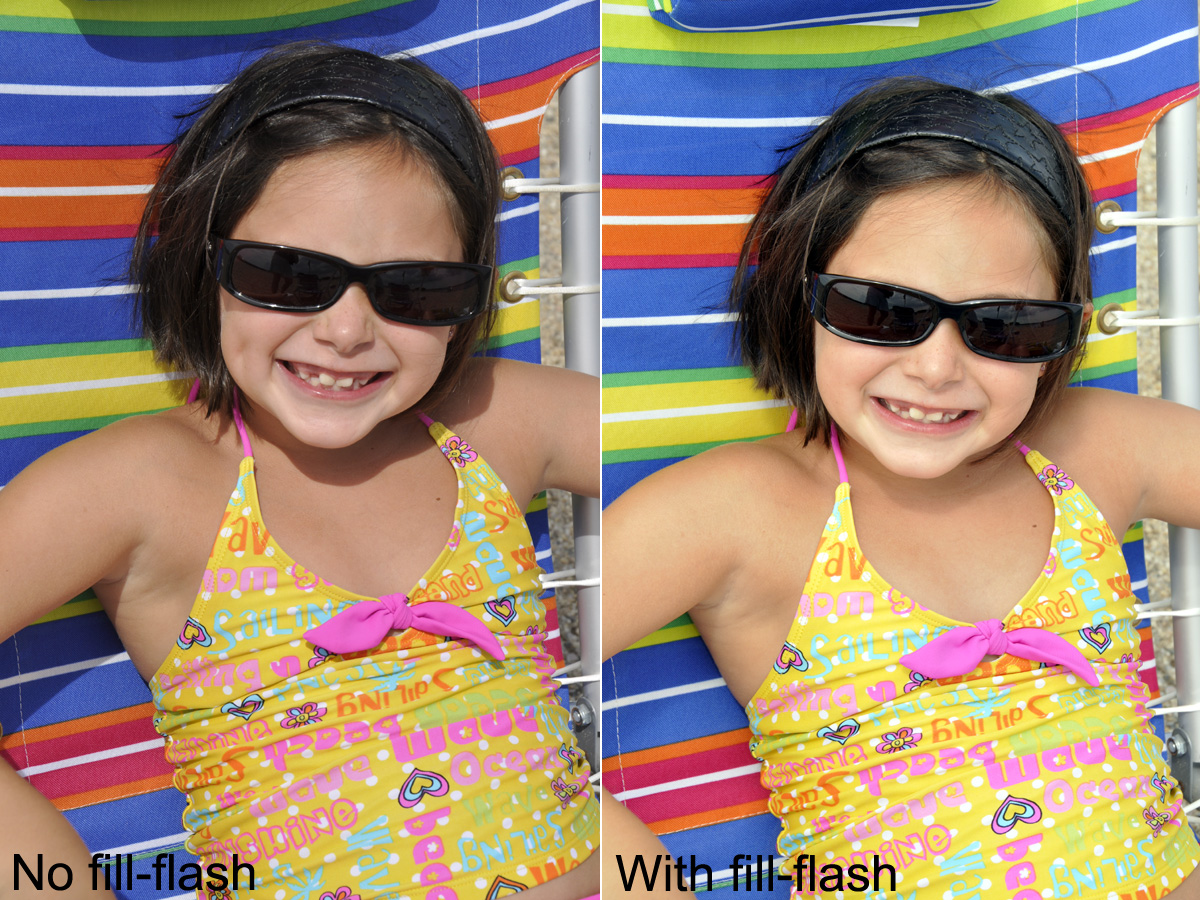
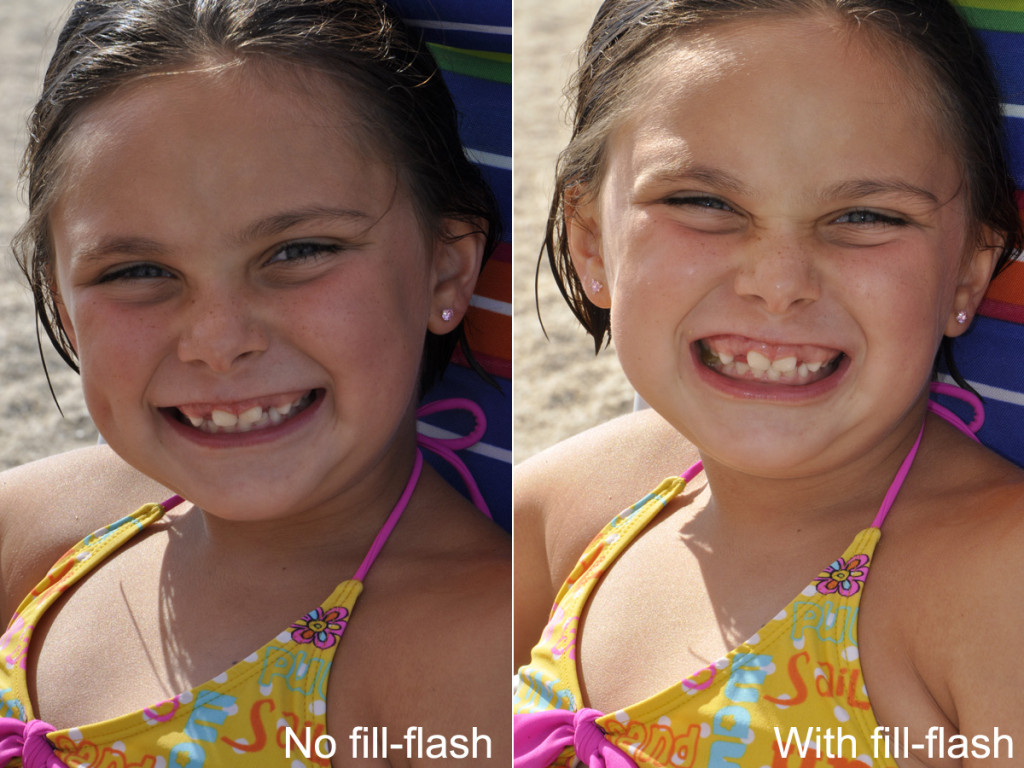
Taking pictures at the beach is always fun (as long as you take a few precautions to protect your camera — see 7/6/11 post). But often we get harsh shadows that make the photos less desirable. Get rid of the harshness and raccoon eyes just by popping up your flash! Put your camera on the program mode (P) and pop-up your flash. As you can see in the example comparisons below, you can soften all of the harsh shadows. Examine the two photos. Look under the chair’s head rest, under the left arm, under the chin and below the rim of the sunglasses. Additionally, look at the sliver of rocky sand in the background on the right side. On the left, it’s sort of greyish, but on the right, it is a more pleasing color. Then look at the example further below (please ignore that toothless grinny expression!). In this case, the brightness behind the subject made the camera’s meter stop down a little (like putting on sunglasses because it was too bright) resulting in her face being too dark. But by popping up the flash, you see how you can brighten up a dark face. Tip: If you find the flash to be too bright or too artificial looking for your taste, then  you can tone down the flash very simply. Look at the same button you use to pop up your flash. It should have a +/- symbol. Hold this button in and dial the wheel at your index finger to the right so that the numbers on your display go to the negative side. You are essentially subtracting power from the flash so that it puts out less light. Try several different settings (-0.7, -1.0, etc) until you achieve a desirable shot. You may need to consult your owner’s manual (yes, sorry) and look for “flash exposure compensation” in the index.

comparison_2_fill flash comparison_1_fill flash

Lighting Diagrams for Window Light Photos

TIPS CARDS_WindowLight_Layered.psd
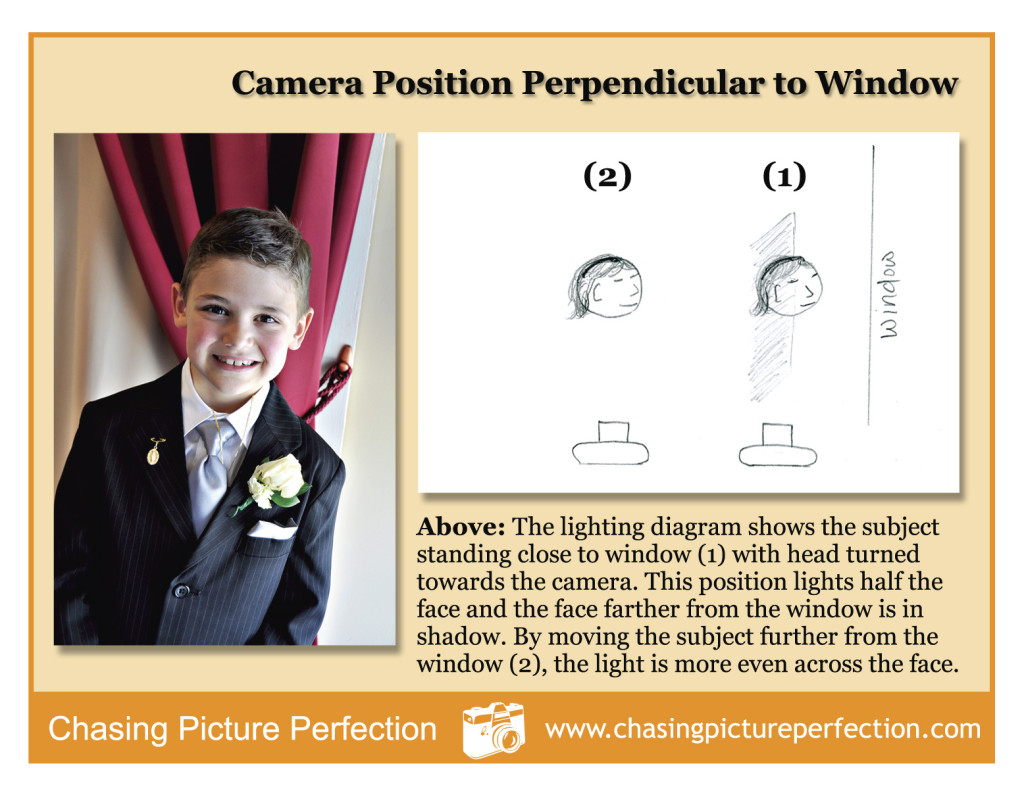
Window light is one of my favorite ways to take portraits and still life shots as you well know since my blog entries frequently feature this type of shot. I felt by sketching out how I position the camera and the subject might be helpful. I am going to ask you to not laugh at my funny sketches, but I am sure you will not be able to help yourself. I laughed too as I was making the card.

Take a Candid Holiday Portrait by Window Light, and Add a Prop!

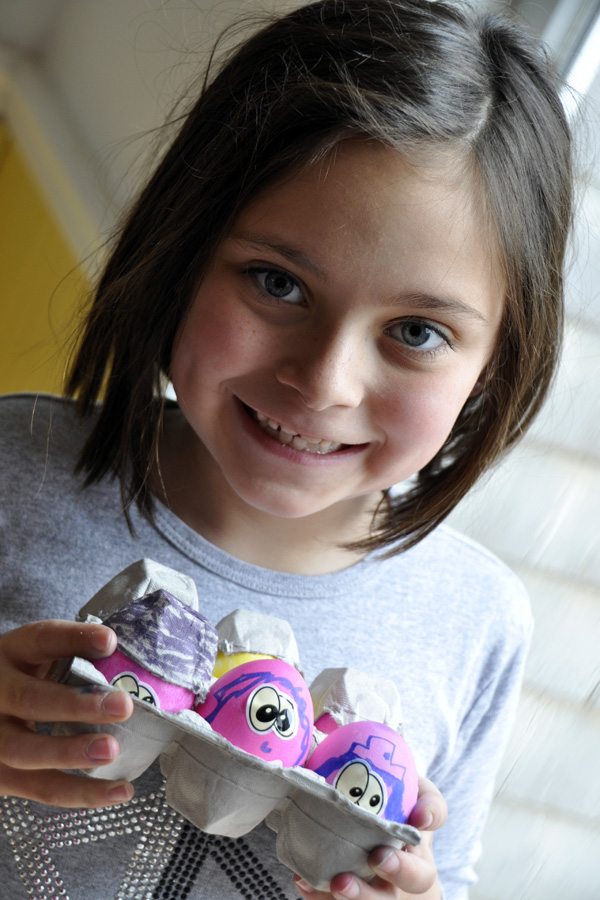
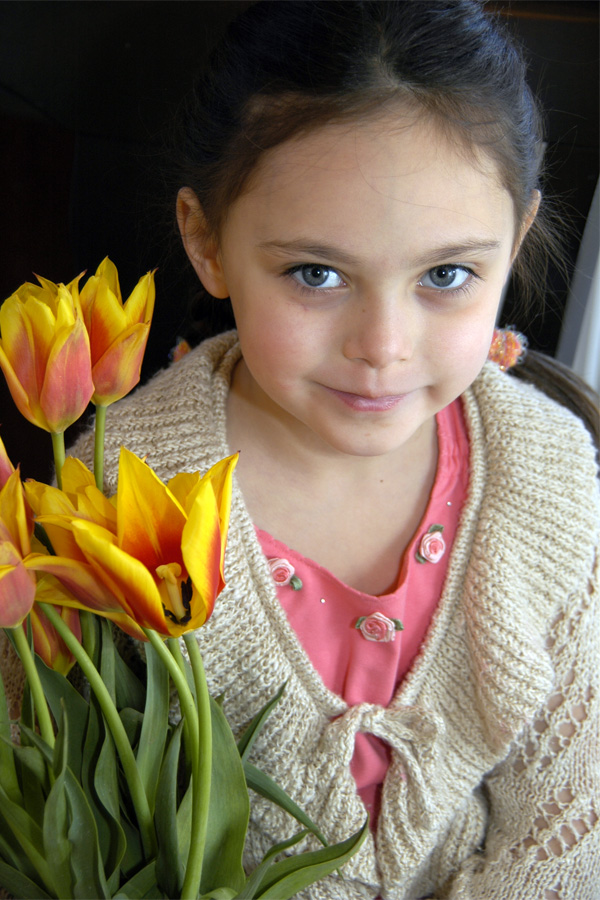
easter_portrait_1The window is your best photo accessory for portraits. It’s so easy to use, always there, you don’t need an assistant to hold anything, and you don’t have to pull out your auxiliary flash. I just love the light that streams through my windows in several rooms. Positioning your subject very close to the window, like in the shot at left from early Easter mornning, can give you a nice dramatic light since the light falls off the opposite side of the face quickly and the eyes have a nice sparkle from the window catchlights. To get more of an even light, move your subject just a further away from the window (as in the first photo below- the subject was across the room from the window), or, face your subject perpendicular to the window instead of parallel. In this case, you can actually stand right in front of the window with your subject in turn in front of you and you will not block the light! See this post here for an example of this type of positioning. You can also “fill in” the other side of the face with a pop of the flash as you can see in the second photo below. If you find there is still a slight “artificial” feeling, you can adjust how much light the flash puts out by adjusting the flash +/- button usually found near the flash. Hold the button in and dial it towards the minus side. Perhaps -.7 or -1.0. Review the flash section in your camera manual to see exactly how to set this on your camera. And don’t foget to add a prop that gives your portrait a sense of time. In my case, the tulips scream spring and the eggs of course will remind me this was Easter time when we look back at these photos years from now. (Watch for a forthcoming download card with lighting diagrams for window light positioning).
easter_portrait_3