Change Your Position for Better Photos

shoot from above
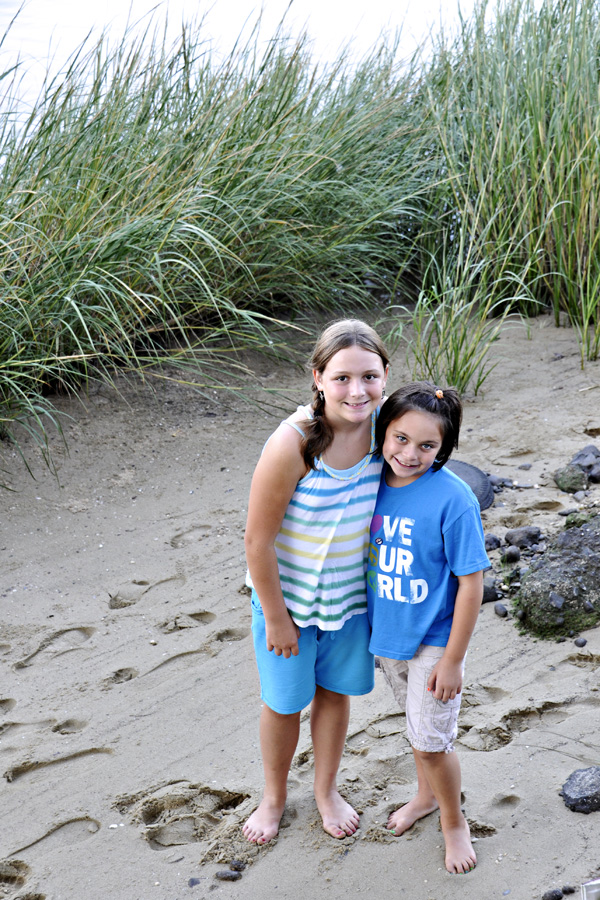
Just like changing the scenery can give us a whole new outlook and change our mood, so does changing your position when taking a photo. It is very common for all of us to just shoot pictures from a standing position, but this leads to somewhat boring images. We have all gotten a much better shot just by crouching down or standing on a chair or bench. Not only do you get a whole new perspective, but this helps to eliminate distracting backgrounds for a clean, more professional look. For this shot, I was standing on the bulkhead while my subjects were down on the shore, allowing me to give a real sense of where they are since I was able to show both the sand and the beach grass in the shot. Plus, the busy background harbor was now out of the shot. Look for the next photo tips card download about positioning yourself for better photos to come shortly (see previous photo tips cards: #1 here; and #2 here).

End of Summer Photo Lesson: Shooting in Open Shade

_DSC4032_RT

When the sun is really harsh, you can still get wonderful portraits by placing your subjects just inside a shady area. This might be just under an umbrella (like my example of these gorgeous siblings), inside a garage door, inside your house door, under the slide at the park, under the light of the first tree, etc. The key is to not position your subject too deep into the shade. You want all of the light that is just behind you to spill softly onto your subjects. This will give even lighting across the face(s) as well as great light in the eyes. (65mm -cropped; F/5.6; ISO 400).

BONUS Lesson: This second photo was also taken in the open shade of a small umbrella on a very bright beach. Here you can actually see just how close they are positioned to the edge of the shade. But I am throwing this in to illustrate leading lines. Your eye naturally goes to the boy first and follows down the line to the sitting girl, but notice how the lines of the table push your eye right back up again. This is a great way to keep your viewer engaged within the image.(55mm; F/5.6; ISO 400)_DSC4035_RT

Use Your Flash for Outdoor Photos

fill flash_blog post

We all have heard the rule that early morning and late afternoon are the magical times for talking photos. But let’s face it. At noon, we’re at the pool or the beach. Noon is when the action is happening and when we are more likely to be taking photos. So in order to avoid the raccoon eyes that come with overhead noon time light, just turn on your flash! The small burst of light will fill in shadows and make your subject’s eyes pop out just like it did for my subject. Look at the shot on the left with no flash. Harsh shadows fill in the eye sockets and the shadow is strong across her shoulder and neck. For the shot on the right, I just popped up my built-in flash and it makes a world of difference. To avoide over-exposing your subject, one trick is to dial in a small aperture like F/16 or F/22. For some people, images that use fill flash may appear to be too artificial. If you find the flash puts out too much light, there is a setting on most DSLR cameras whereby you can “compensate” the flash in a plus (+) or minus (-) direction. Dial in a -1 or -2 flash compensation and the flash will emit less light to fill in shadows more subtly. (For that tip, however, you will have to break out your camera manual to find the setting). So next time you’re at the pool or beach this summer, and you cannot get your subject under an umbrella, or tree or some other type of open shade during those harsh hours between 11am and 3pm, then try popping up your flash! (25mm; F/16; ISO200)