Critique Your Photos In Order To Keep Improving Your Photography Skills

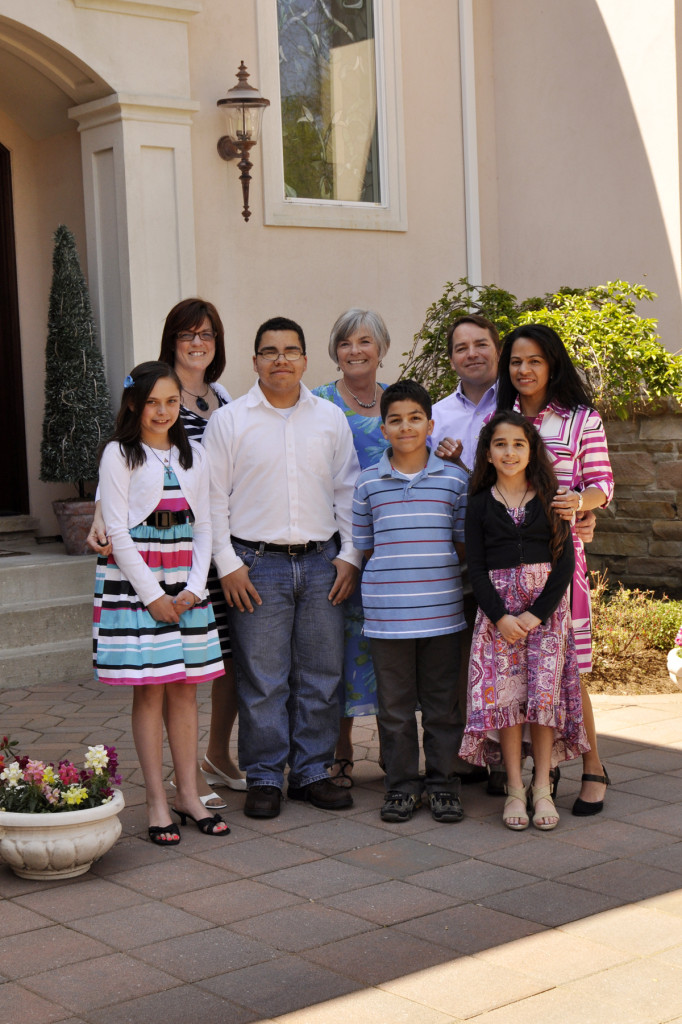
Before I rip this photo apart, I do have to say that I am so glad to have it and it will be framed and scrapbooked regardless of the faults I find in it. However, after loading this up

_DSC7692_RT

onto my computer, I sighed and wished I done some things differently. But this is one of the best ways to improve your picture-taking abilities–critique your images harshly to figure out how to make a better shot. If I could take this photo again, I’d do the following things to improve it:
  • I would get just a little bit higher instead of shooting at eye-level
  • I would have one more level of subjects instead of two predominately same-height rows, allowing me to make the group more narrow to accommodate my desire for a full-length vertical shot
  • I would move the boy in the white shirt to either kneel in front, or to a position behind grandma in blue
  • I would make more organized rows of turned shoulders, instead of all facing forward
  • I love the open shade, but I would changed our position slightly to eliminate the harsh lines of shadow in the foreground and background top right
  • While I purposefully picked F/8 as my aperture to be sure I had enough depth of field for both rows to be in sharp focus, I think stopping down to F/6.3 or 5.6 would have blurred my background more

I do love the lighting, though. Open shade is so flattering (see previous post for more) and in most instances, can be easily found when you take a look around your location. As you see, they are all standing just inside the shade, not in the harsh sun. If they were further back into the doorway, I might not have gotten the sparkle in each of their eyes from the open shade situation. The sun bounces around and lights my subjects evenly as if you held a big sift reflector in front of them, thereby eliminating harsh shadows under chins and brows and giving you highlights in the eyes.

So while I will look for a similar location next time I shoot a group like this, I will a) get higher, b) watch how the subjects are arranged more closely, and c) look more closely at what’s in the edges of the frame and zoom in, change position or change composition to eliminate anything distracting from the frame.

Natural Lighting for Mother’s Day Portraits

7719_Syd-Grandma

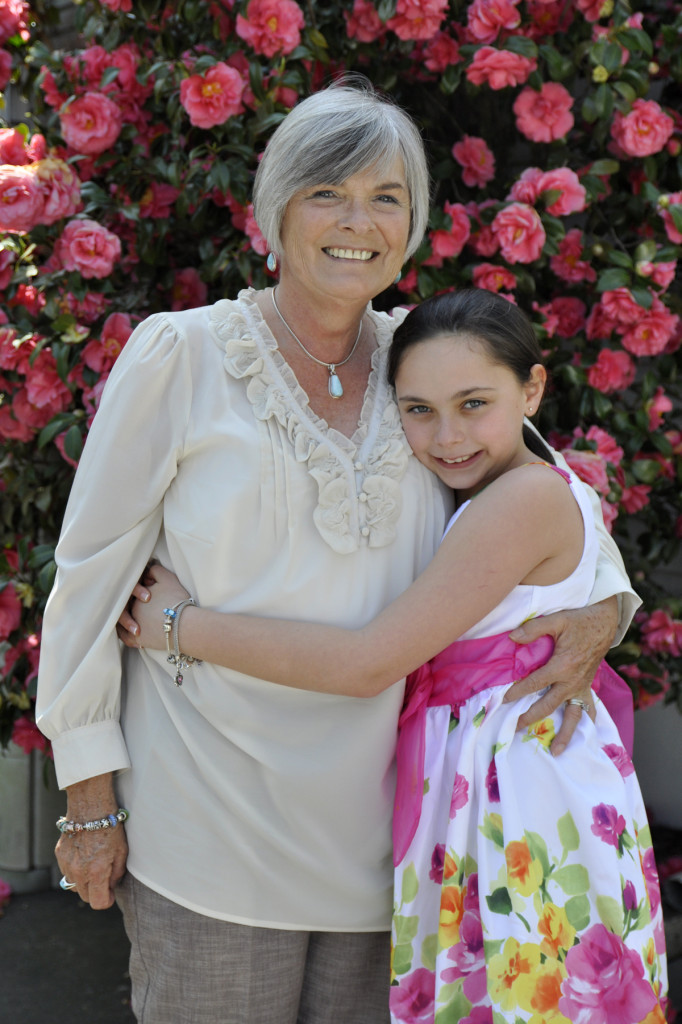
Before mom or grandma comes over for Mother’s Day (May 13th), think about a great spot in your yard to take a beautiful mother’s day portrait. Look for a spot that has open shade. Open shade will give you even lighting and really make the eyes sparkle. Great choices are in a doorway, under a covered porch, or under the perimeter of a shady tree. Position your subject just inside the lens of shade. Rule of thumb for positioning is if she can take just a step or two forward, and she is in sun the sun, then the step or two back is perfect! Too far back and you will lose some of the brightness and highlights in the eyes that the open shade provides. Try to get just a little higher than your subject so she looks up slightly towards your camera. Use a wide open aperture like F/2.8 or F/3.5 to blur the background. If you can use a tele zoom position, then your background will be even more blurred. So scout out your location and do a few test shots before your special guest arrives on Mother’s Day. Read more about open shade here and here).

Don’t Let Bright Sun Ruin a Candid Portrait- Move into the Open Shade

Open_shade_sun_comparison
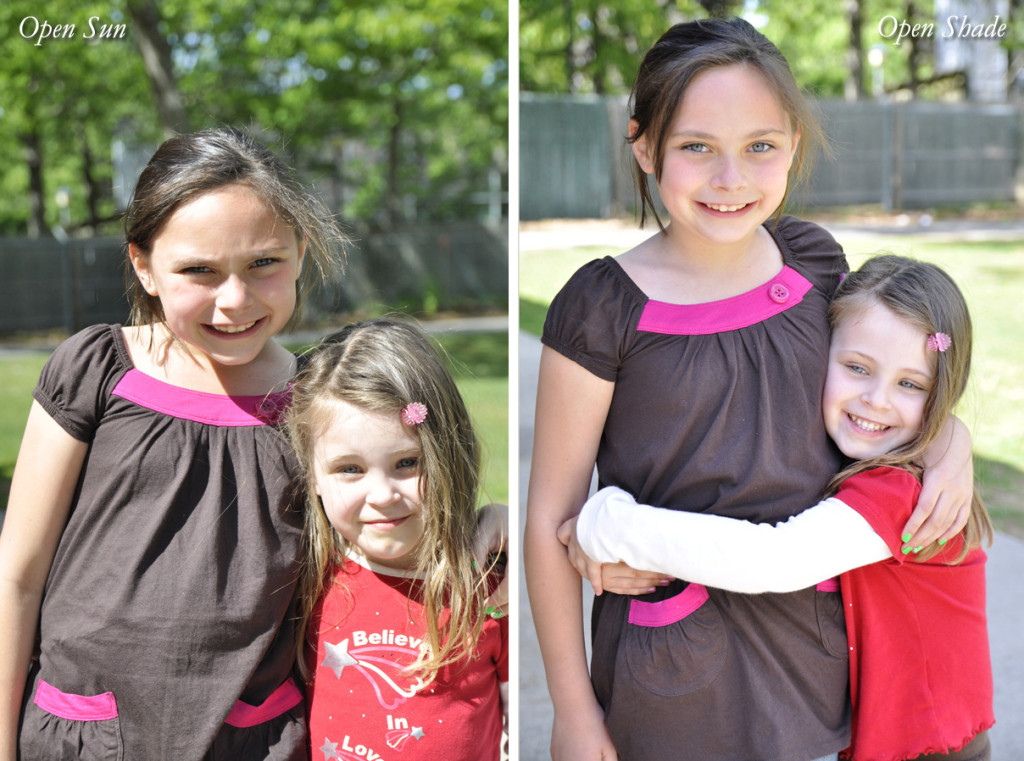
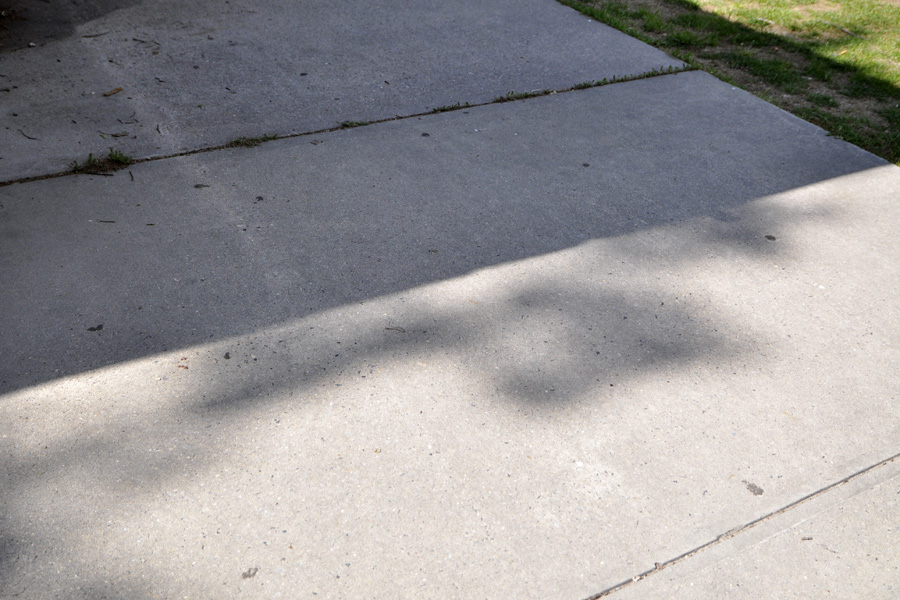
We are not nocturnal by nature, so our photo-taking time is usually during the day. And now that it is almost summer, there will be plenty of bright sunny days on which you want to take photos of vacationing kids and visiting guests. So what do we need to do to get a decent outdoor portrait? The simplest solution is to look for open shade. Open shade is the step you take back from the sunny to the shady. It can be just under a tree. Or a step inside a door frame or porch. Or a tent or any overhang. The open shade eliminates all of the contrasty shadows that appear on the face and clothing of a subject standing in the sun. Look at the side by side comparison, especially the eyes and the shirt of the girl on the left. (Pls ignore the color as I did not reset my white balance from sunny to shade and consequently have some funky color going on; pls be sure to set the WB to auto or shady). Below is a shot that shows you the line between a good and poor candid portrait. The girls were first on the sunny side of the line, and then took a step back into the shade. I love how the light catches in their eyes when you shoot in open shade. For more on open shade, see this post too.
shadow line

End of Summer Photo Lesson: Shooting in Open Shade

_DSC4032_RT

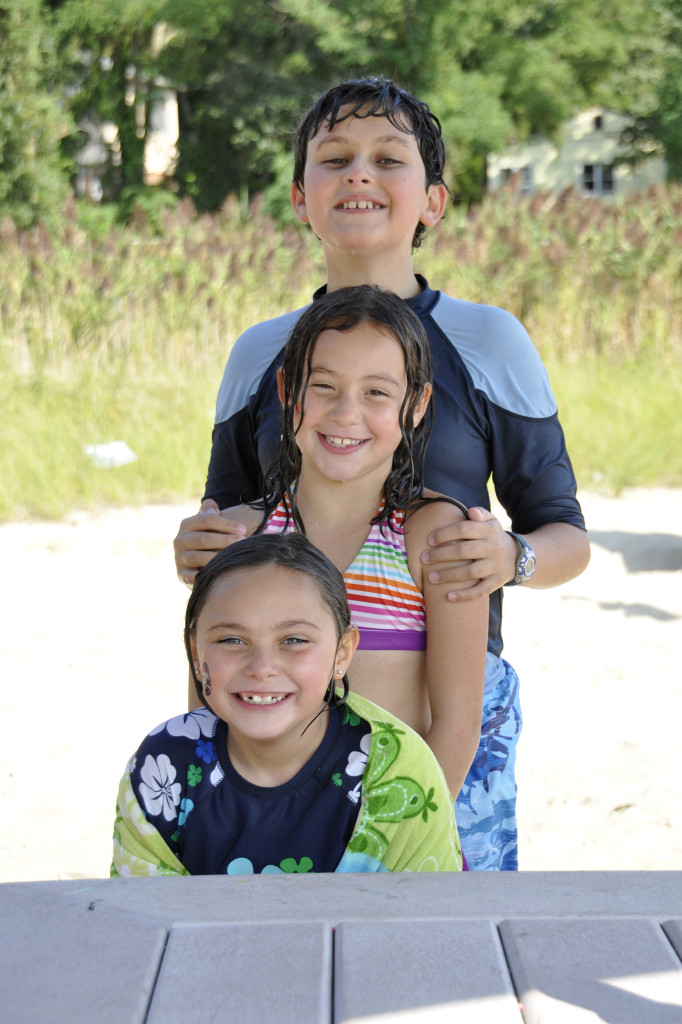
When the sun is really harsh, you can still get wonderful portraits by placing your subjects just inside a shady area. This might be just under an umbrella (like my example of these gorgeous siblings), inside a garage door, inside your house door, under the slide at the park, under the light of the first tree, etc. The key is to not position your subject too deep into the shade. You want all of the light that is just behind you to spill softly onto your subjects. This will give even lighting across the face(s) as well as great light in the eyes. (65mm -cropped; F/5.6; ISO 400).

BONUS Lesson: This second photo was also taken in the open shade of a small umbrella on a very bright beach. Here you can actually see just how close they are positioned to the edge of the shade. But I am throwing this in to illustrate leading lines. Your eye naturally goes to the boy first and follows down the line to the sitting girl, but notice how the lines of the table push your eye right back up again. This is a great way to keep your viewer engaged within the image.(55mm; F/5.6; ISO 400)_DSC4035_RT

Those Eyes! Photographing Pets.

REBEL_1

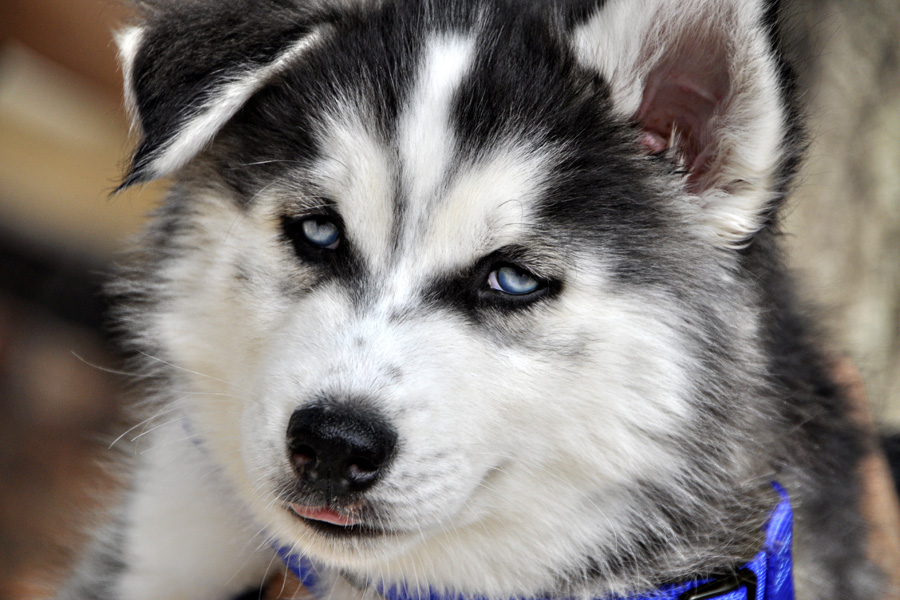
You know that sparkle we strive to get in every subject’s eyes? The sparkle that brings a portrait to life? Well, that same feature needs to be in your pet photos, too. I remember a photo contest judging once where the guest judge, a wildlife photographer, eliminated a contestant’s bird entry since the bird looked dead! It had no pin-point highlight in its eyes and she felt it looked like a taxidermy prop. So when shooting your pets, avoid that same horrible criticism. Walk around them to find the right light, or if you have a well-trained pet, make it sit near a window just like I ask my model to do when I want a casual portrait.

Now with Cinder here (a new addition to the home of close friends), how can you miss? Those eyes! But I still looked to see how the light hit his baby blues. The sun was behind me and we were under the shade of a tree. This is called open shade and gives the image a nice even tone, not contrasty on the bright sunny day. And it also leads to great highlights in the eyes.

Open shade can be found in many places: just inside a doorway, just inside the garage overhang, under the light of the first tree in a forest or tree-lined road, under a beach umbrella, just inside a beach cabana, and many more places just like that. Just be sure to not move your subject too far inside, but keep them just inside where the light is no longer harsh. Use a wide open aperture to blur distracting backgrounds. (ISO 400; 200mm; 1/1250 sec; F/6.3)