Shooting Sample Images to Learn How to Achieve Shallow Depth of Field

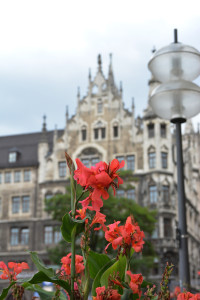
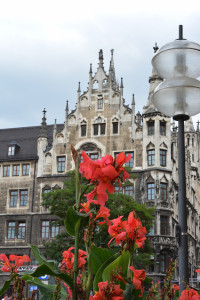
I find that the best way to make aperture-setting selections stick in your mind to be able to achieve a desired effect is to shoot sample images at two aperture extremes. Start by putting your camera into the aperture-priority mode (A on Nikon cameras; AV in Canon cameras). Then set your aperture to the widest setting (like F/2.8, F/3.5, etc.) and take a photo. This will be your sample A (see my sample below). Then move your aperture to its smallest setting (like F/22, F/32). This is your sample B. Then study the difference between the shots.
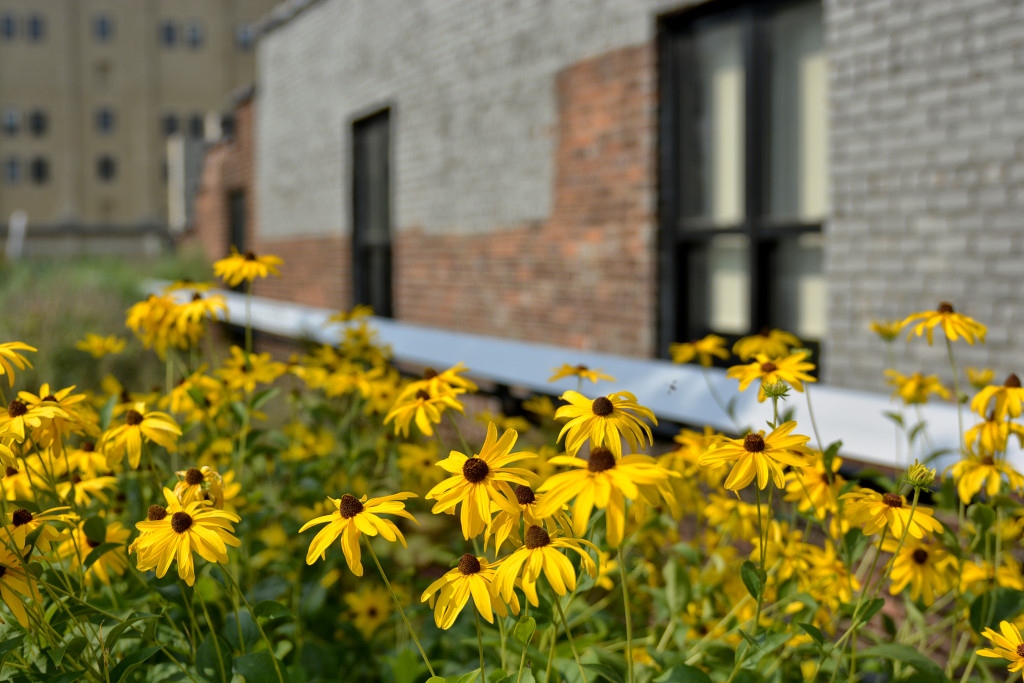
{Sample A} Wide Open Aperture (F/2.8 – 1/1000th sec shutter speed – 34mm)
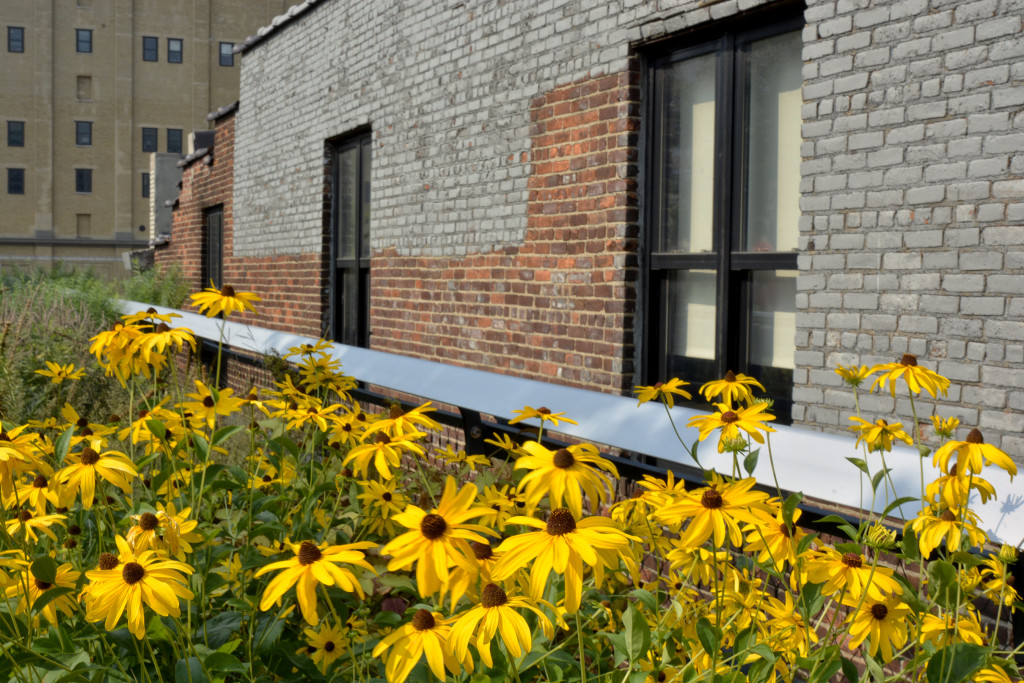
{Sample B} Smallest Aperture (F/22 – 1/125th sec shutter speed – 34mm)

Now, to make things confusing, your results will vary depending on your widest aperture setting, focal length setting and how close you are to the subject. In my sample shots above, I was very close to the flowers I focused on and my aperture was F/2.8 in the first, so the brick building in the background is out of focus perhaps more so or less so than your sample shots may show.

If you keep making samples for yourself like this, eventually it will become second nature when you are shooting to select the appropriate aperture to get the photo you have in mind (with out of focus background or sharp background).

Typically you will want to blur the background a little for portraits for a more professional look; or if the background is very distracting; or if you want the viewers of your photos to be drawn to so a very specific part of the shot.

Photographers will use a smaller aperture to get the foreground to background in focus for landscapes, and sometimes for shots that tell a story of where you are. For example, you may want a store name to be in sharp focus so that it is legible. Or you may want the details of a landmark to be in sharp focus as well as your family standing in front of it.

However, sometimes landmarks, such as the Disney Castle, are so recognizable, that having the castle slightly out of focus works really well to give you a “here we are” shot that is elevated to a more professional looking image. Below is a sample from Epcot’s China Pavilion.

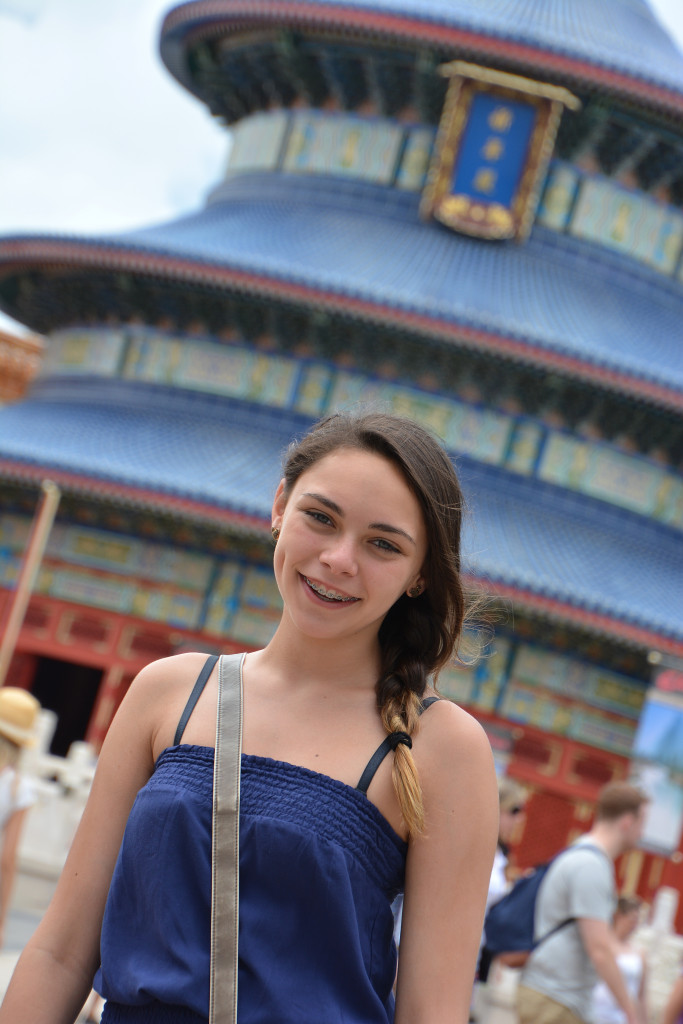
A slightly wider open aperture.


Changing the Look of Your Photo with Aperture Priority Mode

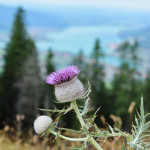
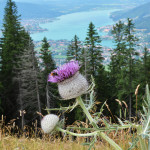
You can dramatically change the look of your photo by changing the aperture of the lens on your camera, which controls the depth of field. Depth of field is how much of your photo in front of and behind your subject is in focus. If foreground to background is all in focus, your depth of field is deep. If the foreground and background are out of focus, then you have shallow depth of field. Learning to control this function on your camera will help you to yield more professional-looking photos that let your subject pop off the image because it will be separated from the background. In the two example photos below, the one on the left shows shallow depth of field. The aperture was set to F/4.5 (a wide open aperture). The photo on the right shows deep depth of field and the aperture was set to F/16 (a small aperture).

RT_Blog4_F4_SAE_1607

RT_Blog5_F16_SAE_1607The aperture is easy to set on your camera by setting your camera mode dial to A (on Nikon cameras) and Av (on Canon cameras). Then use the thumb wheel to move the aperture number to a smaller or a larger number. The smaller the number, the more blurry the background will be like the above left photo. The larger the number, the more in focus both subject and background will be, like the above right photo.

This technique is particularly useful when shooting portraits. You want your subject to stand out from the background, especially if there are distracting items behind the subject. You can choose how blurry or sharp the background will be by experimenting with different aperture settings. To practice, shoot the same subject twice at the two extremes like I did above. Do this several times with different subjects each time you have your camera out until you feel comfortable that you can easily pick the aperture to get the look you want. See more examples below and don’t forget to download the photo tips card for your gadget bag to help you in the field.

One Location. Two Entirely Different Photos.

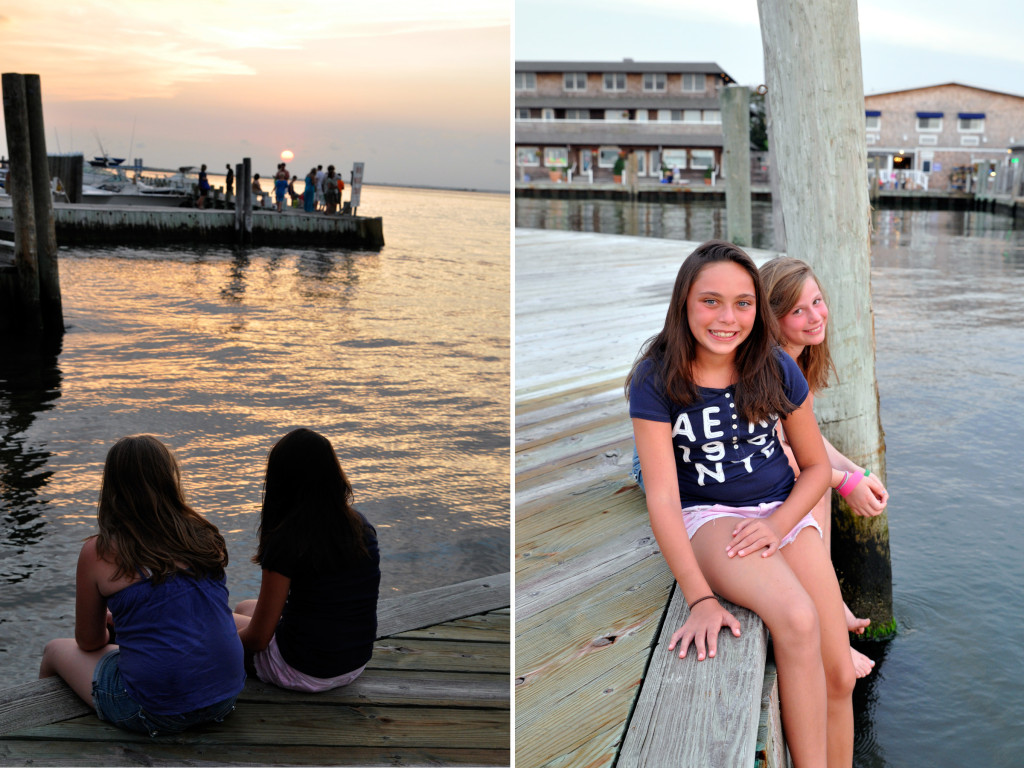
Change your position_compSometimes we take the shot we had in mind and call it a day. But when the light is so beautiful at sunset, it pays to take a few steps around just to check out how the sun is lighting your subject. The photo on the left was the one I was after: two girls watching the sunset, captured in near silhouette as the center-weighted meter gave an exposure for the bright setting sun and made most of the other parts of the shot go dark. Just what I wanted. But then I sat down next to the girls to watch the sunset with them, and wow, was the light across their faces gorgeous. So of course I snapped away while the sun set! Because the light was low, I boosted my ISO to 640 and got a shutter speed of 1/100th sec at F/5.0 aperture. If I had unlimited cooperation from my two subjects, I would have boosted the ISO to 1000 and shot more photos at F/8 so that the girl further back would be in sharper focus. When shooting more than one person, either try to get them on the same plane of focus, or deepen your depth of field by using a smaller aperture like F/8. Not always possible, as was the case here, but the sweet expressions and the light make the shot a perfect one for me.

Video Tutorials Worth Watching


I usually don’t post work-related stuff, but I have to say that the new 1-minute videos featuring professional photographer Andre Costantini are worth checking out, so I thought I’d share the link to the latest video about aperture since it is great information. See Episode Three and other videos here.

Use Your Flash for Outdoor Photos

fill flash_blog post

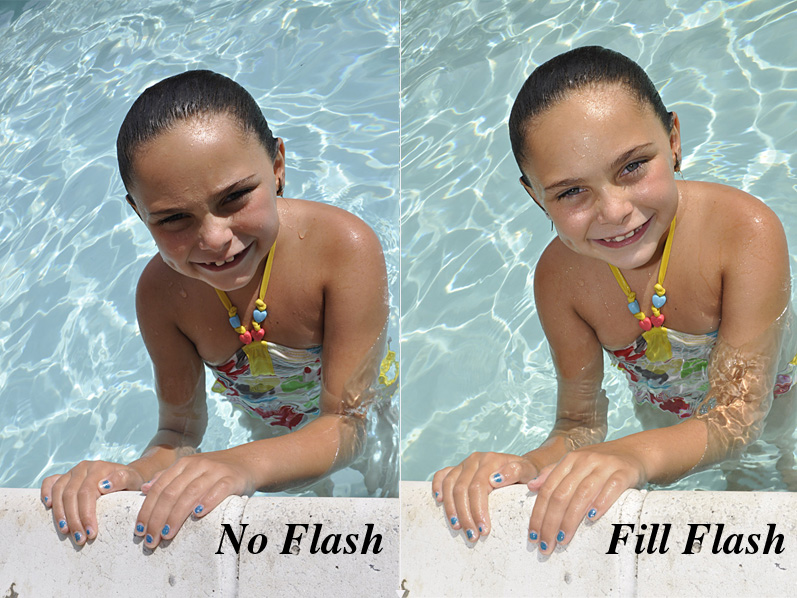
We all have heard the rule that early morning and late afternoon are the magical times for talking photos. But let’s face it. At noon, we’re at the pool or the beach. Noon is when the action is happening and when we are more likely to be taking photos. So in order to avoid the raccoon eyes that come with overhead noon time light, just turn on your flash! The small burst of light will fill in shadows and make your subject’s eyes pop out just like it did for my subject. Look at the shot on the left with no flash. Harsh shadows fill in the eye sockets and the shadow is strong across her shoulder and neck. For the shot on the right, I just popped up my built-in flash and it makes a world of difference. To avoide over-exposing your subject, one trick is to dial in a small aperture like F/16 or F/22. For some people, images that use fill flash may appear to be too artificial. If you find the flash puts out too much light, there is a setting on most DSLR cameras whereby you can “compensate” the flash in a plus (+) or minus (-) direction. Dial in a -1 or -2 flash compensation and the flash will emit less light to fill in shadows more subtly. (For that tip, however, you will have to break out your camera manual to find the setting). So next time you’re at the pool or beach this summer, and you cannot get your subject under an umbrella, or tree or some other type of open shade during those harsh hours between 11am and 3pm, then try popping up your flash! (25mm; F/16; ISO200)

Unclutter Your Photo’s Background

earring_F6_150

Understanding the function of F-stops, or the aperture of your lens, is undeniably the most confusing of your DSLR’s features. However, once you master it, you will make a huge leap forward in the quality of your photos.

As a photo student in high school and college, I stuck a slip of paper onto the back of my camera (yes, in film days SLRs had a bookplate slot on the back of the camera where you slipped in a flap from your film box so that you could remember what film you had loaded. Can you imagine?!). On this slip I wrote, “open aperture=blurry” and “small aperture=sharp.”

An open aperture lets in a lot of light. On your lens it is a setting like F/2.8, 3.5, 5.6, or 6.3. Think of the aperture as your eye’s pupil. If there is not much light, your pupil gets bigger, or “opens” to let in more light. But a big result of using an open aperture is the effect of a blurry background that really makes your subject pop off the page (or screen). You can easily control the aperture setting on your camera by putting the camera on “A” and dialing in one of the aforementioned numbers. Your camera will automatically pick a shutter speed to make a proper exposure.

If you have a distracting background, dialing in a wider (or open aperture) will make the background blurry and eliminate the distractions. However, maybe you want the background really clear. Like if you’re standing in front of a sign that you want to be able to read in the photo. Then you would dial in a small aperture.

In this first photo, her eye is in focus, but her earring is not, and neither is the tip of her nose. I was just a few feet away and had the camera set to “A” (Aperture Priority) and dialed in F/6.3. Now conversely, if you choose a small aperture, like F/22 or F/32, your background will appear more sharp. Again, imagine a bright sunny day and how your pupils react: they get smaller and let in less light. But also, think about when you squint and how things get clearer. This is sort of how a smaller aperture works. In the second photo, I dialed in F/32 and her earring is now in more focus.

{F/6}

{F/6}

{F/32}

{F/32}


{F/6.3}

{F/6.3}

{F/22}

{F/22}

Lawn Angels: Blurring and Freezing Motion in Photos

LawnAngel_Blur

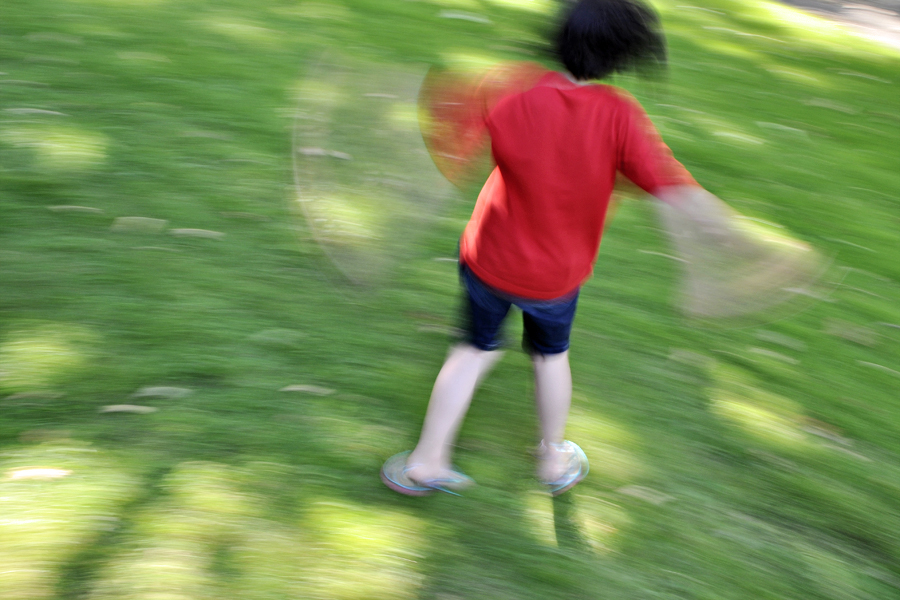
I set out to take two contrasting photos in order to visually demonstrate the effect different shutterspeed settings will have on your photos. Check it out! I got a shot that reminds me of snow angels! The shot above was taken at very slow shutterspeed (1/6 second), so the action is blurred. Most of the time when we take a shot that’s blurry, we delete it. Right? But take a second look. Sometimes there’s a story or an emotion that’s told because of the blur! My lawn angel spun until she was dizzy while I snapped away on the deck that gave me more of a “bird’s eye” view. The elevated position also allowed me to keep the lush green grass as a backdrop and eliminate from the shot the distracting cars and more in front of the house. I set my camera to aperture priority and selected a small aperture (f/18) and lowered the ISO to 200. These settings ensured that I would get a slow shutterspeed and blur the action.
LawnAngel_Freeze

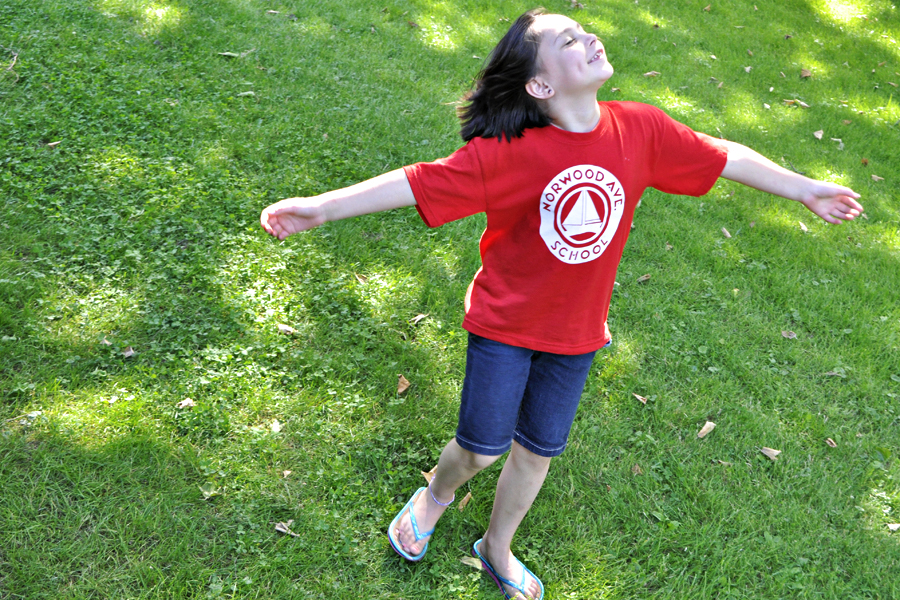
The contrasting shot above turns my angel into a statue, yet there is still a joy about the image since you can clearly see her face. But I may have to tell you that she was spinning or you might think she’s just breaking out into song or feeling the breeze. But whatever story you put to the image, it’s still joyous. To freeze the action, I moved the settings to the opposite end: the aperture was changed to the widest opening I could select (F/6.3) and I raised the ISO to 800. This ensured that I would get a faster shutterspeed of 1/200 sec.
So slow down a bit, literally, by capturing the movement in your active kids! Summer is the perfect time to try-jumping into and out of the pool, racing in the yard, playing jump rope, simply jumping, sliding into home plate, and so much more. And don’t delete the shots off your camera. Download them and take a closer look. You might be surprised at what you get. (PS-I am working on freebie cards for basic photo tips, so keep a look out for those).

Play with Panning for Action Photos

PANNING_1


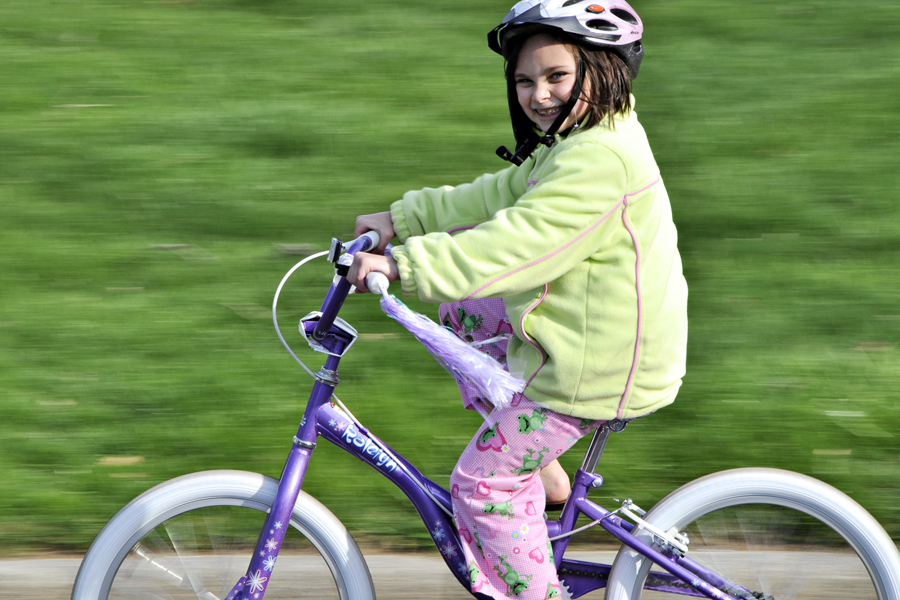
I took about 100 photos of Sydney riding her new bike to show what panning is. Panning is when you follow the action at the same rate of speed as the subject, resulting in a blurry background and a sharp subject. I discovered it is not so easy as it sounds. There are several steps to follow in order to get the result:

1) set your camera to Aperture Priority and select a very small aperture like F/22. This slows down your shutter speed to about 1/25th sec depending on how bright it is out;

2) in order to ensure your camera can select a slow shutter speed, set your ISO to 200;

3) set your camera to continuous shooting and continuous AF; and

4) take lots and lots of shots as the action speeds by you parallel to your camera. Pivot your whole body while keeping the camera level, following the action as it passes in front of your camera. Keep your finger on the shutter release button until after the action has passed you.

The background will be streaks of color (the slower the shutter speed, the more streaky). If your subject appears blurry, you are moving slower than your subject. This technique requires lots of practice. So don’t be discouraged your first time out. The images here were shot at varying shutter speeds and the result in each differs slightly. Notice a nice clean background makes the best image, but this technique also helps to make a cluttered background look better.

PANNING_2PANNING_3