Lawn Angels: Blurring and Freezing Motion in Photos

LawnAngel_Blur

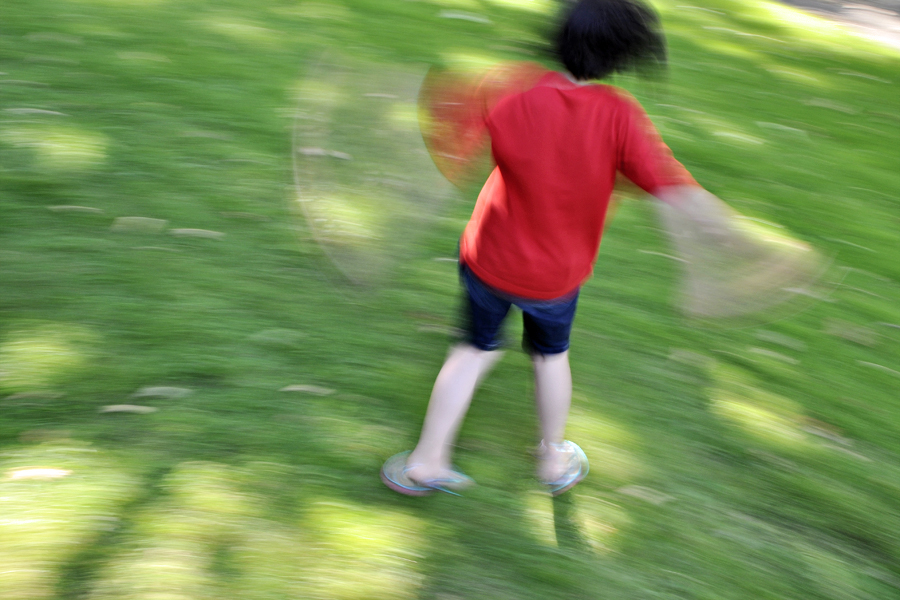
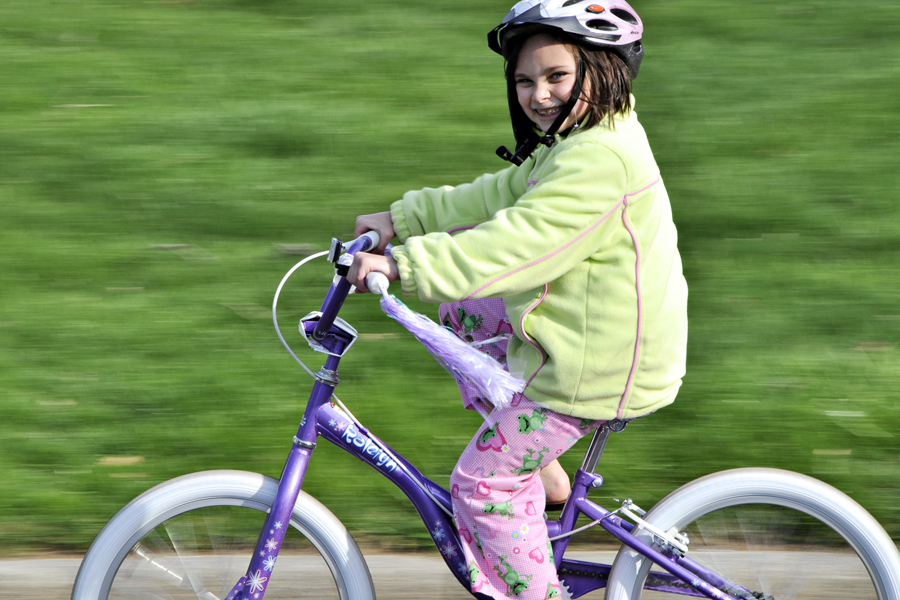
I set out to take two contrasting photos in order to visually demonstrate the effect different shutterspeed settings will have on your photos. Check it out! I got a shot that reminds me of snow angels! The shot above was taken at very slow shutterspeed (1/6 second), so the action is blurred. Most of the time when we take a shot that’s blurry, we delete it. Right? But take a second look. Sometimes there’s a story or an emotion that’s told because of the blur! My lawn angel spun until she was dizzy while I snapped away on the deck that gave me more of a “bird’s eye” view. The elevated position also allowed me to keep the lush green grass as a backdrop and eliminate from the shot the distracting cars and more in front of the house. I set my camera to aperture priority and selected a small aperture (f/18) and lowered the ISO to 200. These settings ensured that I would get a slow shutterspeed and blur the action.
LawnAngel_Freeze

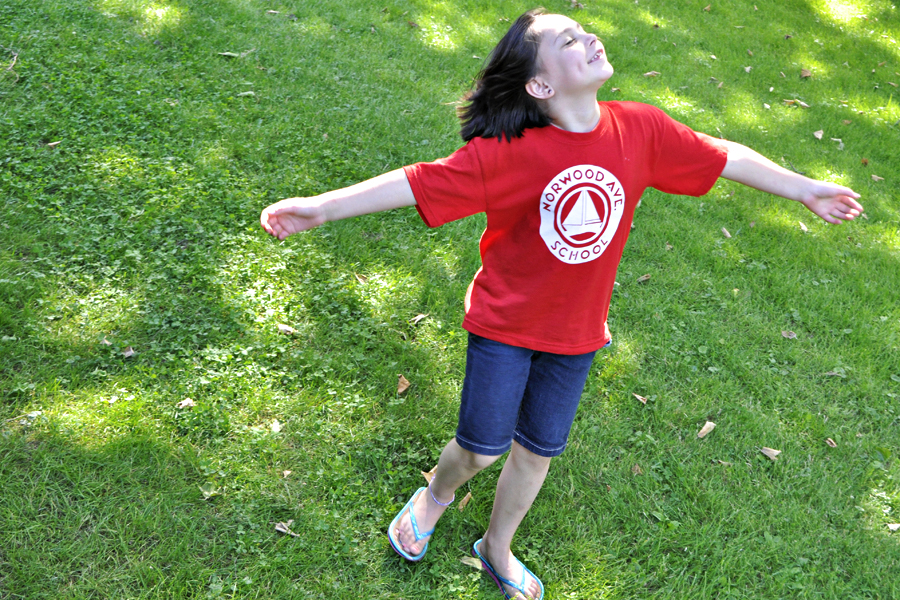
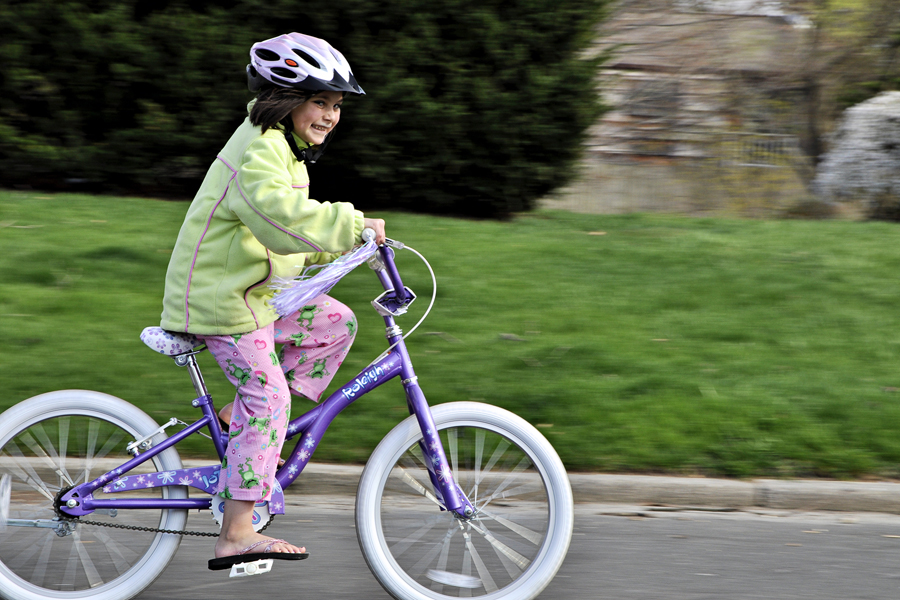
The contrasting shot above turns my angel into a statue, yet there is still a joy about the image since you can clearly see her face. But I may have to tell you that she was spinning or you might think she’s just breaking out into song or feeling the breeze. But whatever story you put to the image, it’s still joyous. To freeze the action, I moved the settings to the opposite end: the aperture was changed to the widest opening I could select (F/6.3) and I raised the ISO to 800. This ensured that I would get a faster shutterspeed of 1/200 sec.
So slow down a bit, literally, by capturing the movement in your active kids! Summer is the perfect time to try-jumping into and out of the pool, racing in the yard, playing jump rope, simply jumping, sliding into home plate, and so much more. And don’t delete the shots off your camera. Download them and take a closer look. You might be surprised at what you get. (PS-I am working on freebie cards for basic photo tips, so keep a look out for those).

Sideline Shooting

SOCCER_2
Today was her last game of the season (they tied 1-1). And today was the first time I shot a game this season. Shooting any sport from the sidelines can be challenging. But I’ve found a few of the following tips to be useful. First, make sure your camera is set to aperture priority and select the widest aperture you can with your lens. This way, your camera will always choose the fastest shutter speed for you. Plus, you’ll bring the focus on your subject since the background will then blur out a little.

SOCCER_1

Set your ISO a little higher (400 or 800 if sunny; 1000 if overcast) to ensure faster shutter speeds to stop the action. (If you have a point and shoot camera, try setting the camera on the sports mode). Next, put your camera on both the continuous auto focus and continuous shooting mode. If you have to lift your finger after each shot to take the next, you’re guaranteed to miss something. If you’ve ever had the opportunity to watch a pro shoot, you’ll remember that their finger stays on the shutter release until the ball is out of play! You almost feel as if you’re watching a video when you review their thousands of shots. For sure, knowing the game is a big help since you can anticipate where the action will be. But, if you’re sports-challenged like me, then following the ball through your viewfinder will naturally keep you where the action is and then start pressing the shutter as soon as your child enters the frame. You may also choose to follow your child, but then you sort of miss the game. Another good tip is to not stay in one place. If your child plays on the same side as where you are seated (left wing, e.g.), you may wind up shooting a lot of his or her back. If you venture to the opposing side, on your team’s goal end, you may have a better chance at getting a shot of them facing you rather than the back of their jersey. And of course, your positioning may need to change throughout the game, so be prepared to walk/run the field on a day you plan to take lots of photos. Crouch down once in a while to get a different perspective, and zoom in on details like cleats and balls to make a full story for your album, photo book, scrapbook or digital frame. And last but truly not least, make sure you have a lens that can zoom over a wide range so you can get in close when the action is far down the field (a lens that goes up to around 300mm on a digital SLR is ideal) and you can capture it all as the action gets close to the sidelines by zooming out to a wide angle setting. Additionally, while you still may want to crop in a little closer later on, the closer you are to start, the better quality your cropped photo will be in the end. (ISO 400; 232mm; 1/1250 sec; F/6.3)

Play with Panning for Action Photos

PANNING_1


I took about 100 photos of Sydney riding her new bike to show what panning is. Panning is when you follow the action at the same rate of speed as the subject, resulting in a blurry background and a sharp subject. I discovered it is not so easy as it sounds. There are several steps to follow in order to get the result:

1) set your camera to Aperture Priority and select a very small aperture like F/22. This slows down your shutter speed to about 1/25th sec depending on how bright it is out;

2) in order to ensure your camera can select a slow shutter speed, set your ISO to 200;

3) set your camera to continuous shooting and continuous AF; and

4) take lots and lots of shots as the action speeds by you parallel to your camera. Pivot your whole body while keeping the camera level, following the action as it passes in front of your camera. Keep your finger on the shutter release button until after the action has passed you.

The background will be streaks of color (the slower the shutter speed, the more streaky). If your subject appears blurry, you are moving slower than your subject. This technique requires lots of practice. So don’t be discouraged your first time out. The images here were shot at varying shutter speeds and the result in each differs slightly. Notice a nice clean background makes the best image, but this technique also helps to make a cluttered background look better.

PANNING_2PANNING_3