Free Photo Tips Card Download 1: Aperture

TIPS CARDS_final.psd

I’m using my time in the airport in Palm Springs (I’m painfully early for my flight and it’s 112 degrees outside so I can’t even enjoy the outside cafeteria) to finish and upload the first of what I hope will be many free download cards. These will be a series of cards that you can print out and keep with you to refer to when you’re out shooting. The first is about aperture priority mode. I’ve covered this topic a lot since I feel it is the most important technique to master to make better photos. Understanding what is does allows you to be more creative since you can force the outcome of your image to better tell your story. And we all know practice is the best way to master any technique. So print out this first set of cards on one letter-size sheet of photo paper (luster is best since it won’t scratch as much). Then cut the paper along the grey lines to give you a set of four cards. If you like, punch a whole in the corners and put them on a D-ring key chain and attach them to your camera bag. You could even have them laminated at your local office supply store. This is the first set of Chasing Picture Perfection Tips Cards. Download the file at this link http://www.4shared.com/file/119167214/5e95ce94/TIPS_CARDS_final.html

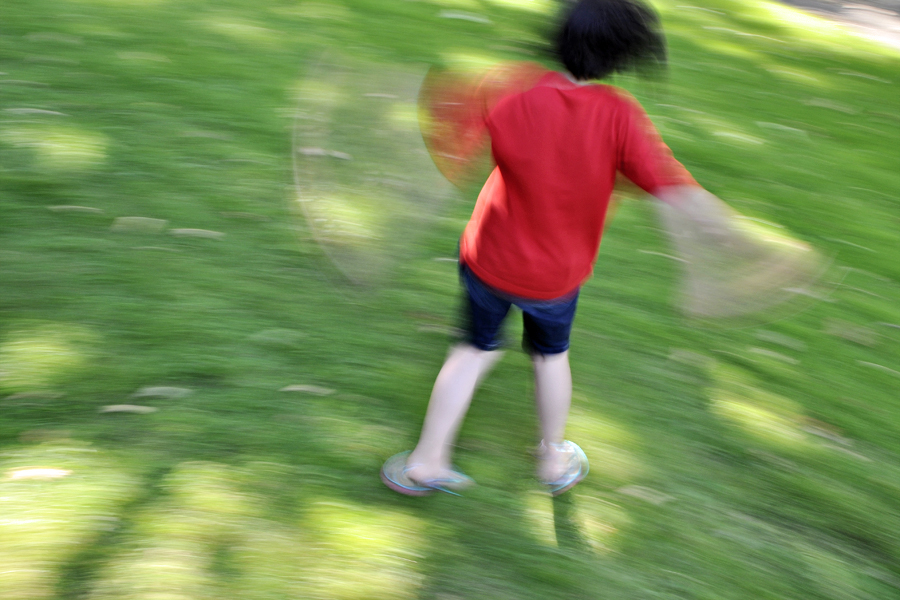
Lawn Angels: Blurring and Freezing Motion in Photos

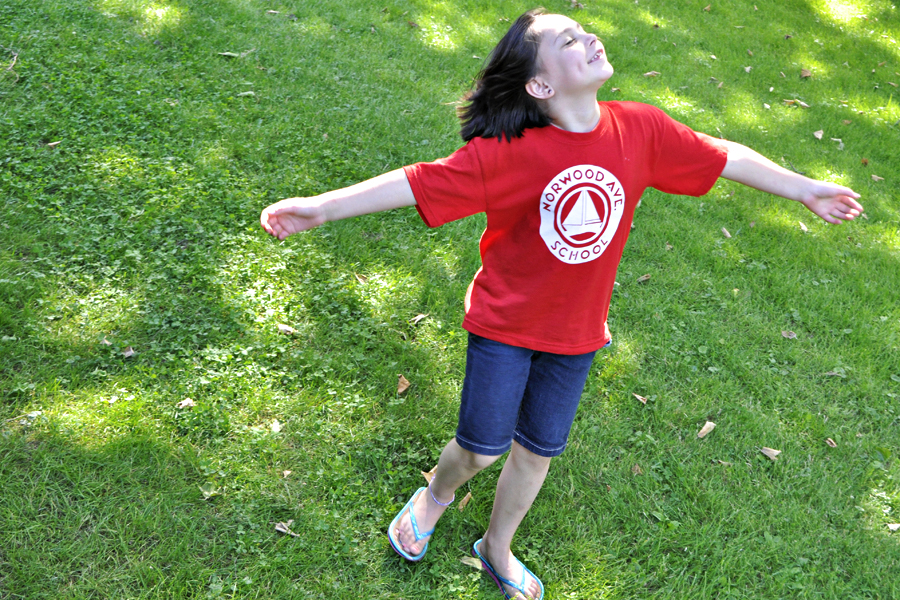
LawnAngel_Blur

I set out to take two contrasting photos in order to visually demonstrate the effect different shutterspeed settings will have on your photos. Check it out! I got a shot that reminds me of snow angels! The shot above was taken at very slow shutterspeed (1/6 second), so the action is blurred. Most of the time when we take a shot that’s blurry, we delete it. Right? But take a second look. Sometimes there’s a story or an emotion that’s told because of the blur! My lawn angel spun until she was dizzy while I snapped away on the deck that gave me more of a “bird’s eye” view. The elevated position also allowed me to keep the lush green grass as a backdrop and eliminate from the shot the distracting cars and more in front of the house. I set my camera to aperture priority and selected a small aperture (f/18) and lowered the ISO to 200. These settings ensured that I would get a slow shutterspeed and blur the action.
LawnAngel_Freeze

The contrasting shot above turns my angel into a statue, yet there is still a joy about the image since you can clearly see her face. But I may have to tell you that she was spinning or you might think she’s just breaking out into song or feeling the breeze. But whatever story you put to the image, it’s still joyous. To freeze the action, I moved the settings to the opposite end: the aperture was changed to the widest opening I could select (F/6.3) and I raised the ISO to 800. This ensured that I would get a faster shutterspeed of 1/200 sec.
So slow down a bit, literally, by capturing the movement in your active kids! Summer is the perfect time to try-jumping into and out of the pool, racing in the yard, playing jump rope, simply jumping, sliding into home plate, and so much more. And don’t delete the shots off your camera. Download them and take a closer look. You might be surprised at what you get. (PS-I am working on freebie cards for basic photo tips, so keep a look out for those).

Play with Panning for Action Photos

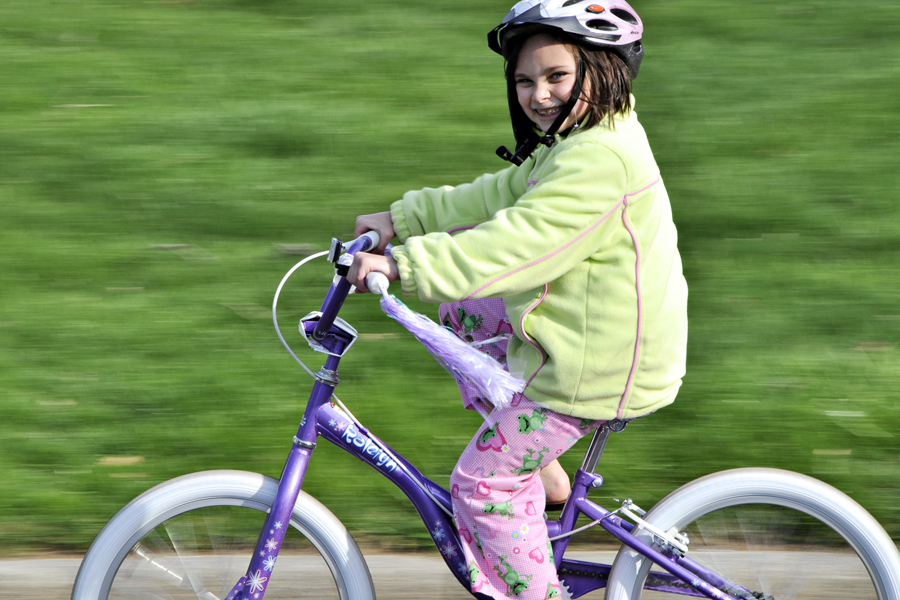
PANNING_1


I took about 100 photos of Sydney riding her new bike to show what panning is. Panning is when you follow the action at the same rate of speed as the subject, resulting in a blurry background and a sharp subject. I discovered it is not so easy as it sounds. There are several steps to follow in order to get the result:

1) set your camera to Aperture Priority and select a very small aperture like F/22. This slows down your shutter speed to about 1/25th sec depending on how bright it is out;

2) in order to ensure your camera can select a slow shutter speed, set your ISO to 200;

3) set your camera to continuous shooting and continuous AF; and

4) take lots and lots of shots as the action speeds by you parallel to your camera. Pivot your whole body while keeping the camera level, following the action as it passes in front of your camera. Keep your finger on the shutter release button until after the action has passed you.

The background will be streaks of color (the slower the shutter speed, the more streaky). If your subject appears blurry, you are moving slower than your subject. This technique requires lots of practice. So don’t be discouraged your first time out. The images here were shot at varying shutter speeds and the result in each differs slightly. Notice a nice clean background makes the best image, but this technique also helps to make a cluttered background look better.

PANNING_2PANNING_3