
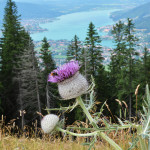
When sunlight hits colorful fall foliage, it makes a stunning backdrop for your impromptu family portraits. The trick to getting the painterly background look that makes the subject pop off the background is to use a wide open aperture. The portrait here was taken at 70mm with an aperture setting of F/2.8. Focusing on the eyes, the background drops out due to the shallow depth of field into a painterly sparkle of fall colors. If your lens does not open to a fast aperture like F/2.8, use your telephoto lens at its maximum zoom, set the camera to aperture priority and choose the widest aperture opening (most likely F/5.6 or F/6.3) and step in a little bit closer. That combination will drop out the background for a similar look that makes a beautiful portrait suitable for framing and display on your mantle. 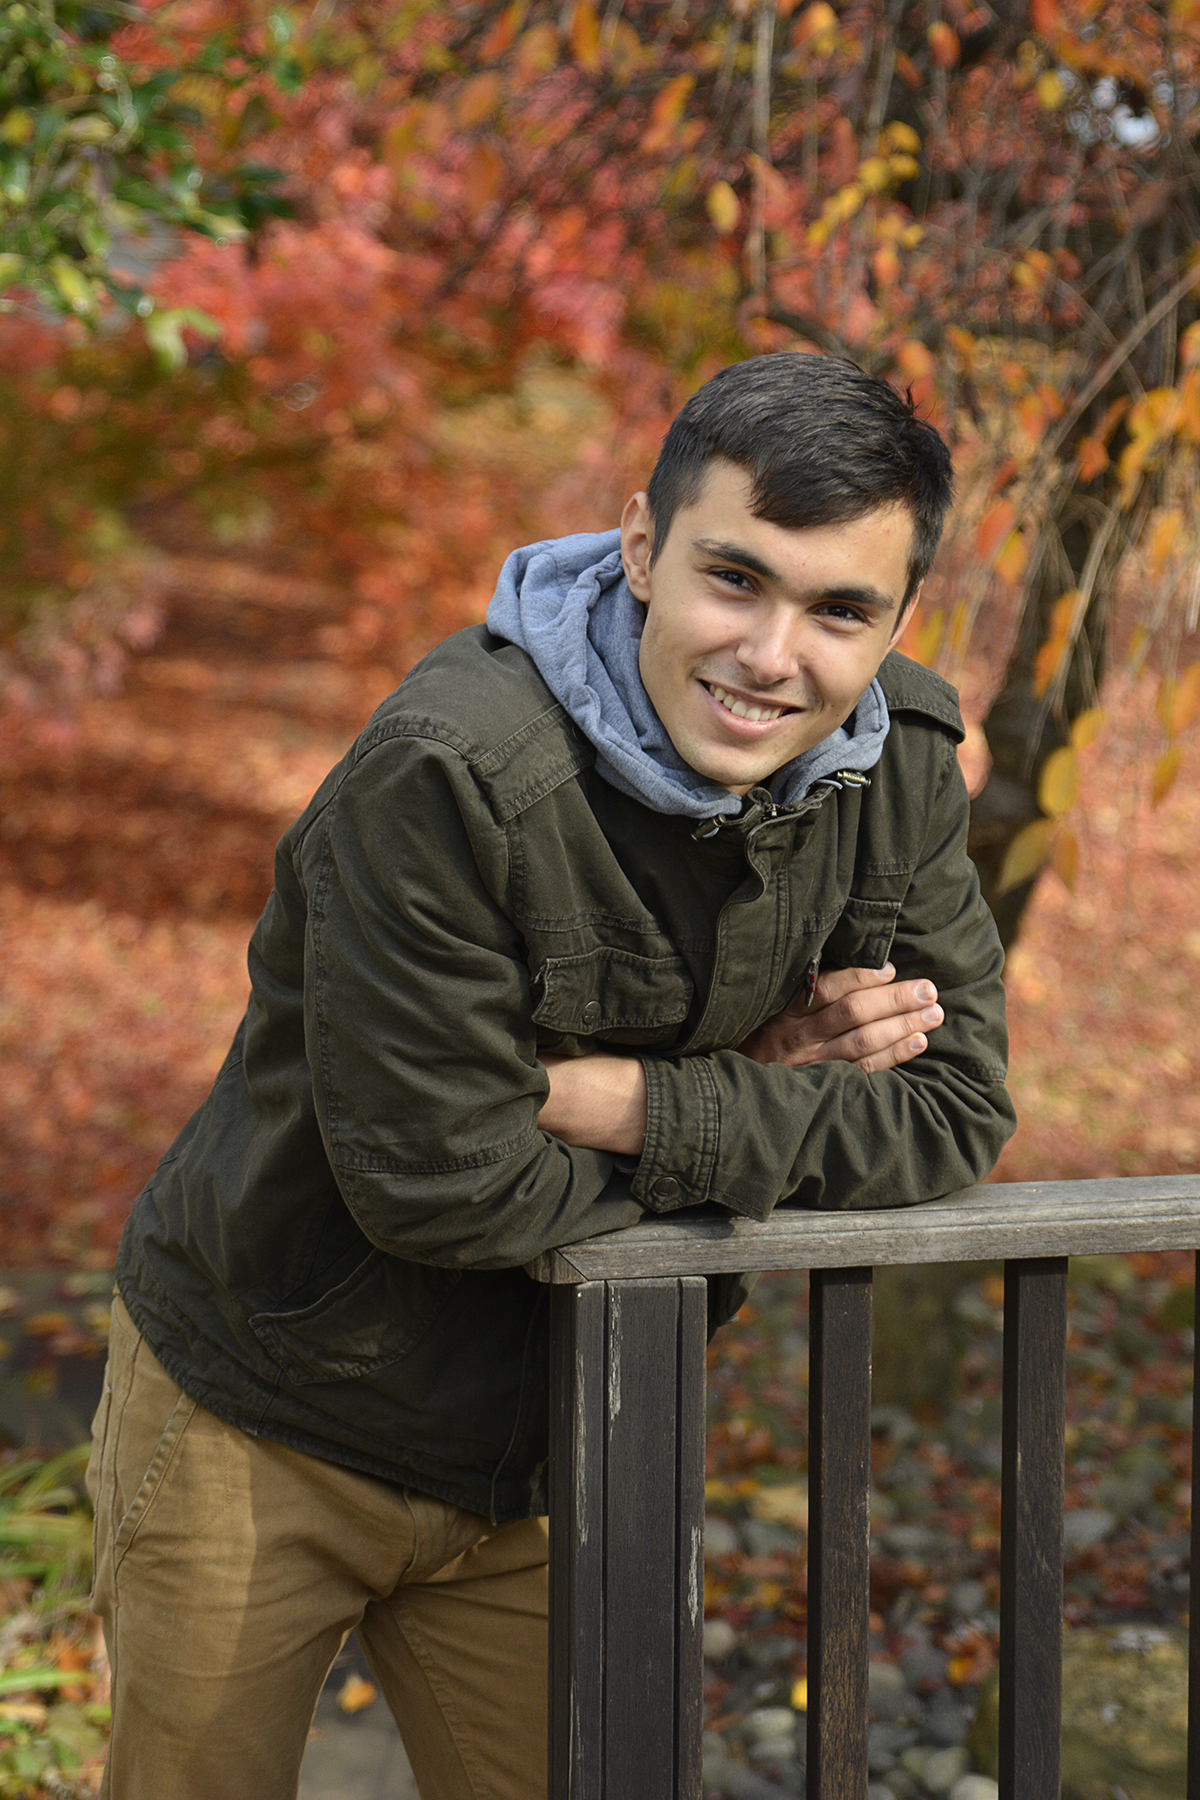
Tag Archives: shallow depth of field
Shooting Sample Images to Learn How to Achieve Shallow Depth of Field
I find that the best way to make aperture-setting selections stick in your mind to be able to achieve a desired effect is to shoot sample images at two aperture extremes. Start by putting your camera into the aperture-priority mode (A on Nikon cameras; AV in Canon cameras). Then set your aperture to the widest setting (like F/2.8, F/3.5, etc.) and take a photo. This will be your sample A (see my sample below). Then move your aperture to its smallest setting (like F/22, F/32). This is your sample B. Then study the difference between the shots.
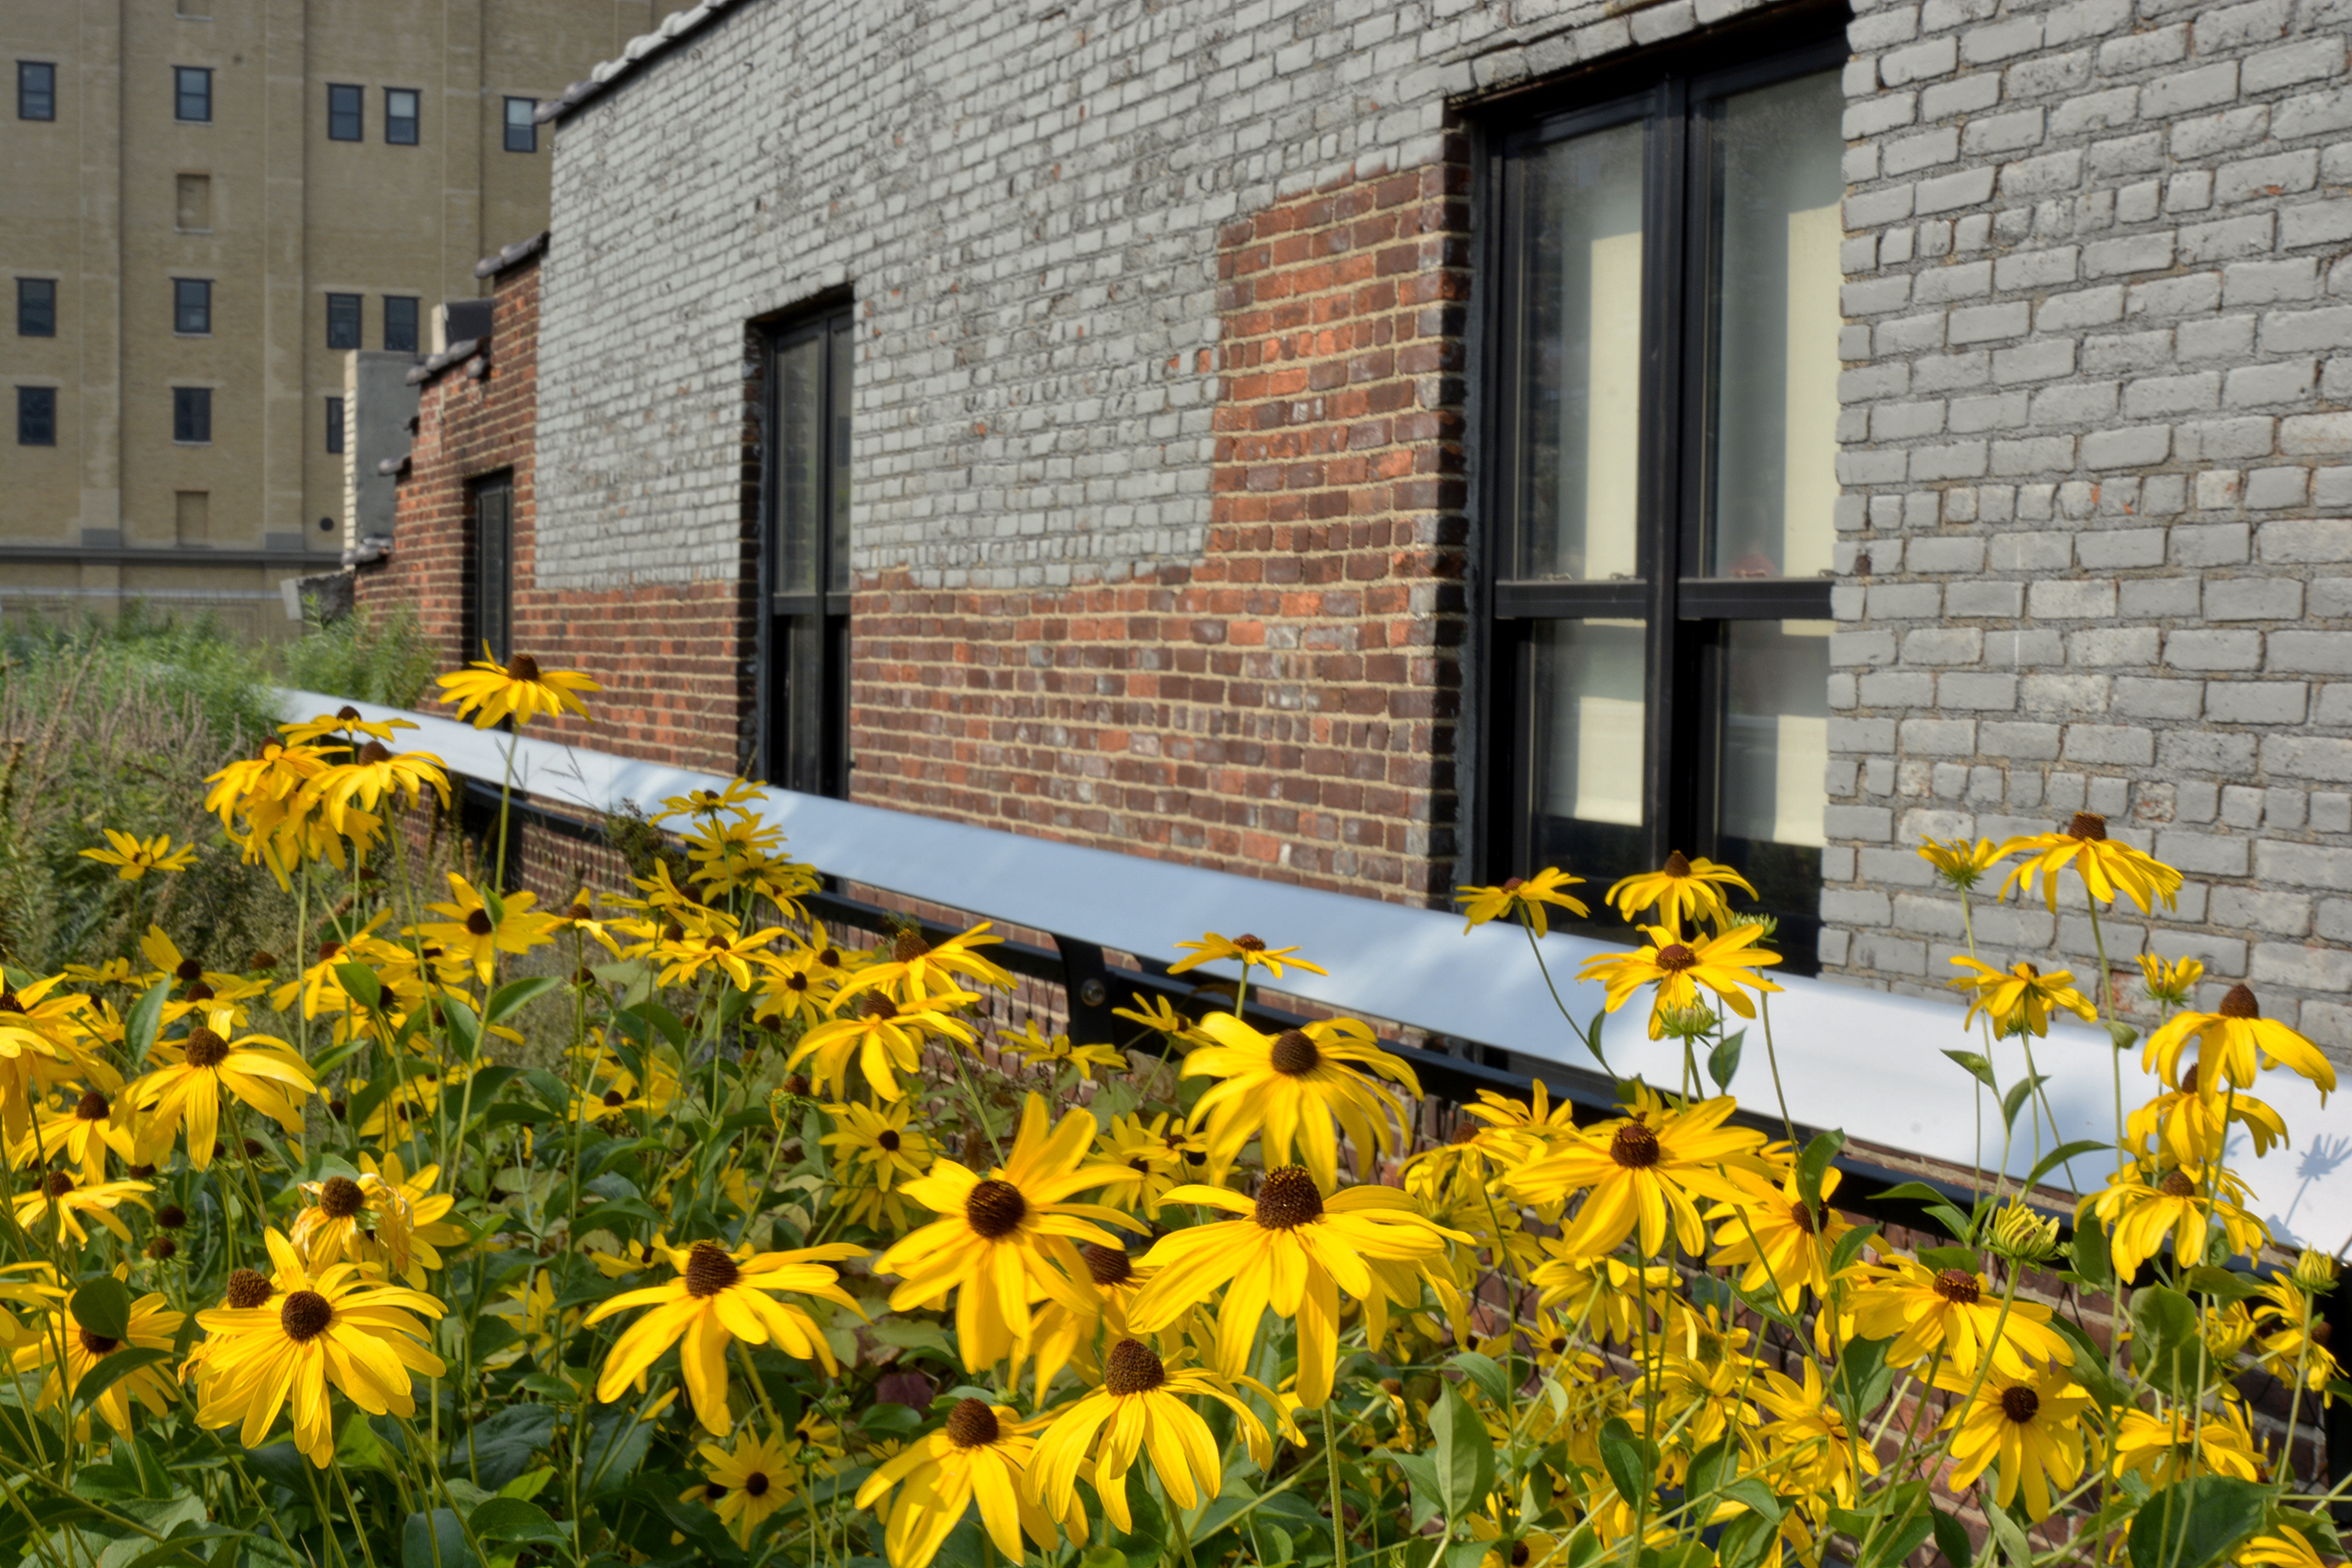
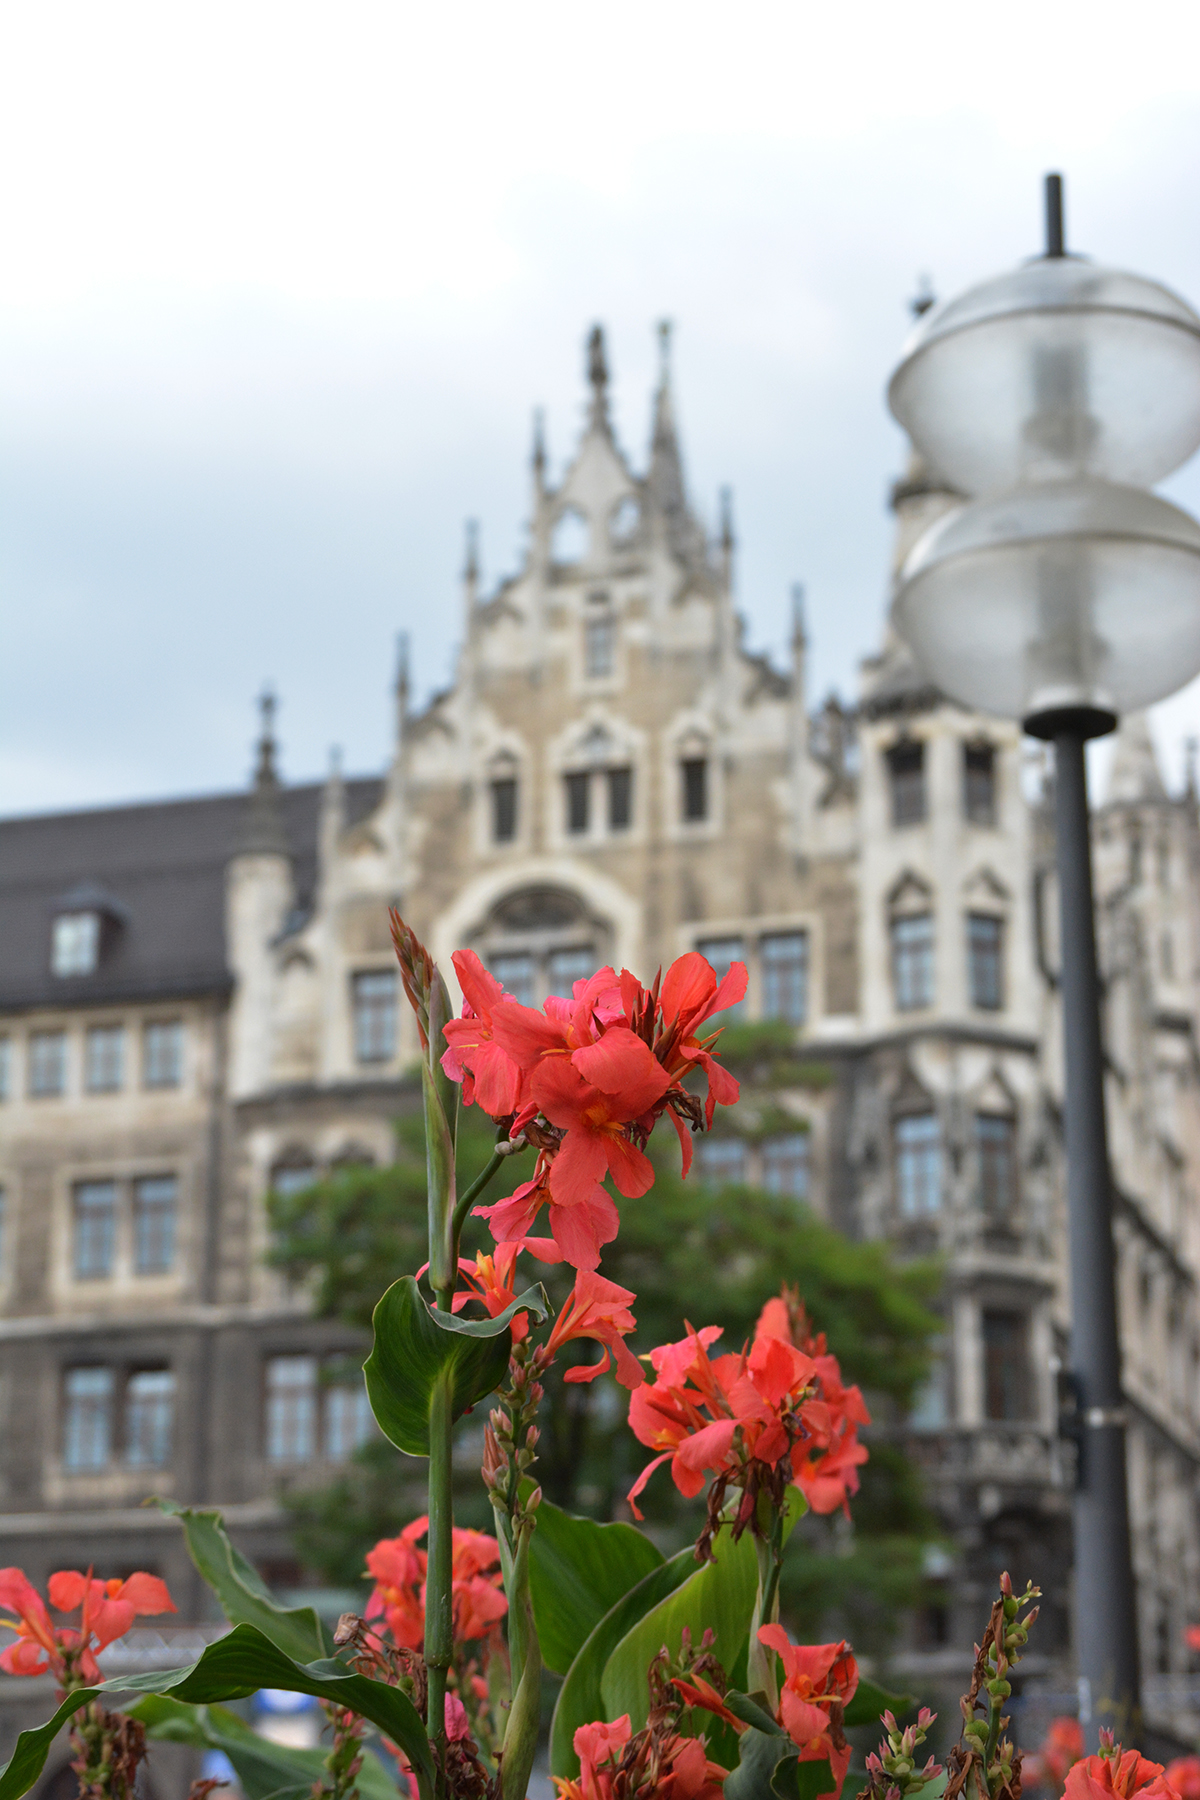
 {Sample A} Wide Open Aperture (F/2.8 – 1/1000th sec shutter speed – 34mm)
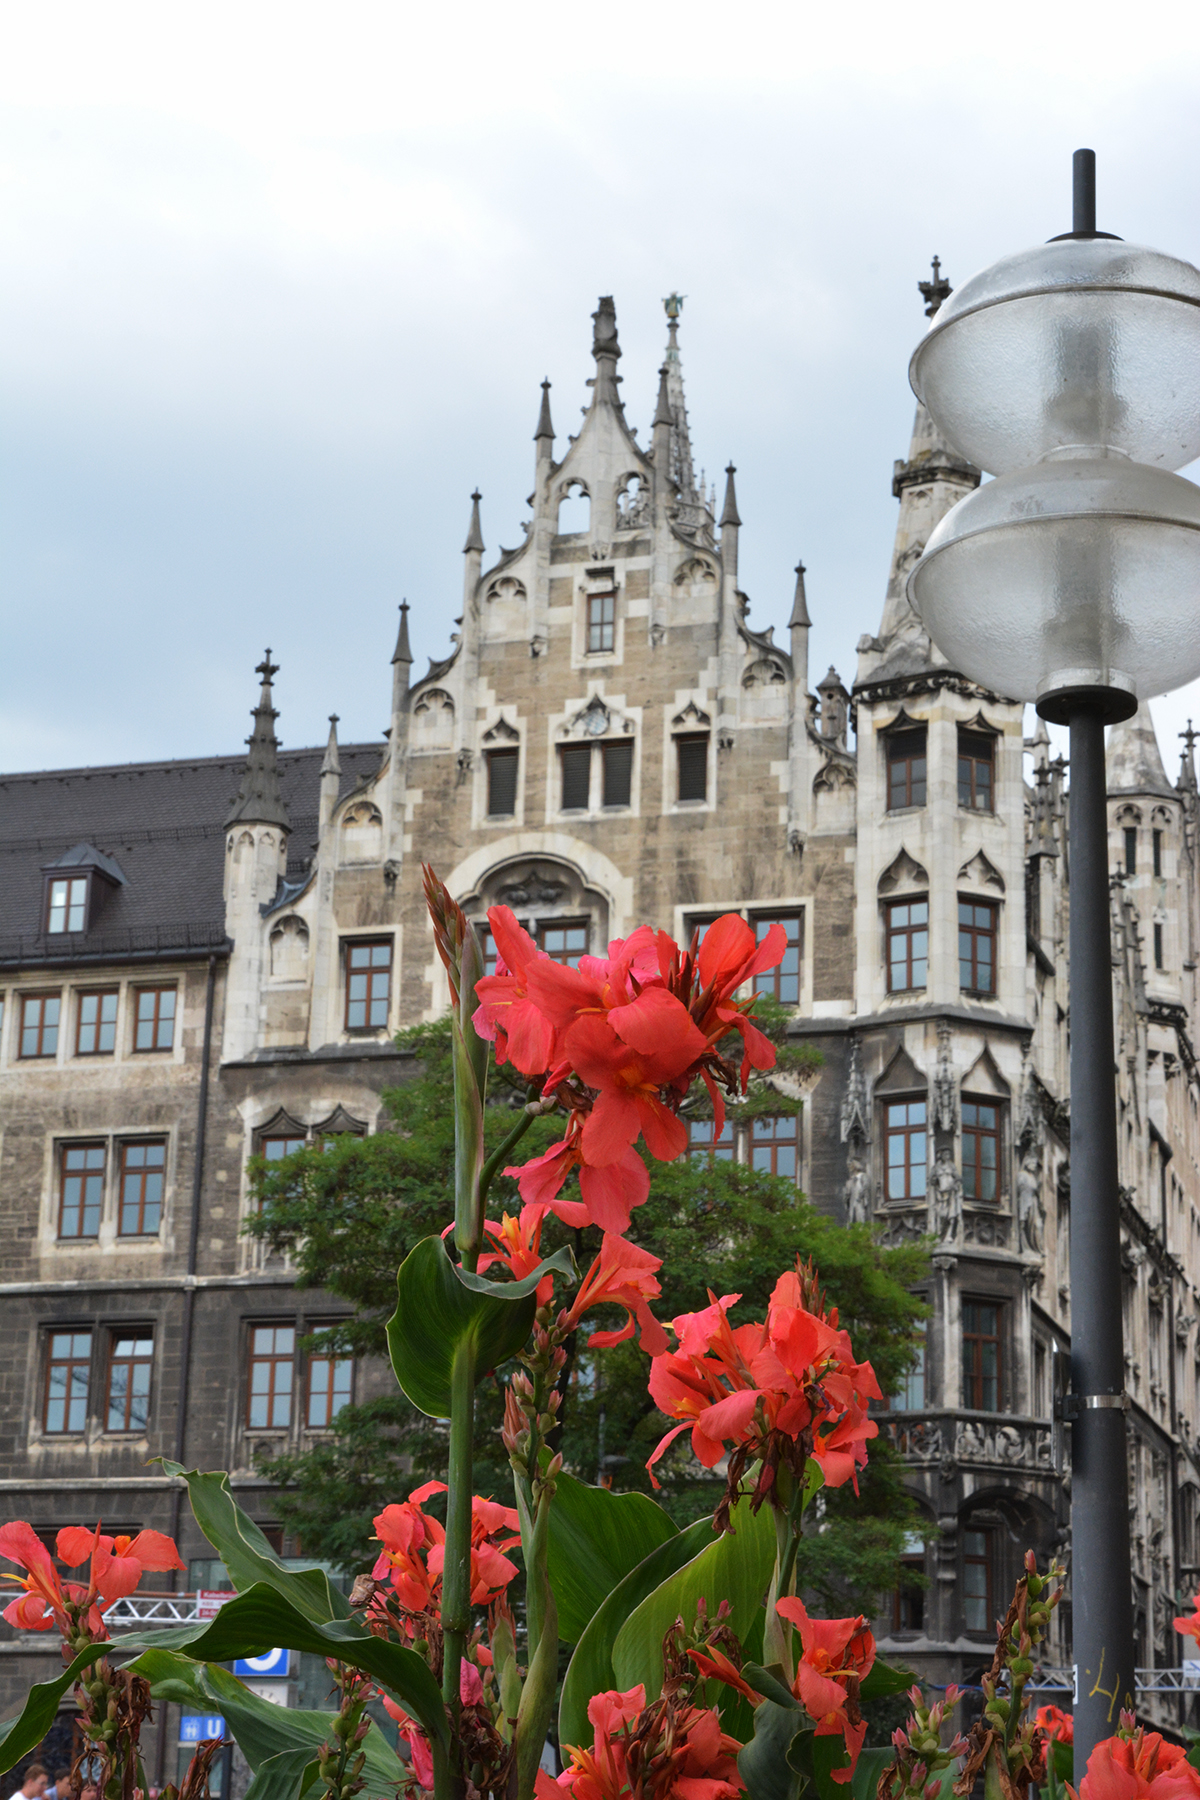
 {Sample B} Smallest Aperture (F/22 – 1/125th sec shutter speed – 34mm)
Now, to make things confusing, your results will vary depending on your widest aperture setting, focal length setting and how close you are to the subject. In my sample shots above, I was very close to the flowers I focused on and my aperture was F/2.8 in the first, so the brick building in the background is out of focus perhaps more so or less so than your sample shots may show.
If you keep making samples for yourself like this, eventually it will become second nature when you are shooting to select the appropriate aperture to get the photo you have in mind (with out of focus background or sharp background).
Typically you will want to blur the background a little for portraits for a more professional look; or if the background is very distracting; or if you want the viewers of your photos to be drawn to so a very specific part of the shot.
Photographers will use a smaller aperture to get the foreground to background in focus for landscapes, and sometimes for shots that tell a story of where you are. For example, you may want a store name to be in sharp focus so that it is legible. Or you may want the details of a landmark to be in sharp focus as well as your family standing in front of it.
However, sometimes landmarks, such as the Disney Castle, are so recognizable, that having the castle slightly out of focus works really well to give you a “here we are” shot that is elevated to a more professional looking image. Below is a sample from Epcot’s China Pavilion.

Changing the Look of Your Photo with Aperture Priority Mode
You can dramatically change the look of your photo by changing the aperture of the lens on your camera, which controls the depth of field. Depth of field is how much of your photo in front of and behind your subject is in focus. If foreground to background is all in focus, your depth of field is deep. If the foreground and background are out of focus, then you have shallow depth of field. Learning to control this function on your camera will help you to yield more professional-looking photos that let your subject pop off the image because it will be separated from the background. In the two example photos below, the one on the left shows shallow depth of field. The aperture was set to F/4.5 (a wide open aperture). The photo on the right shows deep depth of field and the aperture was set to F/16 (a small aperture).
 The aperture is easy to set on your camera by setting your camera mode dial to A (on Nikon cameras) and Av (on Canon cameras). Then use the thumb wheel to move the aperture number to a smaller or a larger number. The smaller the number, the more blurry the background will be like the above left photo. The larger the number, the more in focus both subject and background will be, like the above right photo.
This technique is particularly useful when shooting portraits. You want your subject to stand out from the background, especially if there are distracting items behind the subject. You can choose how blurry or sharp the background will be by experimenting with different aperture settings. To practice, shoot the same subject twice at the two extremes like I did above. Do this several times with different subjects each time you have your camera out until you feel comfortable that you can easily pick the aperture to get the look you want. See more examples below and don’t forget to download the photo tips card for your gadget bag to help you in the field.
-

- Aperture set to F/4
-

- Aperture set to F/8
-
- Aperture set to F/20
Photographing Pets
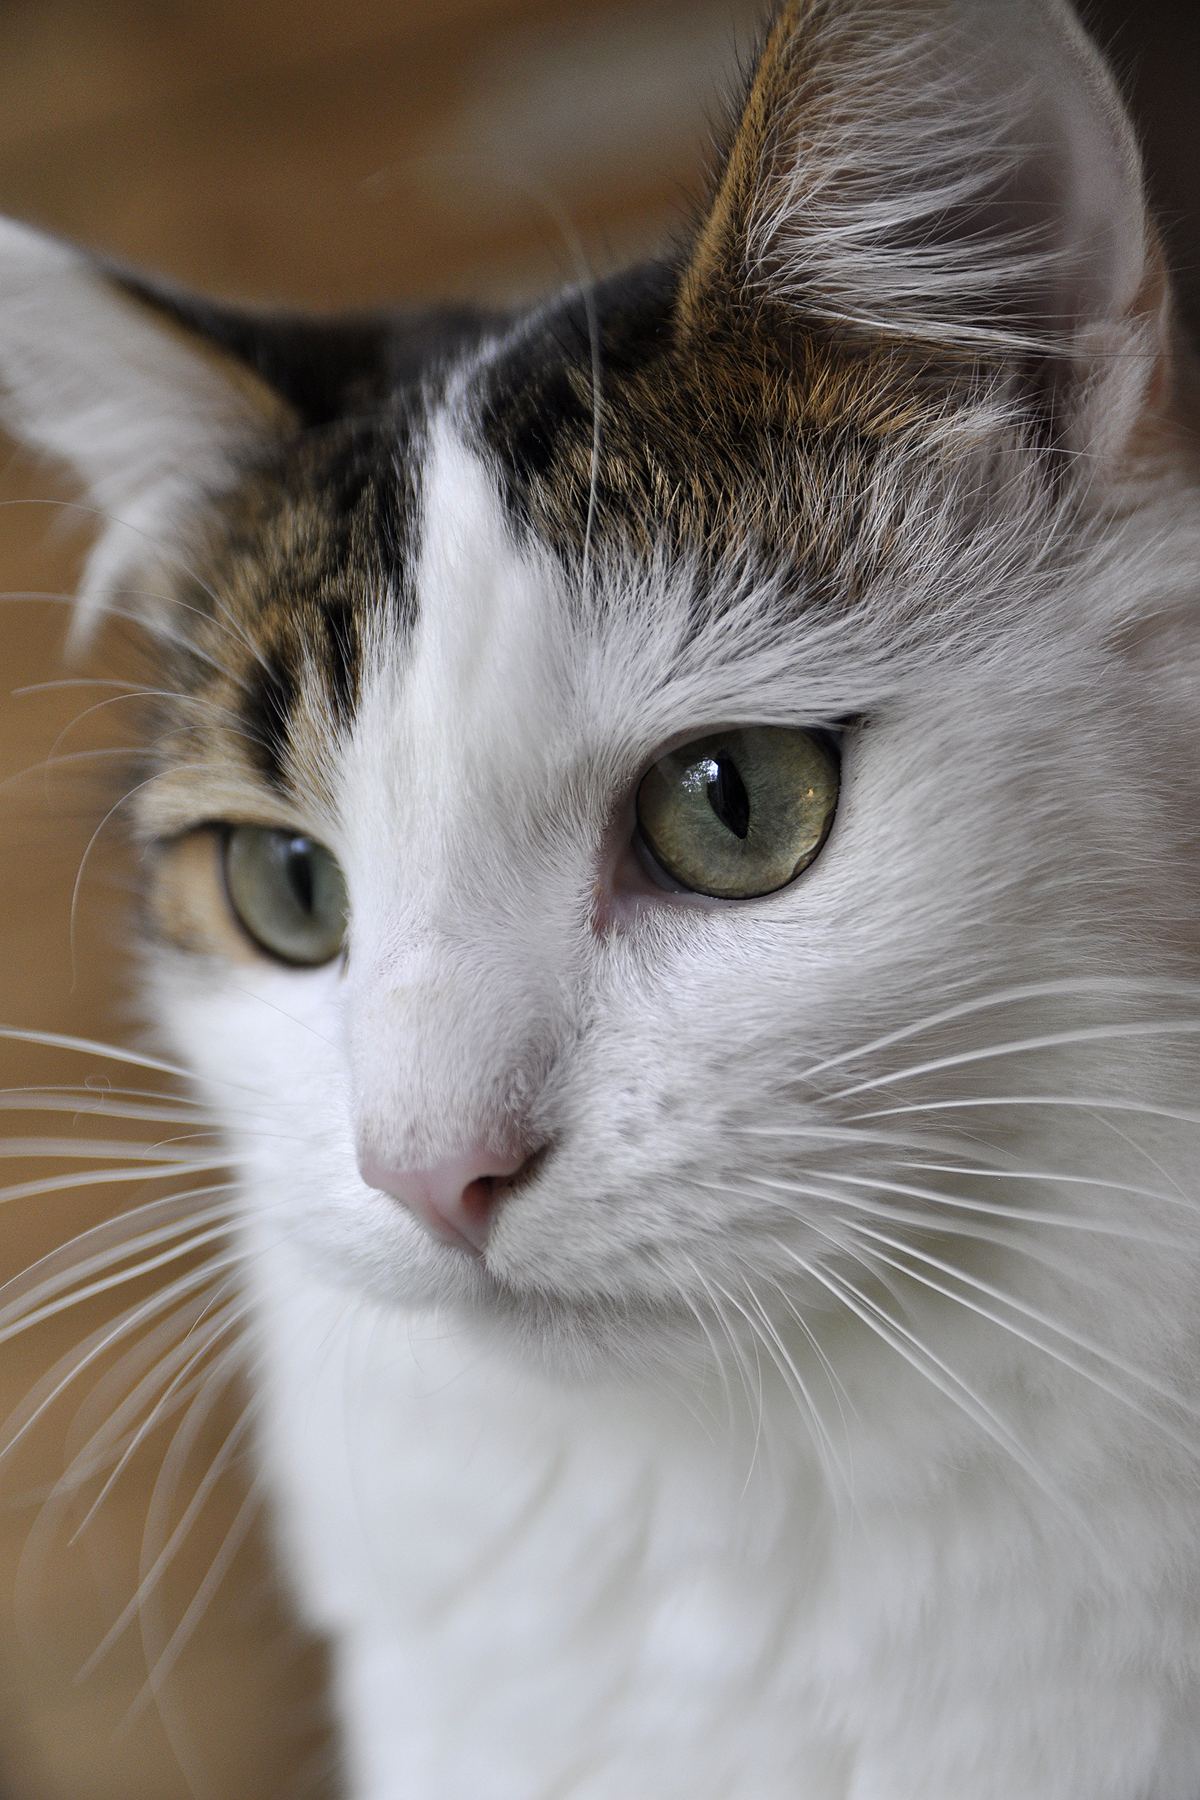
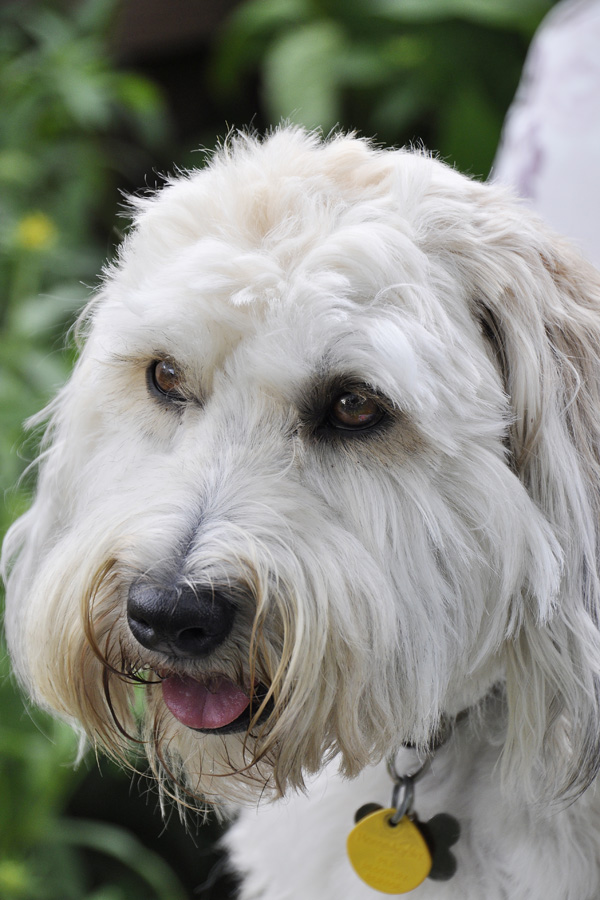
The key to taking good photos of your pets is to approach them in much the same way you do people in regards to lighting and composition. Much like children, however, it may be hard to get them to actually pose for you. I took a few shots of Spanky and Darla while they were having a quieter day. The lighting in each of the shots is slightly different, but each photo is done without flash and using only window light. Try to not use flash when taking photos of pets to avoid washing out their fur. In the main photo, Spanky was positioned very close to the window and looking out of it. You can actually see the window reflected in his eyes. I was close to him, and at 70mm, the F/2.8 aperture really helped to drop out the background and keep the main focus on his eye closest to the camera.
In picture B, Spanky moved to another table in my work area to lounge. Here, that same window is behind him, creating a nice bright background, and he is lit by the light from that same window that is bouncing off the white wall he is now facing. When taking portraits of people or pets, reflected or bounced light provides a beautiful even lighting that can be very flattering. See a post about reflected light off of a house in the backyard here. You can see the door reflected in his eyes, where a skylight in the hallway has provided extra light and makes a great catch light in his eyes. As with people and birds, it is important to get a catch light in your cat or dog’s eyes to really bring their portrait to life.
-

- {Photo B}
-

- {Photo C}
-

- {Photo D}
In photo C, Spanky was bored of posing, and moved to a location further away from the window and while the light here was not as bright as close to the window, it was spread out over the room for some nice even lighting (see how even the background is lit up). So here, I boosted my ISO a little higher to be able to capture more light. The very shallow depth of field throws his paws out of focus, but helps to show off his comfy sleeping position.
Lastly, in photo D, Darla is photographed in a diffused side-lit manner. The window partially covered by drapes is still allowing a lot of light to come into the room, and the slight side lighting gives the shot a little more definition and drama as opposed to the flattering and softer front or reflected lighting in Spanky’s portraits. Darla was much more curious about the camera and moved in closer to me for a look. The wide open aperture gave me sharp focus on her eyes and everything else drops out of focus.
One Location. Two Entirely Different Photos.
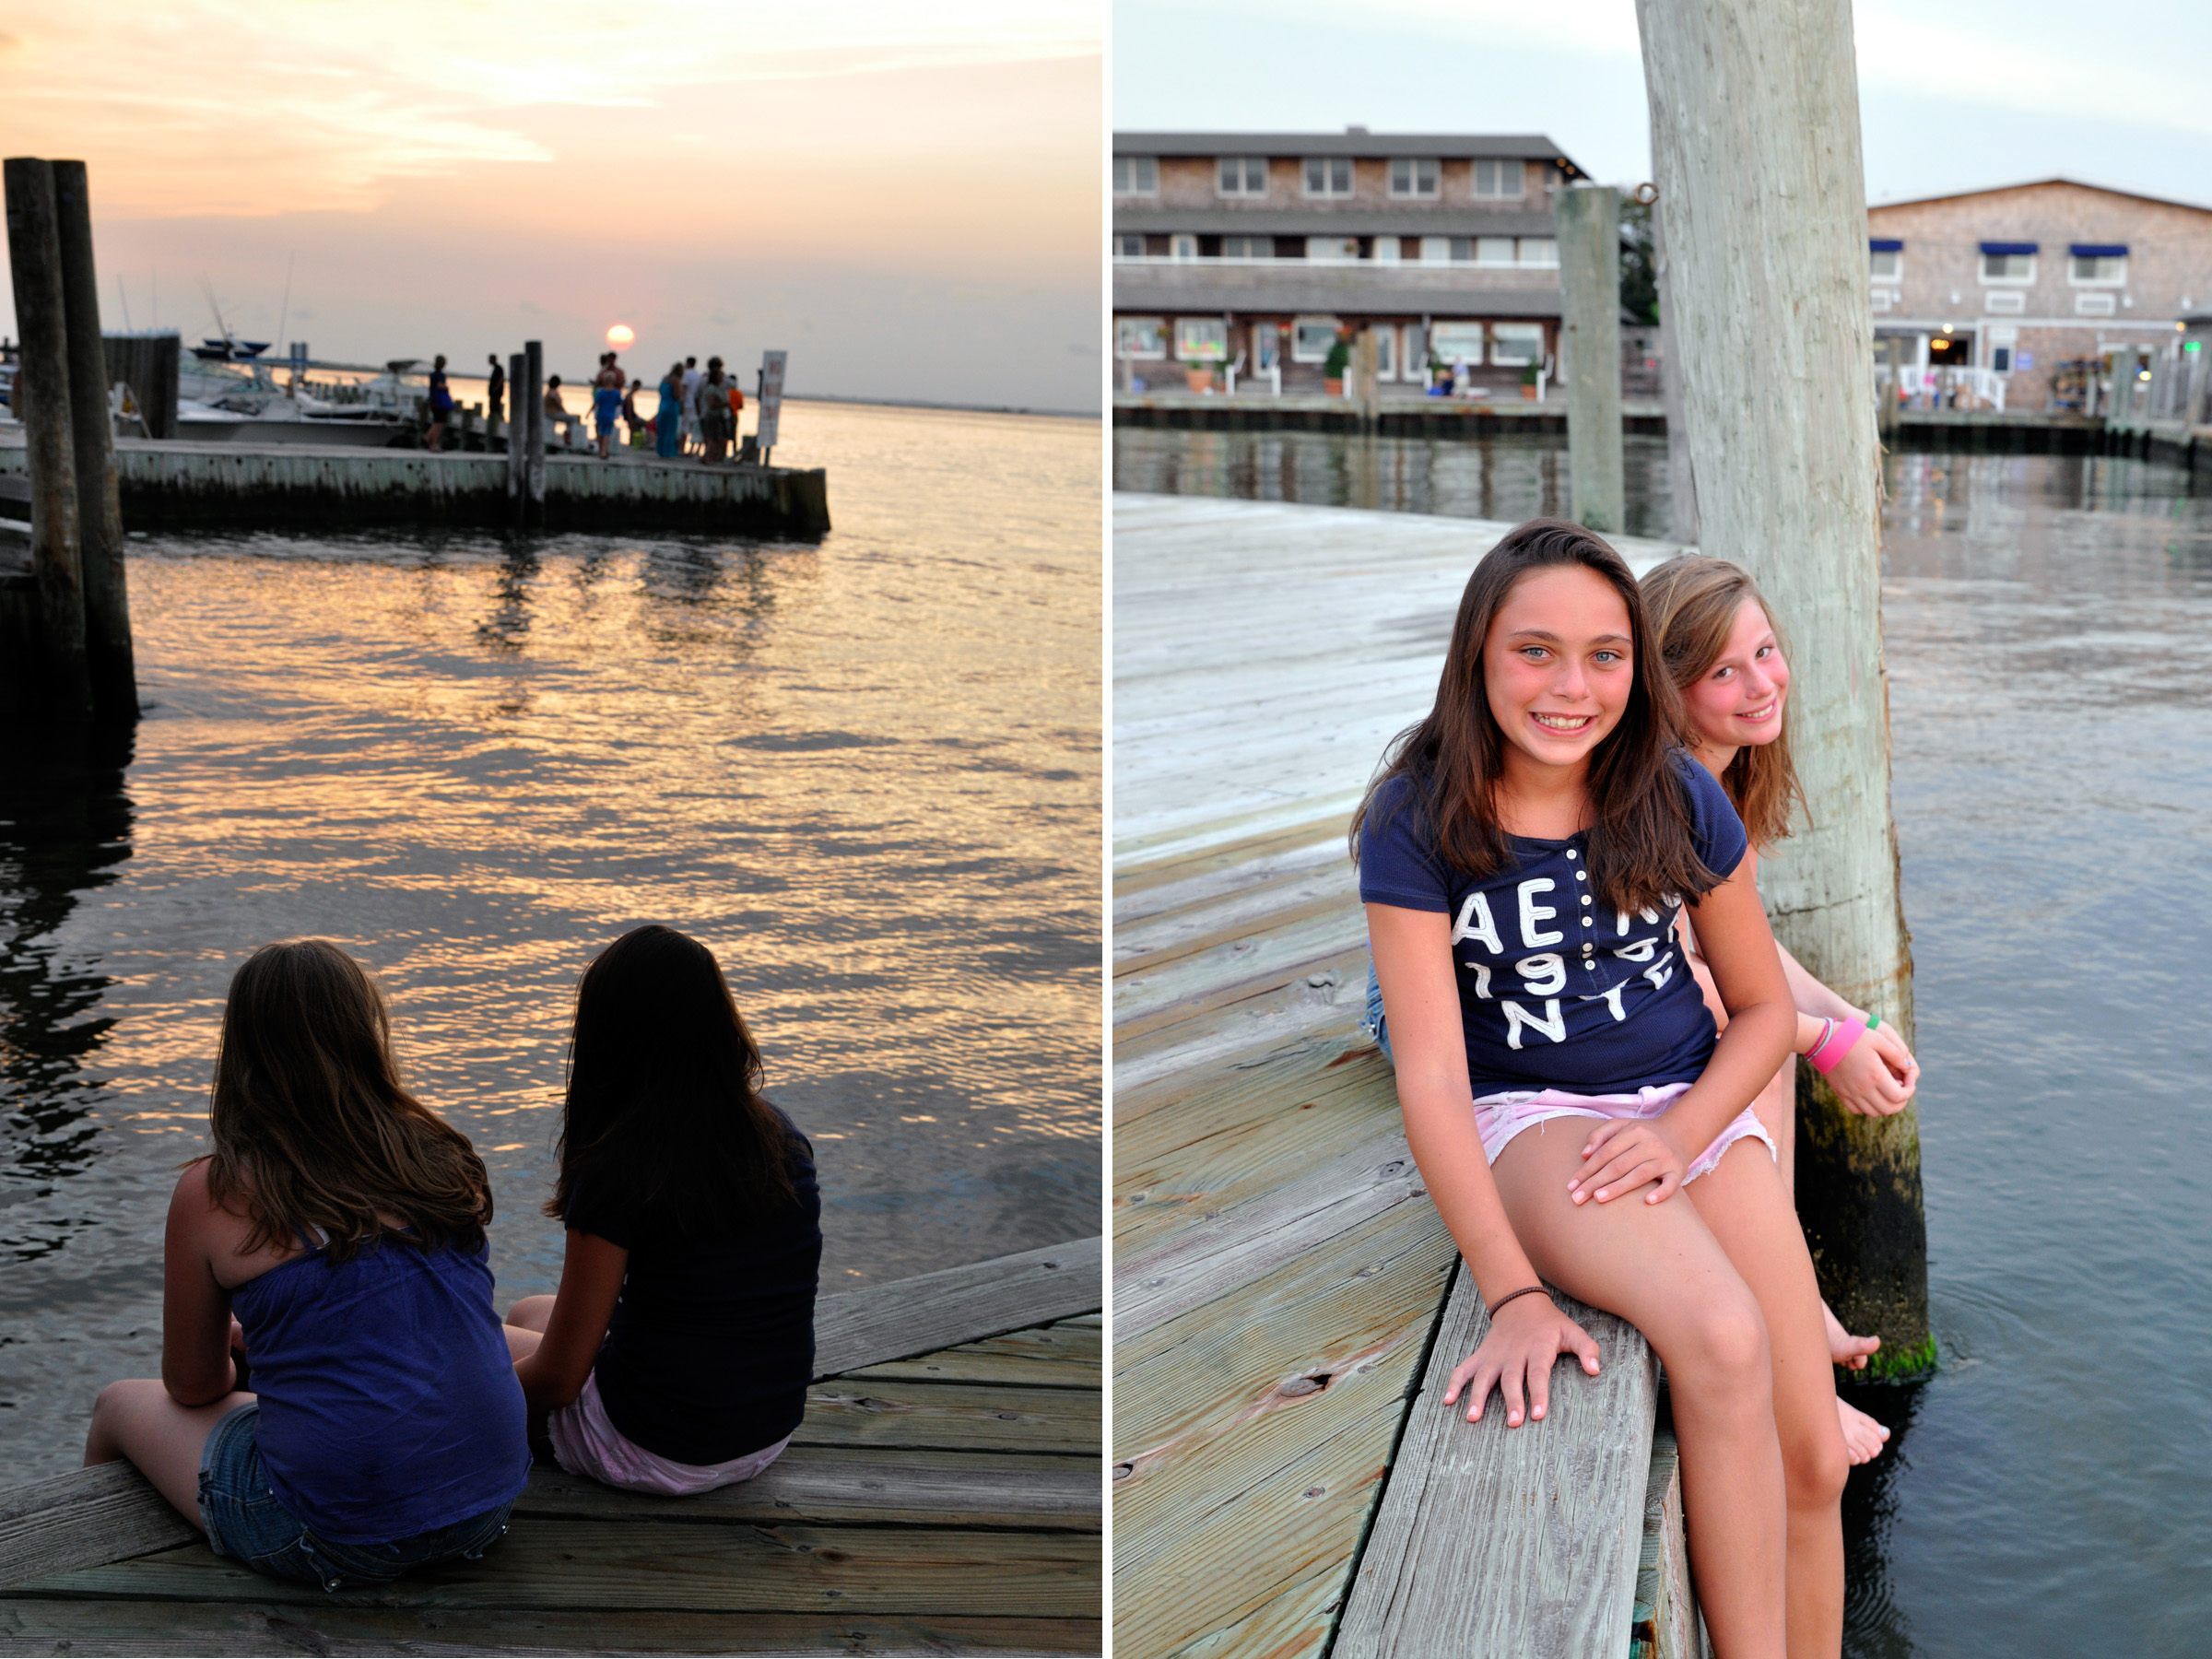 Sometimes we take the shot we had in mind and call it a day. But when the light is so beautiful at sunset, it pays to take a few steps around just to check out how the sun is lighting your subject. The photo on the left was the one I was after: two girls watching the sunset, captured in near silhouette as the center-weighted meter gave an exposure for the bright setting sun and made most of the other parts of the shot go dark. Just what I wanted. But then I sat down next to the girls to watch the sunset with them, and wow, was the light across their faces gorgeous. So of course I snapped away while the sun set! Because the light was low, I boosted my ISO to 640 and got a shutter speed of 1/100th sec at F/5.0 aperture. If I had unlimited cooperation from my two subjects, I would have boosted the ISO to 1000 and shot more photos at F/8 so that the girl further back would be in sharper focus. When shooting more than one person, either try to get them on the same plane of focus, or deepen your depth of field by using a smaller aperture like F/8. Not always possible, as was the case here, but the sweet expressions and the light make the shot a perfect one for me.
Bring a Symbol of the Holiday Into Focus
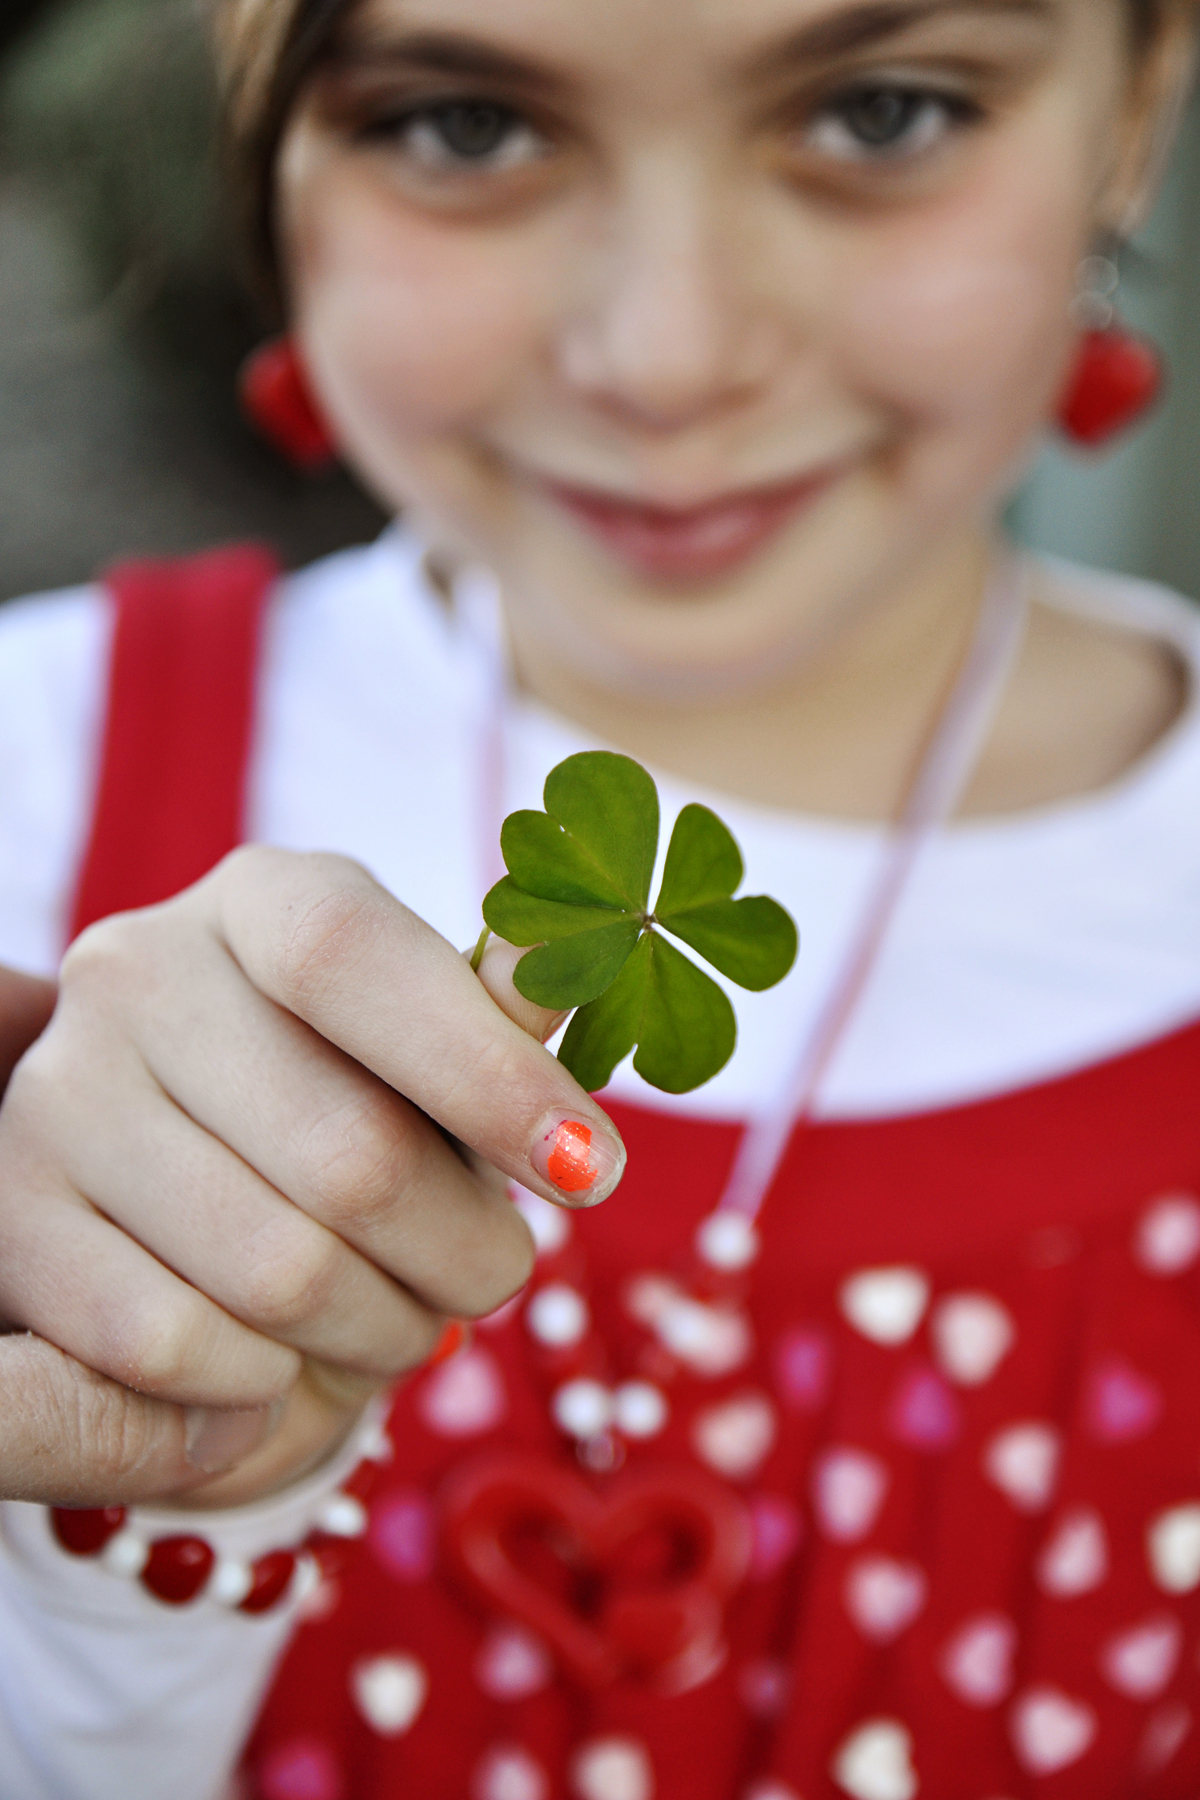
I have made this same picture over and over and I still love it. Birthday cupcakes with lit candle, a number of fingers held up to signify a birthday year, a lottery ticket, a dyed Easter egg, and more. This time it’s the four leaf clover my subject plucked from a pot in the yard (look closely since at first glance it looks like three, but it is four). I was actually taking pictures of her cute Valentine’s outfit when she found the clover and held it out to me to inspect. The resulting image is really cute and the clover pops out not only because my aperture was set wide open at F/2.8 and I focused on the clover (thus blurring the background), but also because of the contrast of the green against the red and white of her clothing. So whether it’s your child’s favorite stuffed animal, a perfect test score, or a special holiday object, this effect is a great way to bring focus to the event or milestone while still keeping the subject’s face present in your photos.
Video Tutorials Worth Watching
I usually don’t post work-related stuff, but I have to say that the new 1-minute videos featuring professional photographer Andre Costantini are worth checking out, so I thought I’d share the link to the latest video about aperture since it is great information. See Episode Three and other videos here.
Window Light: Use it to take close-up photos, too!
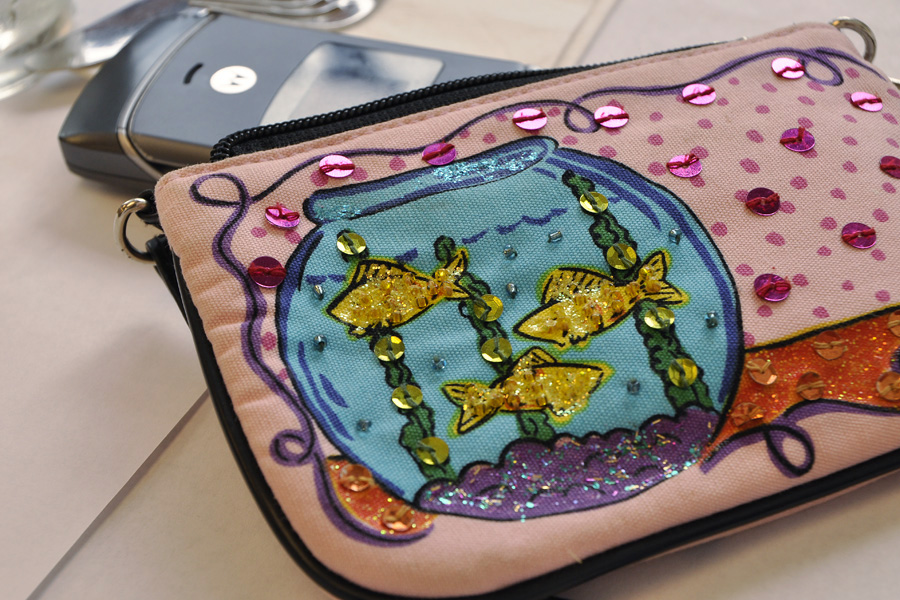
It’s important to capture possessions that are important to you and your family as it will be fun to look back on those photos years from now when the item is either gone or no longer shiny and new. But without a true 1:1 macro lens and macro lighting, you may feel you cannot get great shots of smaller objects like we see in home decor magazines. Nothing could be further from the truth. Any zoom that gives you a maximum magnification of 1:4 or better can yield great close-up shots (consult your owner’s manual to see this specification for your lens, or check out the specs of any lens you are thinking about purchasing). And small objects can be photographed beautifully in natural light. Window light is my favorite light for people, but also for things. The harshness of mid-day light is diffused and makes for excellent quality light for a variety of subjects. Take this cute little beaded purse- a favorite possession of its young owner. Sitting at corner table in a small cafe at lunchtime, I couldn’t help but notice how the light from the large window made the sequins sparkle. So from my booth seat, I zoomed in tight enough to catch the detail (and allowed enough of a glimpse of the non-working cell phone that resides inside this purse these days to complete the story!). The shallow depth of field, created due to my close proximity to the subject, keeps the focus on the purse details. (55mm; F/9; ISO 400)
Free Photo Tips Card Download 1: Aperture

I’m using my time in the airport in Palm Springs (I’m painfully early for my flight and it’s 112 degrees outside so I can’t even enjoy the outside cafeteria) to finish and upload the first of what I hope will be many free download cards. These will be a series of cards that you can print out and keep with you to refer to when you’re out shooting. The first is about aperture priority mode. I’ve covered this topic a lot since I feel it is the most important technique to master to make better photos. Understanding what is does allows you to be more creative since you can force the outcome of your image to better tell your story. And we all know practice is the best way to master any technique. So print out this first set of cards on one letter-size sheet of photo paper (luster is best since it won’t scratch as much). Then cut the paper along the grey lines to give you a set of four cards. If you like, punch a whole in the corners and put them on a D-ring key chain and attach them to your camera bag. You could even have them laminated at your local office supply store. This is the first set of Chasing Picture Perfection Tips Cards. Download the file at this link http://www.4shared.com/file/119167214/5e95ce94/TIPS_CARDS_final.html
Unclutter Your Photo’s Background

Understanding the function of F-stops, or the aperture of your lens, is undeniably the most confusing of your DSLR’s features. However, once you master it, you will make a huge leap forward in the quality of your photos.
As a photo student in high school and college, I stuck a slip of paper onto the back of my camera (yes, in film days SLRs had a bookplate slot on the back of the camera where you slipped in a flap from your film box so that you could remember what film you had loaded. Can you imagine?!). On this slip I wrote, “open aperture=blurry” and “small aperture=sharp.”
An open aperture lets in a lot of light. On your lens it is a setting like F/2.8, 3.5, 5.6, or 6.3. Think of the aperture as your eye’s pupil. If there is not much light, your pupil gets bigger, or “opens” to let in more light. But a big result of using an open aperture is the effect of a blurry background that really makes your subject pop off the page (or screen). You can easily control the aperture setting on your camera by putting the camera on “A” and dialing in one of the aforementioned numbers. Your camera will automatically pick a shutter speed to make a proper exposure.
If you have a distracting background, dialing in a wider (or open aperture) will make the background blurry and eliminate the distractions. However, maybe you want the background really clear. Like if you’re standing in front of a sign that you want to be able to read in the photo. Then you would dial in a small aperture.
In this first photo, her eye is in focus, but her earring is not, and neither is the tip of her nose. I was just a few feet away and had the camera set to “A” (Aperture Priority) and dialed in F/6.3. Now conversely, if you choose a small aperture, like F/22 or F/32, your background will appear more sharp. Again, imagine a bright sunny day and how your pupils react: they get smaller and let in less light. But also, think about when you squint and how things get clearer. This is sort of how a smaller aperture works. In the second photo, I dialed in F/32 and her earring is now in more focus.
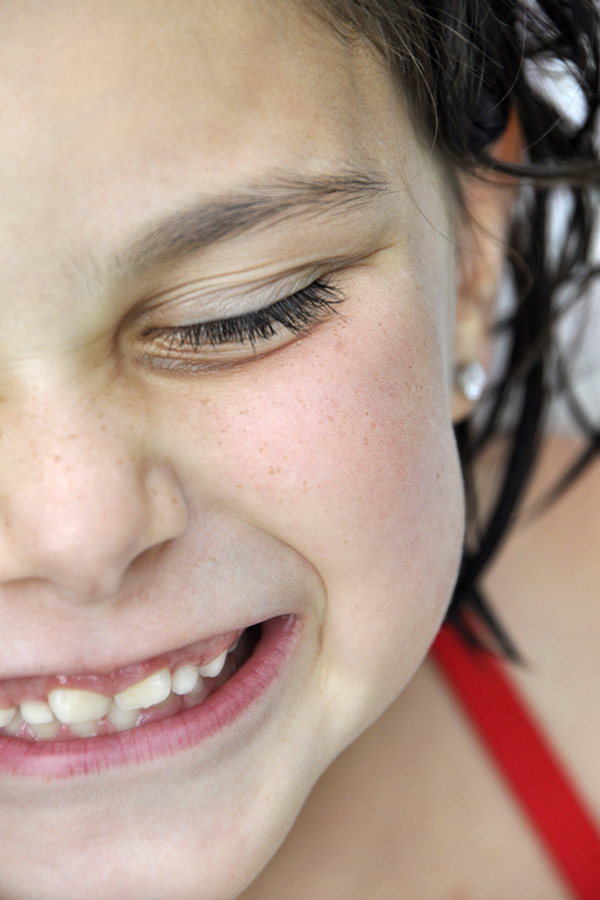
{F/6}
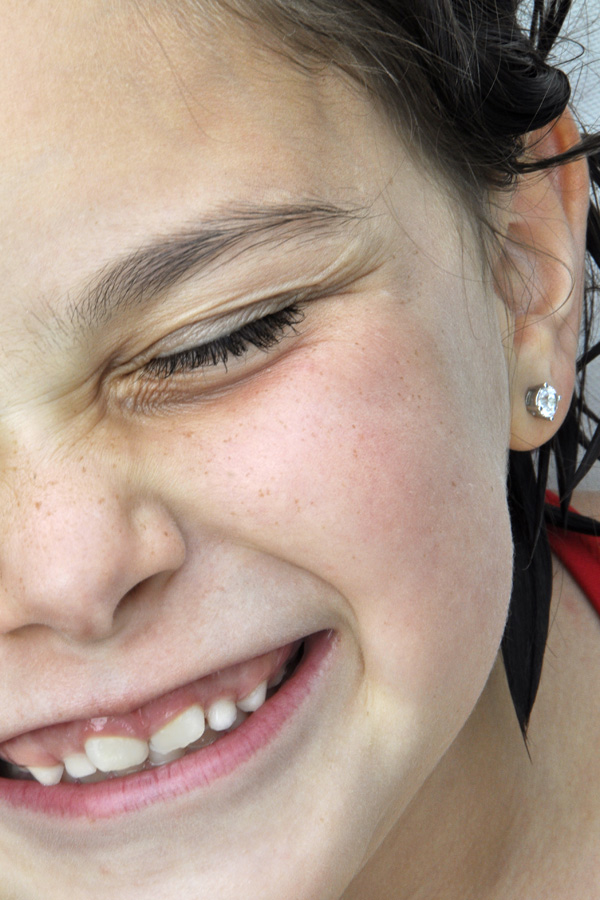
{F/32}
{F/6.3}

{F/22}