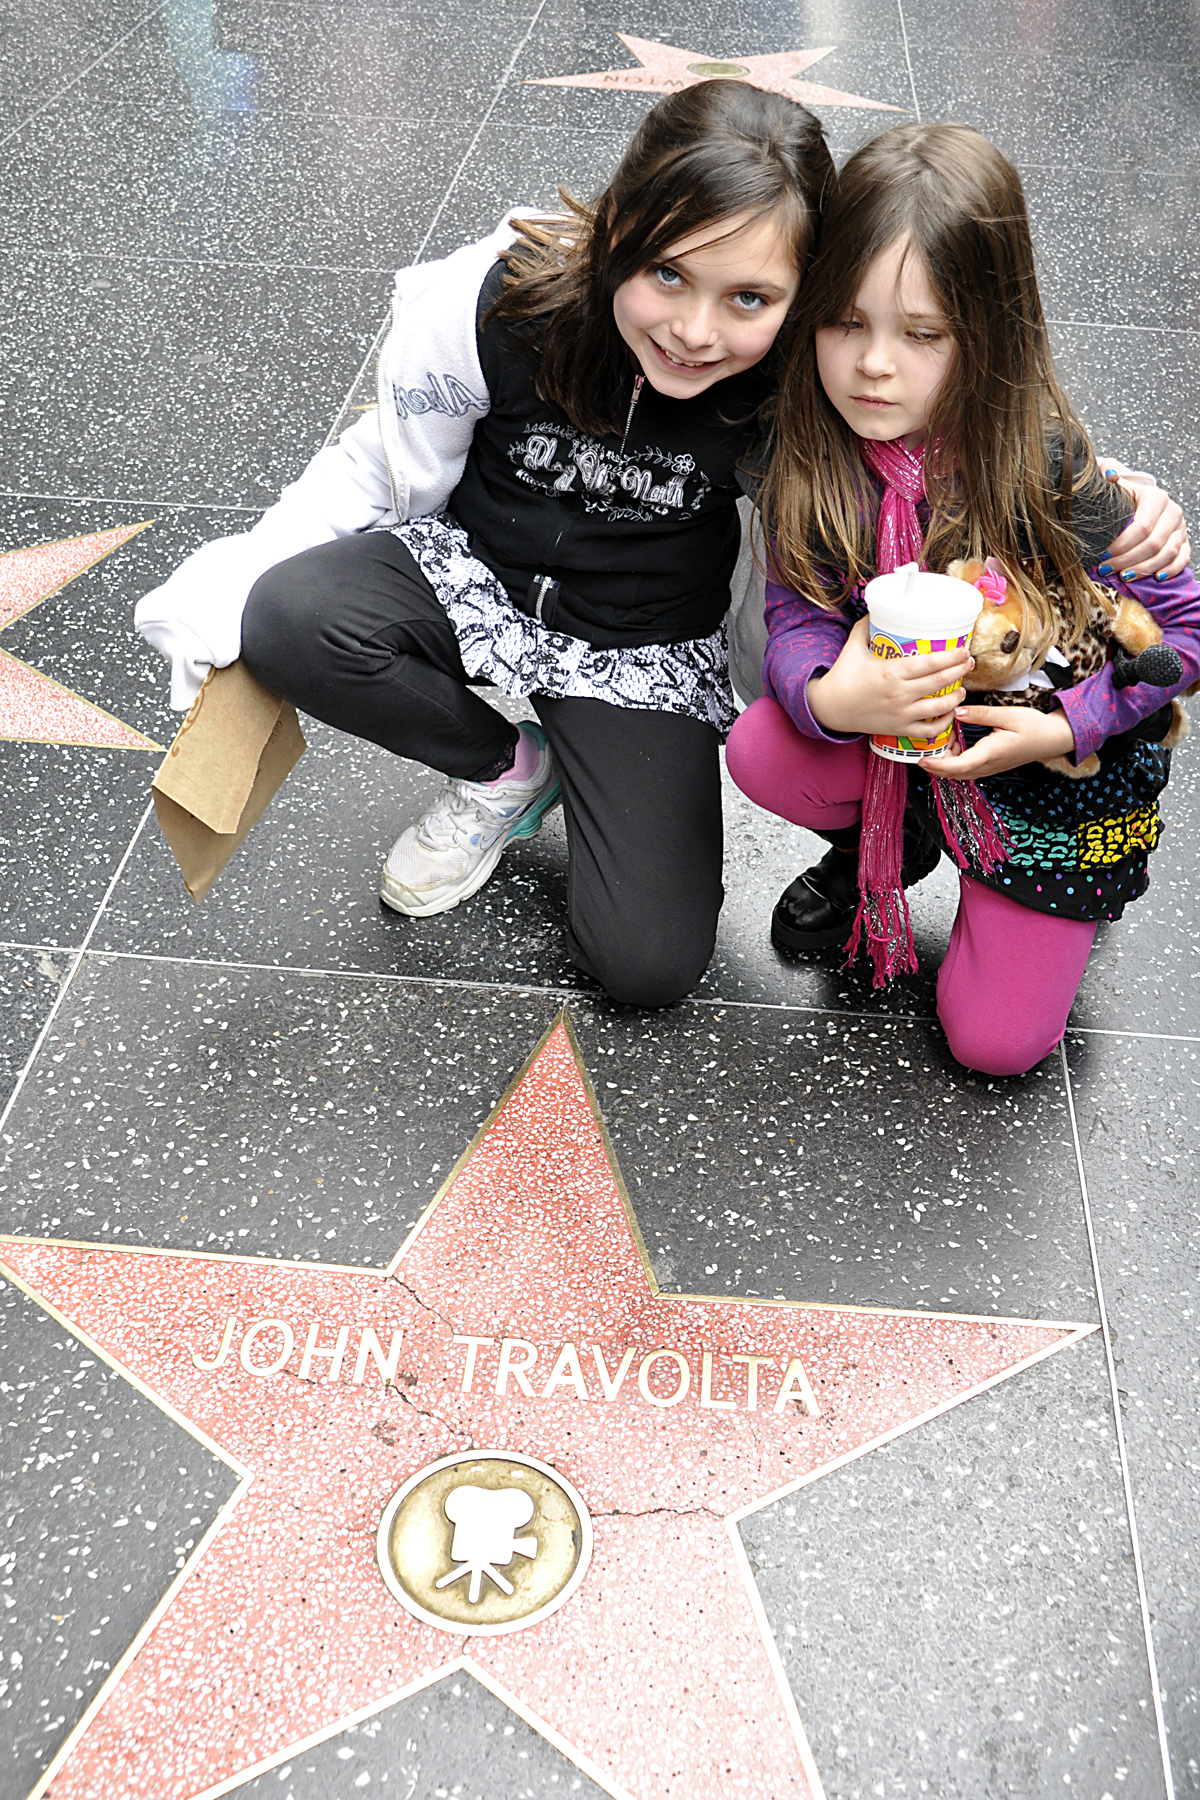
During winter break, we spent a few days in sunny and warm California. Our trip to Hollywood was brief and pictures were difficult with so many people on the crowded boulevard that was in full set-up mode for the Academy Awards. And with two kids all too anxious to see the sights, I had just a moment to capture a “we are here” photo in front of a star on the Hollywood Walk of Fame. By setting my lens to a 23mm wideangle setting, getting close to them and tilting down on the scene, I was able to quickly eliminate the people in the background while still capturing their expressions and John Travolta’s star. I used a slightly small F/6.3 aperture, that when combined with the wide focal length, kept both the star and the kids in focus. Be sure to focus on the subjects eyes and then tilt down for your best exposure and to keep the most important focus point sharp. (Note: I did Photoshop out one lingering foot of a Storm Trooper from the upper right side of the frame. Don’t be afraid to crop or retouch to make your photo even better before posting, framing, scrapbooking or adding to an album).
Author Archives: stacieerrera
Last Minute Tips for Holiday Picture-Taking

Much of holiday picture-taking involves capturing people and holiday details. Taking a moment to think about the kind of photo you want and setting your camera properly or changing your position can take your pictures from typical snapshots to outstanding holiday photographs. Here are few tips from my LifetimeMoms.com post last month. Happy Holidays!
 Photograph traditions and candid moments: Capture the result of an activity, like cooking and baking, with flair. Position yourself at a higher level and shoot down. Position the subject in the top one-third of the frame and the activity in the bottom two-thirds for a pleasing composition. This elevated position also eliminates distracting backgrounds.
Capture family interaction by keeping your distance and zooming in a bit. When shooting into a wall, you chance getting harsh shadows behind your subject. Try using a flash that can bounce off of a white ceiling, which showers the area with light and eliminates the shadows.
A key to getting good expressions during gift-giving is to be on the subject’s level or slightly below. Kneel or sit on the floor with them and you’ll capture more of their face instead of the top of their head. Additionally, the shadows created by your on-camera flash can be reduced.
Capturing group portraits: For fast group pictures, line up your family members with tallest on the outer sides of the group. Avoid the “line-up” look turning their bodies slightly towards the center. Or try arranging chairs so that the tallest, or the patriarch/matriarch, can be seated in the center with children standing to their sides and adults leaning in from behind and the side. Ask men to kneel and women sit on the floor. Avoid having heads all on the same level, or “ear to ear.” Stagger heads for a more pleasing composition. Avoid photos on a couch as people tend to lean back and their position is not flattering. Take several shots to ensure all eyes are open and expressions are good.

 Shoot the details: Capturing favorite holiday items is easy when you set your camera to macro mode or use a lens that can zoom in close. When you are so close to your subject, the background automatically becomes blurry making the subject to stand out. Focus carefully when shooting close up.
Better Holiday Snapshots Article Features Photos and Tips From Yours Truly!
 I was honored to be asked by Stephanie from LifetimeMoms.com to write up some tips on how to take better photos over the holiday season. Well, that season officially starts next week and there are a few tips in that article that will come in handy at your Thanksgiving gathering. Or as you think about snapping away over the extended weekend trying to get the perfect photo for your holiday card. Please take a look at the article by clicking here. And thanks Stephanie!
Photographing a Spooky Jack O’Lantern
 Tonight is the perfect night to light up your carved pumpkin and snap a few spooky shots. I found that taking a shot a little bit after the sun sets, while there is still some light left in the sky, can make your pumpkin look more scary. The tree branches will be back-lit, which adds to the mood of the shot. Start by setting your camera to aperture priority and selecting the widest aperture your lens allows (F/2.3, F/3.5) and a low ISO (200 or 100). Next, put your camera on a tripod or other stable surface. Using a cable release or electronic remote control like I did will ensure that you do not get an blur when you press the shutter release button during your long exposure. If you have a lens with an anti-shake mechanism (like Tamron’s VC, Nikon’s VR or Canon’s IS systems), be sure to turn it off when using a tripod as it is counter-productive to use the stabilizer system in that situation. Then, shoot your pumpkin at a lower angle using a wide angle setting on your lens to get some of the trees in the background. You can add extra exposure if your background is too dark by using the exposure compensation dial and going to the plus side. This slows down your shutter speed even more. Your exposure will be somewhere around 15 seconds to get the soft glow of the jack o’lantern and the bluish sky in the background.


Happy Halloween!
"My Photo Are Too Dark" — Solutions for Common Problems: Part 2

In my last post (so long ago, I apologize but summer seemed to have gotten in the way), I covered easy solutions for blurry photos. The next most common problem is dark photos (i.e., under-exposed). While the most logical answer is there just is not enough light, there are other reasons for dark photos.
Problem: You are using the flash but the subject is still dark. Reason: The subject is too far away. The built-in flash on your camera can safely cover a distance of about 10 feet or so. If your subject is well beyond that, chances are it cannot be lit by your flash. Solution: The answer in this case would be to move a little closer. (You can also try raising your ISO to give your flash some more distance coverage).
Problem: The background is really bright and the camera’s meter is fooled. This is called a “back-lit” situation. The meters in today’s cameras are excellent, and you have the choice of several metering patterns to help you achieve your desired result. However, there are still situations like back-lit where you camera’s meter is fooled and gives you the wrong exposure for your subject. When the background is overly bright, the camera “puts on a pair of sunglasses” by closing the aperture down a little to let in less light, resulting in a nicely exposed background and a darker subject.
Examples of back lit situations:
- in front of a picture window
- at the beach or pool
- on snow
- when shooting from below up against a bright sky, etc.
- under an overhang (like a stadium with field in the background)
- The sun is behind your subject
Solution: 1 My favorite option is to use the + exposure compensation (covered here and here). This +/- button usually positioned near your thumb is one of my often used adjustments since you can quickly darken or lighten a subject. By adding (+) .3 to 1 full stop of light by dialing towards the plus side (see your instruction manual to see just how your camera works), you can trick your camera into removing the sunglasses and get a perfect exposure on your subject. By bracketing (taking several shots at several different exposure compensation settings) you are sure to get the proper exposure.
Solution 2: A second solution is to pop up the flash and fill in the subject.
Solution 3: Another way to get a good exposure in a precise area is to switch the camera’s metering pattern to spot metering. Most of the time, you are most likely shooting in the camera’s matrix mode that reads several areas of the image and gives you an exposure based on a lot of data built into the camera. This pattern works well much of the time. But the camera also has a center metering pattern where a smaller area is read and the exposure is based on that area. And even smaller sliver of the image can be measured by suing the spot metering mode (the rectangle with a small dot in the middle is the symbol for this pattern). Make sure the dot lays over the area of your subject you want properly exposed and then take the shot. If you need to recompose your image after taking the reading (dot on subject), then hold in the AE lock button located near the +/- button until you have finished taking the photo. Breaking out your camera’s instruction manual will give you the exact steps to set spot metering and to use AE lock.
In my example above (a perfect shot to end the summer), the child’s face my have been under-exposed, or dark, due to the brightness of the sky, surf and sand. But by adding 2/3-stop of light using the +/- feature, I was able to get a great exposure on her cute face.
"My Photos Are Blurry" — Solutions for Common Photo Problems: Part 1
 So while talking with friends who are all new DSLR owners this past weekend, we discussed the solutions for the most common problems people have with their photos. So of course, it sparked an idea for a blog post. Here is part 1: “My Photos Are Blurry.”
The reason for a blurry photo is that the shutter speed is too slow to stop either fast moving action or camera shake in low light situations. The faster action moves, the faster the shutter speed required to stop the action; the longer your lens setting (telephoto), the faster the shutter speed required to stop camera shake since the shake is magnified (think about looking through powerful binoculars and how hard it is to hold them without the seeing shake); and finally, in lower the lighting conditions, the shutter speed slows down to let in more light, making it harder to hand hold.
So what to do? First, you need to understand what the ideal shutter speed is for hand-holding to avoid camera shake. The quick answer to to shoot at a shutter sped that is no slower than the reciprocal of the focal length setting of your lens. So if you are zoomed out to 300mm to catch sports, nature, wildlife or candid portraits, the ideal shutter sped will be 1/300th of a second or faster to stop hand shake blur. However, with today’s stabilized lenses, you can shoot a 2-3 or even 4 stops slower with no resulting hand-shake. Second, understand that it is almost impossible for anyone to hand hold the camera at any focal length setting if the shutter speed goes below 1/30th of a second. Thirdly, if action is moving fast, like soccer or basketball, you will need a shutter speed of approx. 1/500th of a second. If the action moves even faster than that, such as car racing or horse racing, you will need to shoot even faster (1/1000th, 1/2500th, etc.(.
Solution 1: Open your aperture to let in more light and the camera will pick a faster shutter speed.
If you set your camera to aperture priority, move the aperture towards a wider opening (e.g., F/6.3, F/5.6, F/3.5) and watch your shutter speed get faster. Hopefully, you will be able to get a shutter speed / aperture combination that allows you to have a fast shutter speed for the action or zoom setting. Be mindful that with an open aperture, you have less depth of field, so precisely focusing on the critical part of your image is very important.
Solution 2: If opening the aperture does not give you a shutter speed high enough to action blur or stop hand shake from slow shutter speeds as a result of low light or long telephoto settings, then the next solution is to boost your ISO higher. A higher ISO, will automatically provide you with higher shutter speeds. While your photo might have a little more noise or not as vibrant of color, you will be able to shoot the image. (Some DSLRs have really great high ISO capabilities, so don’t be afraid to try higher ISO settings).
Solution 3 (and my least favorite): If neither solution above works, then you can try to increase the lighting in the scene. One way is by adding flash. Flash will certainly freeze action and eliminate hand shake blur (as long as you are not in night time portrait mode). While flash can lead to an artificial feeling in your shot, hence my reason for it not being my favorite, it can do the job effectively and send you home with images of the moment. Remember, however, that flash can only cover a certain distance, and is sometimes not allowed at certain venues, so solutions 1 or 2 or a combination of both may be your only choices to correct the problem.
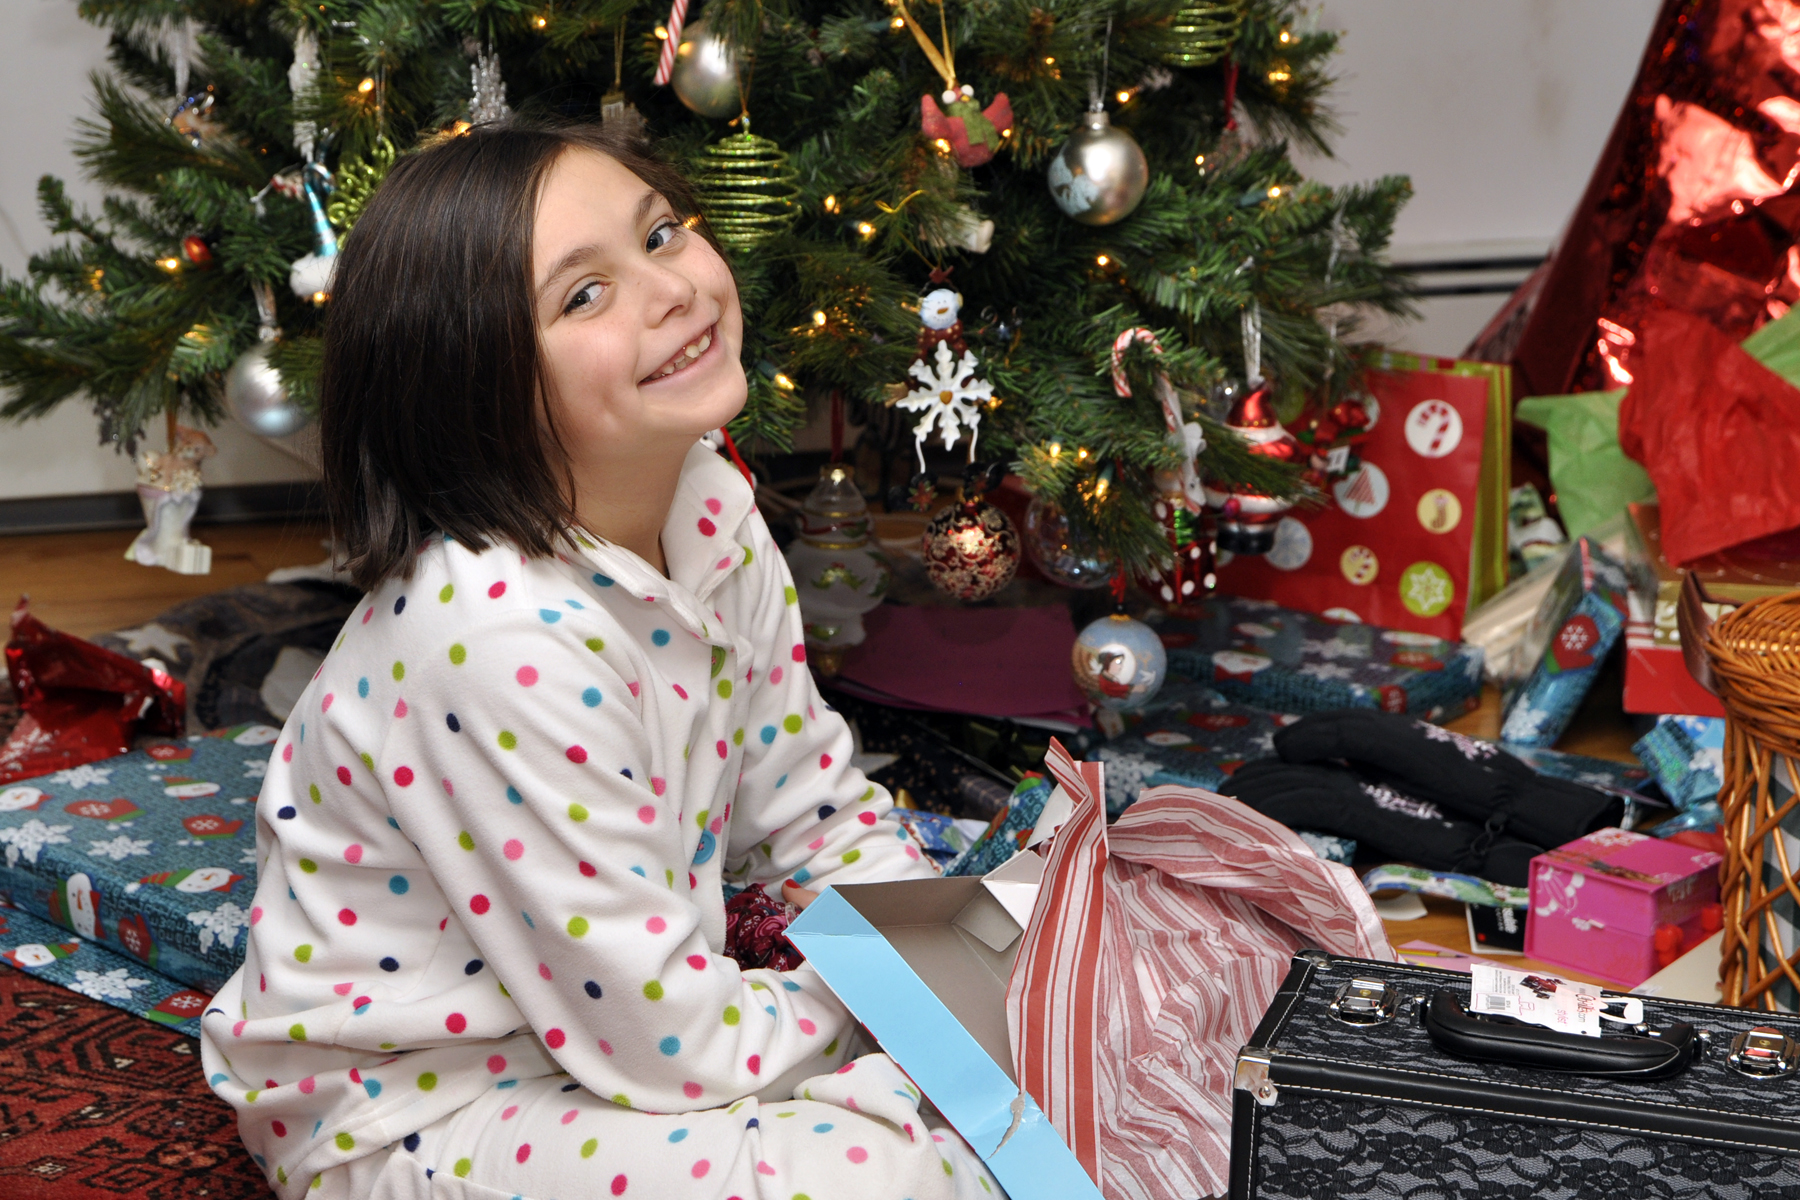
The image above would have been completely different had I used flash. So I boosted my ISO to 1600 so that the little bit of light coming into the room could be captured naturally. My lens was zoomed to 60mm, making the magic shutter speed 1/60th of a second. However, with my stabilized lens, I was fortunate to be able to catch the image at 1/8th of a second, the fastest shutter speed I could achieve with the given lighting, ISO setting and open aperture (F/4). The VC stabilization allowed me to shoot 3 stops slower than what would be normally required.
And of course, a solution that works the best for low light situations is a tripod. As long as there is no movement in your shot, a tripod will stabilize your camera and let you shoot at rather slow shutter speeds. Tripods are the most essential tool for landscape and nature photographers since a smaller aperture like F/11, F/16 or F/22 are required to achieve deep depth of field, but shutter speeds are naturally slower.
Next time you are shooting in low light, shooting at a longer telephoto zoom setting, or shooting action, consider the solutions above and you should find your images will be sharp as a result.
Shooting Against a Bright Background Fools Your Camera’s Meter: One Easy Answer Is A Quick Exposure Compensation Adjustment
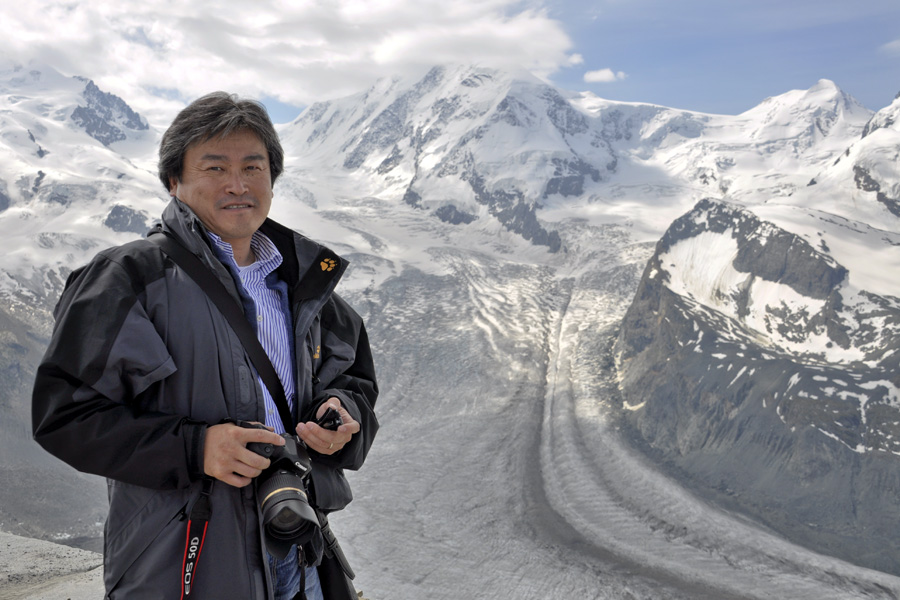
On my recent business trip to Switzerland this month, we had the opportunity to sightsee for two days. Our tour took us to an amazing view of the Swiss Alps. A short train trip on the Matterhorn Cog Railway from the mountain town of Zermatt brought us to the Gornergrat where we were met with a panoramic view at 3131 meters above sea level. This astounding view of 29 peaks, each over 4000 meters and including the Matterhorn at 4478 meters, offered up the chance for our small group of 25 to take thousands of photos. We each took turns taking photos of each other and quickly discovered we needed to adjust our camera settings to compensate for the extremely bright background. In this case, the meter saw that much of the frame was filled with white, so the camera “stopped down” the aperture to let in less light (sort of like squinting in bright light). However, this made the subject’s face quite dark. To compensate, I moved the exposure compensation setting to +1.0. I then pointed the camera at my colleague, held the shutter release button down halfway to lock in the focus, and shifted the camera so that I could capture Yuki in front of the Klein Matterhorn. This tip is useful when shooting against any bright background such as snow, sand, water and bright windows, all which lead to backlit situations. So keep this in mind as you travel this summer or spend a day at the beach or boating.
A Video on Making Silhouettes
My friend and colleague Ken did a better job than me explaining this. Enjoy!
Don’t Let Bright Sun Ruin a Candid Portrait- Move into the Open Shade

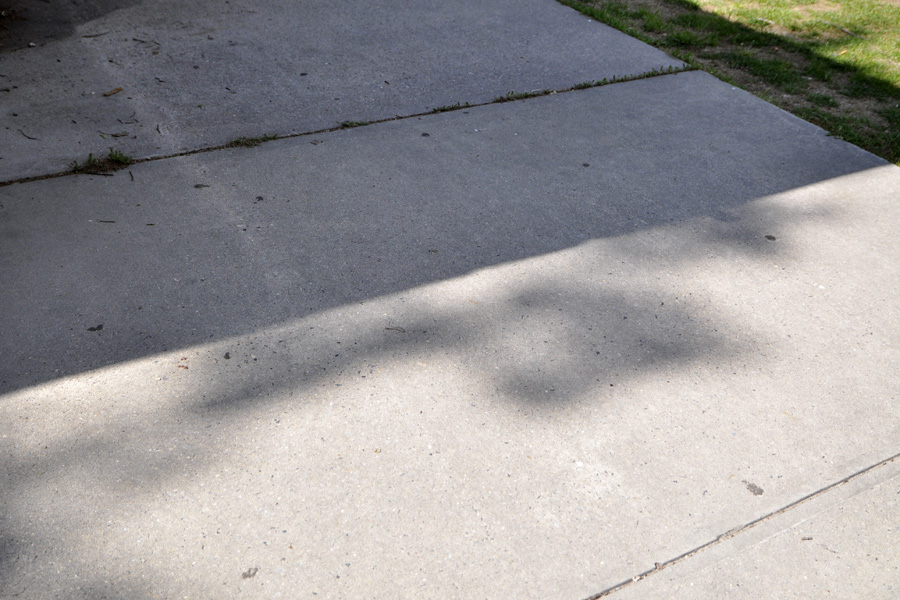
We are not nocturnal by nature, so our photo-taking time is usually during the day. And now that it is almost summer, there will be plenty of bright sunny days on which you want to take photos of vacationing kids and visiting guests. So what do we need to do to get a decent outdoor portrait? The simplest solution is to look for open shade. Open shade is the step you take back from the sunny to the shady. It can be just under a tree. Or a step inside a door frame or porch. Or a tent or any overhang. The open shade eliminates all of the contrasty shadows that appear on the face and clothing of a subject standing in the sun. Look at the side by side comparison, especially the eyes and the shirt of the girl on the left. (Pls ignore the color as I did not reset my white balance from sunny to shade and consequently have some funky color going on; pls be sure to set the WB to auto or shady). Below is a shot that shows you the line between a good and poor candid portrait. The girls were first on the sunny side of the line, and then took a step back into the shade. I love how the light catches in their eyes when you shoot in open shade. For more on open shade, see this post too.
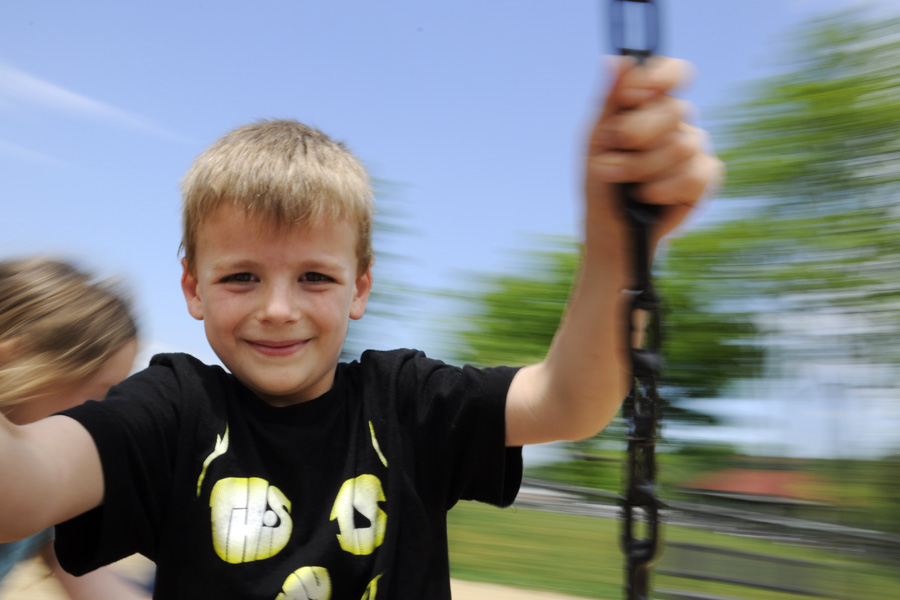
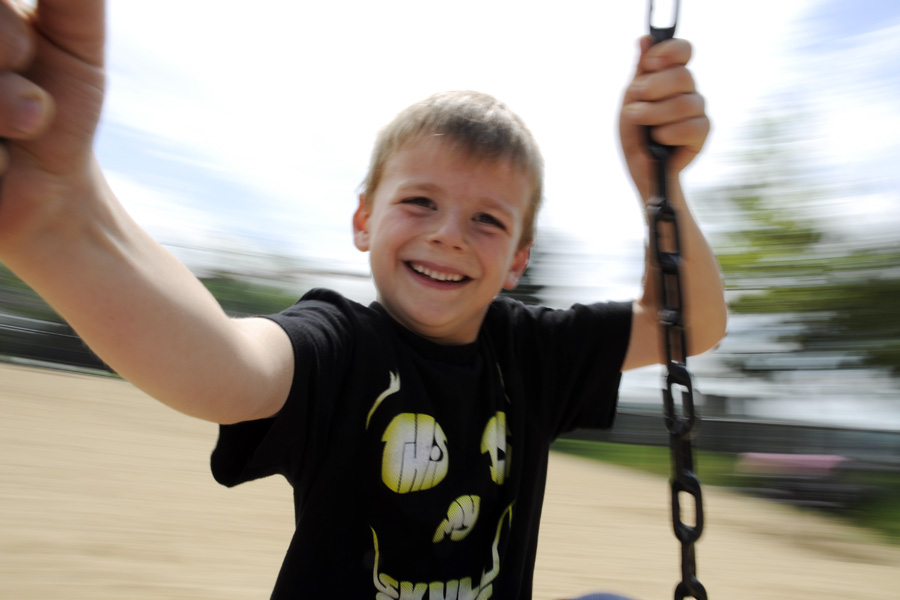
Set a Slower Shutter Speed for Fun Photos

My friend and professional photographer Andre Costantini has this great shot in his presentation that really shows the effect of a slow shutter speed. So while at the park last week, I bravely got on a tire swing with my subject and we were promptly spun until I wanted to throw up. In fact, I closed my eyes and just kept shooting and screaming. But it was worth it to show you how a slow shutter speed setting can make a really fun shot. I had my camera set at ISO 200 as it was a really nice bright day and I put the camera on high continuous shooting. I then set the camera to F22 while in the aperture priority mode, which in turn gave me a shutter speed of 1/30th of a second. This slow shutter speed cannot stop the fast action of the tire spinning around, so the sky and trees in the background are wonderful streaky blurs. Yet the subject is in focus (well, relatively speaking and I will explain that in a minute). The reason the subject stays in focus even though the shutter speed is so slow, is that in relation to each other, our position stays the same. It’s as if we were just standing still looking at each other. Now, he is admittedly slightly out of focus since he was a little too close to the camera and had I just kept my eyes open while shooting, I would have spotted this and leaned back a touch. So if you can get yourself on a fast carnival or theme park ride, or a tire swing or one of those merry-go-round things on the playground, position yourself so that you and your subject face each other and relative to each other do not move (i.e., in the same seat), and shoot on a slow shutter speed to really show off the motion of the ride. Tell your subject not to move too much, especially closer or further away from the camera. And have fun. Maybe take some Dramamine® before you head out to take this shot.